Guide to Bosses in Core Keeper
Hello everyone, this guide was created to simplify the search and defeat of bosses.
Stage 1 Bosses
1. First Boss
A giant slime that you need to defeat, spawns near the starting point of the game.

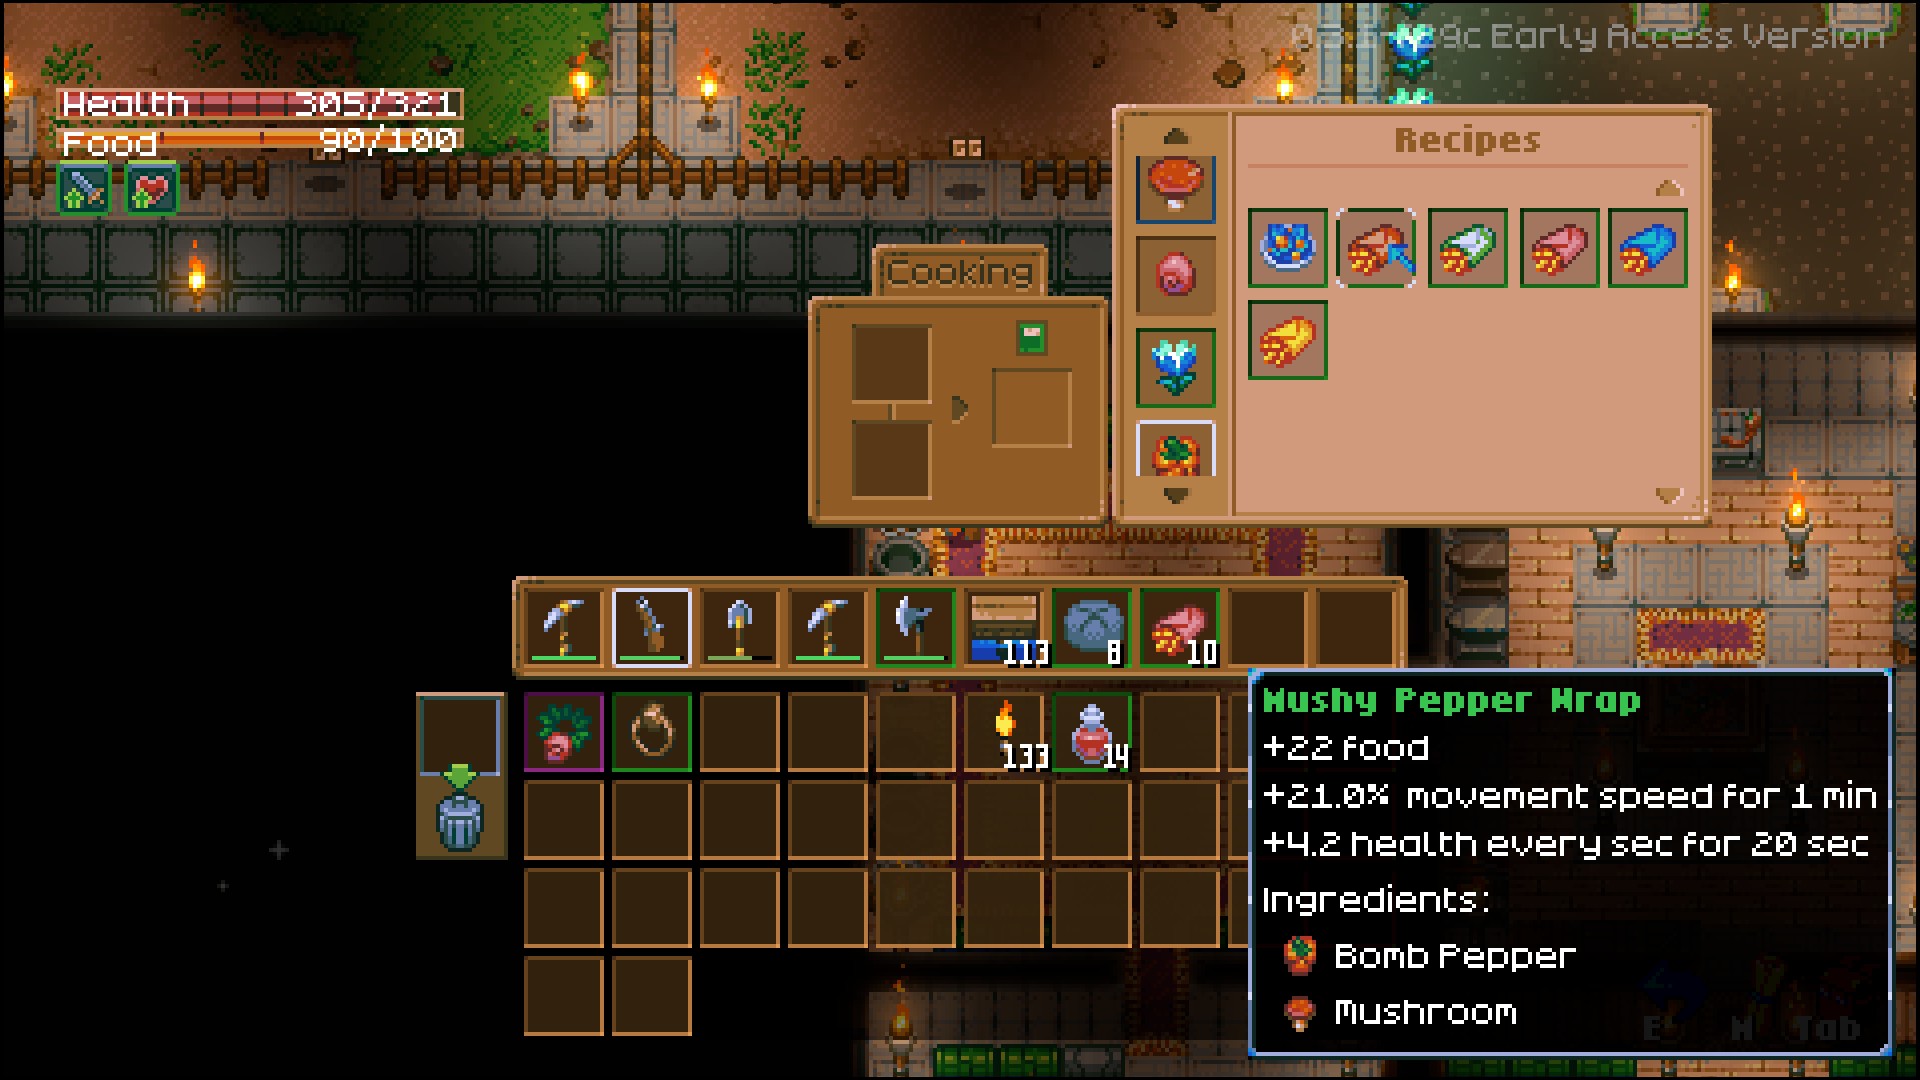
A fairly easy boss, doesn't pose much of a problem. To make it easier to defeat, stock up on speed-boosting food.
It's best to attack with a slingshot to avoid its jumps. The slingshot can be found in a chest or looted from wooden crates.
After defeating the boss, a crystal will drop, which is needed to activate the first statue, and a merchant NPC will appear.
Once you've collected the loot, run back to base and insert the crystal. After doing so, three new crafting options will appear. You will need two interesting orbs, which will show the location of the next bosses. (To clarify, I searched for the third boss, the Queen Larva, by myself until I crafted the orbs…)
2. Second Boss
A giant larva that moves in a huge circle.

The boss isn't hard, but there are some peculiarities. Firstly, it's best to fight it using a musket.
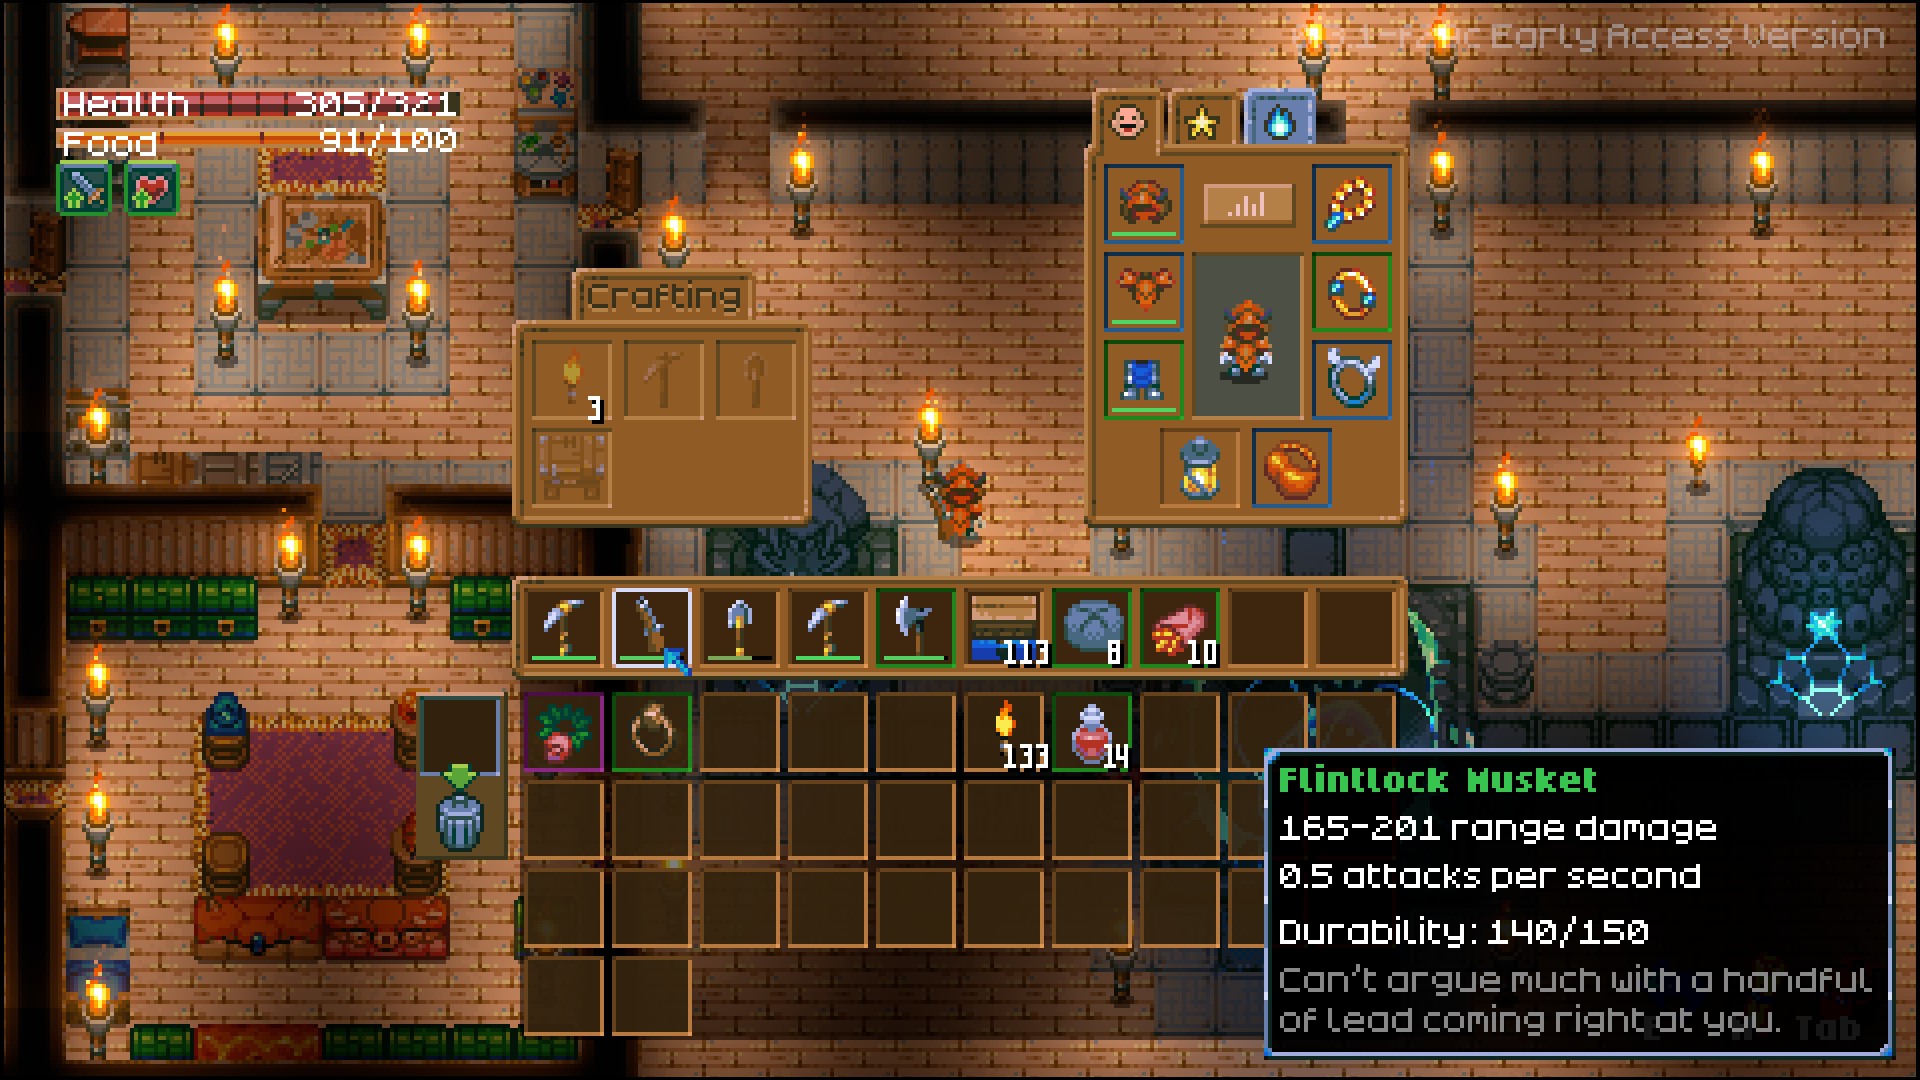
It can be found in an unpleasant place—in the stone biome with monsters wielding pickaxes (very annoying enemies early in the game).
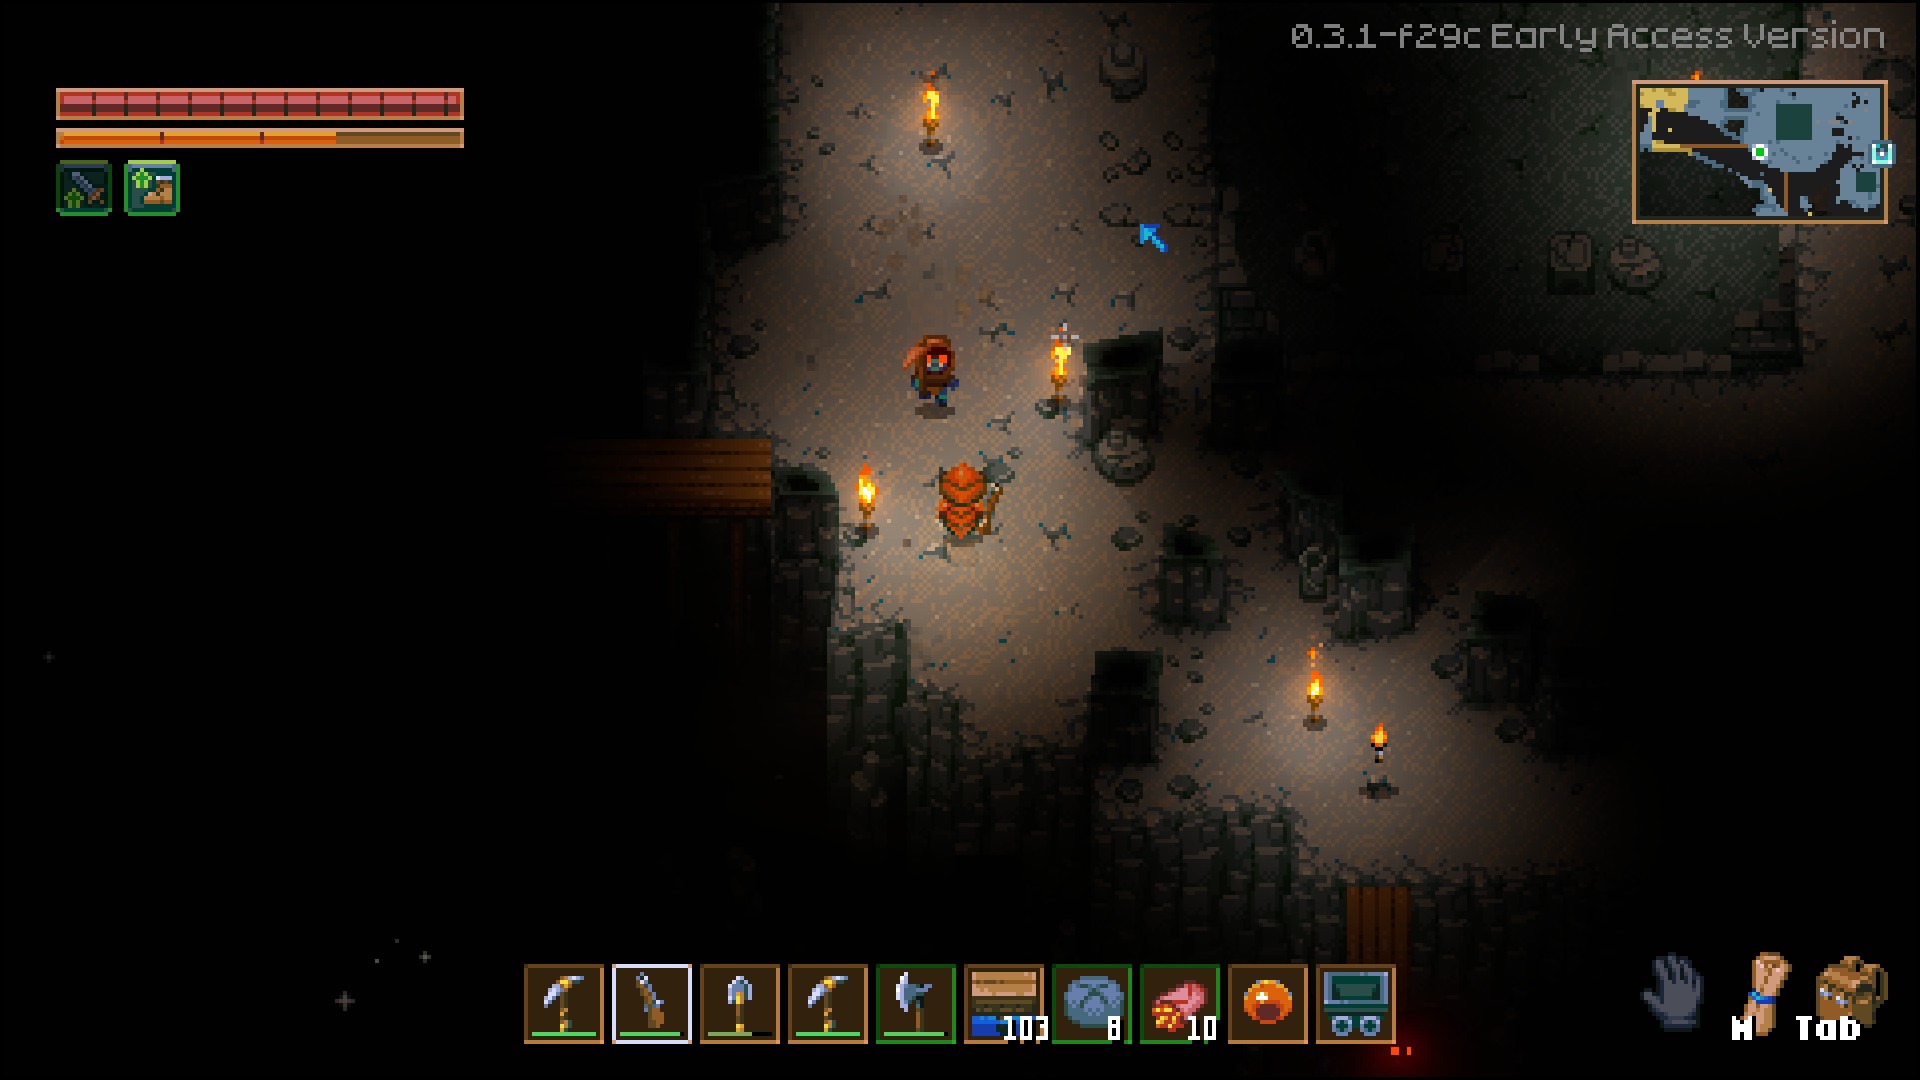
After obtaining the gun, here are a few tips for fighting the boss:
- Stock up on food for speed and health regeneration (regen just in case);
- You don't need to face the boss head-on; you can attack it from behind, but you'll need to keep up;
- When the boss reaches half health, it will go into a rampage, destroying everything in its path and attacking you. This is where the speed-boosting food comes in handy;
- The boss always spawns blocks under itself, so if you need dirt, you can dig along its path to farm without deforming the biome too much.
3. Third Boss
The Queen of the pesky larvae, the most annoying boss.
The strategy is simple: stock up on food, potions, and torches! To fight this boss, it's best to obtain a large axe.
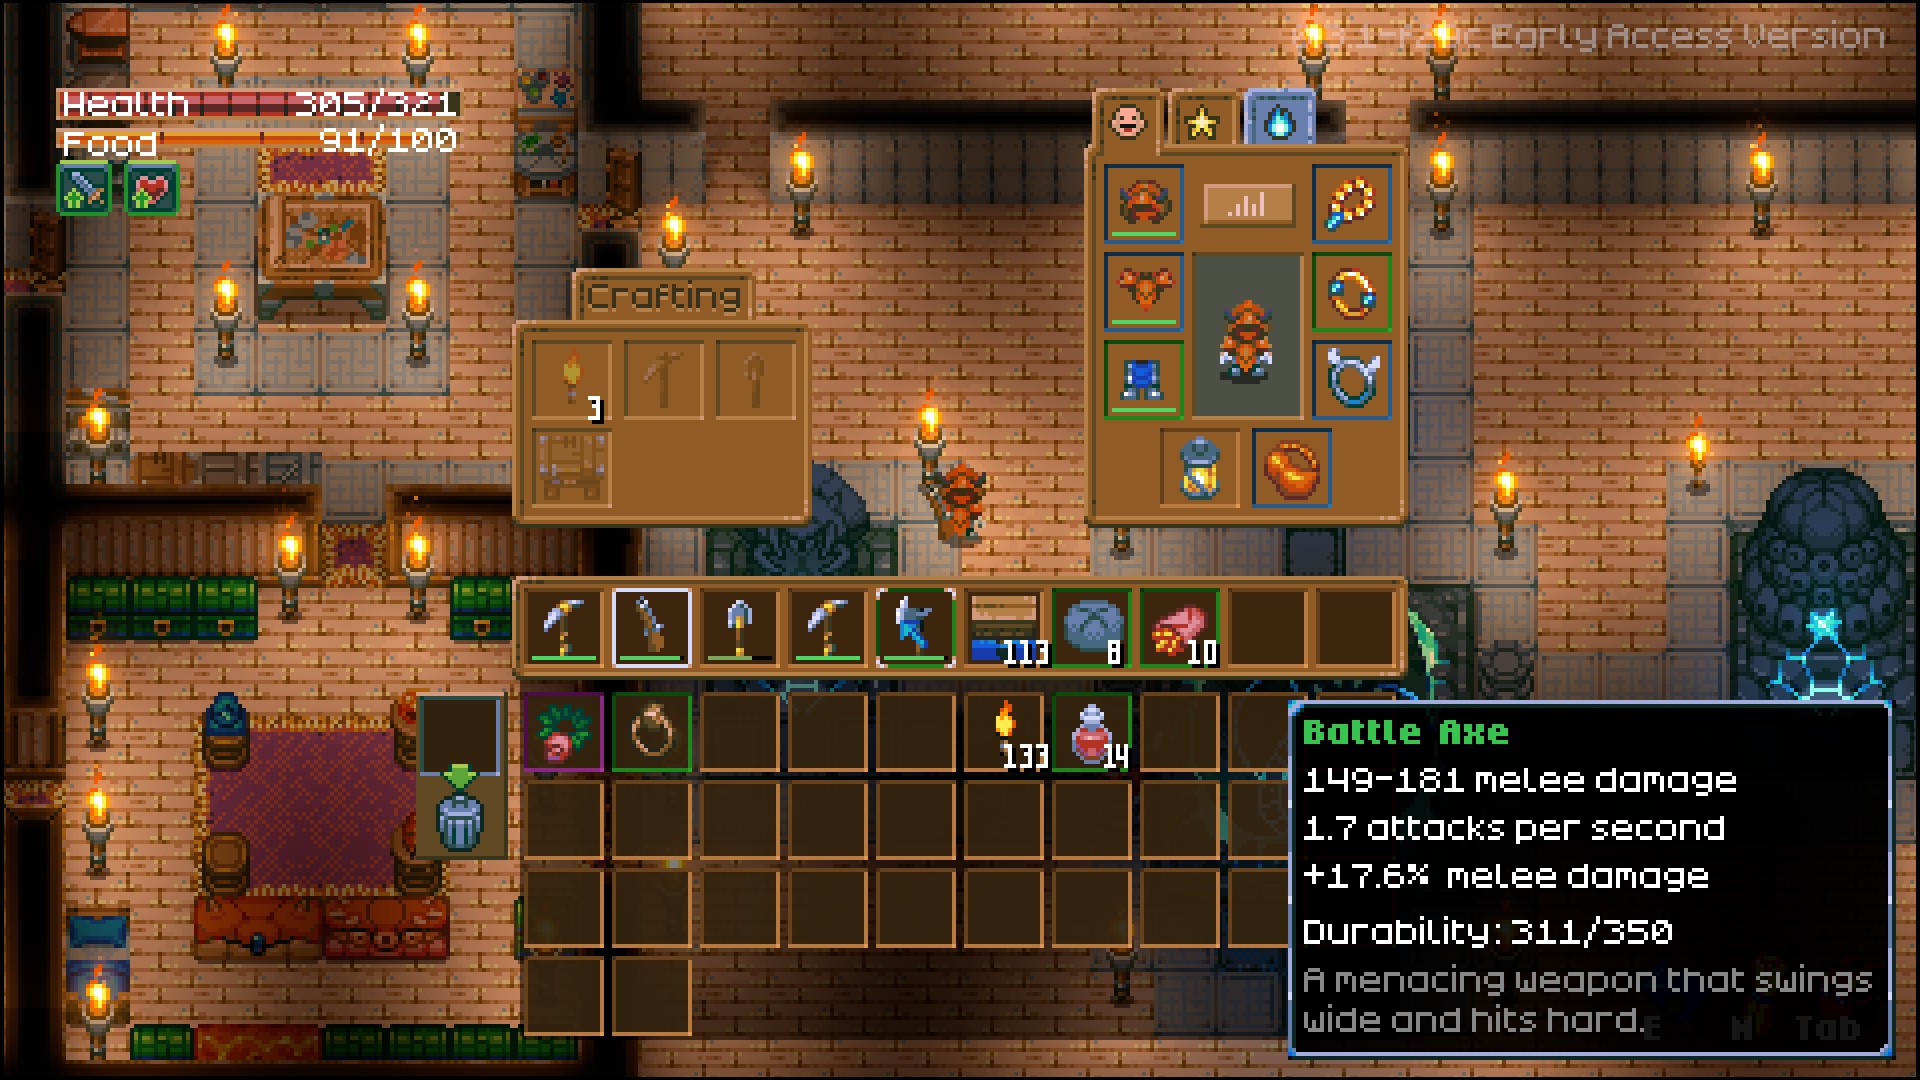
The axe drops from a giant monster in the stone biome or can be found in a chest.
Here’s how the fight goes:
- The boss spits acid in an arc;
- It summons larvae (kill them quickly, or they will spawn in huge numbers);
- You just need to hit the boss and its larvae cocoons, and you'll be done!
To make the fight easier, dig up the ground near the boss's spawn point. You'll need space to dodge the acid and hit the boss, as after the update, she’s become the most annoying of the first three bosses (new larvae eat blocks and can’t be trapped anymore).
End of Stage 1
After defeating all the bosses and inserting all the crystals, speak with the so-called egg, and you'll be able to craft a key to unlock the giant wall. Beyond it lies the forest biome with red ore and new bosses.
Stage 2 Bosses
Poisonous Sludge Boss (Ivy)
The second slime boss. Its main feature is poison, which prevents you from healing properly. Annoying but manageable. As usual, craft a scanner and find it.
Here's what the slime looks like:
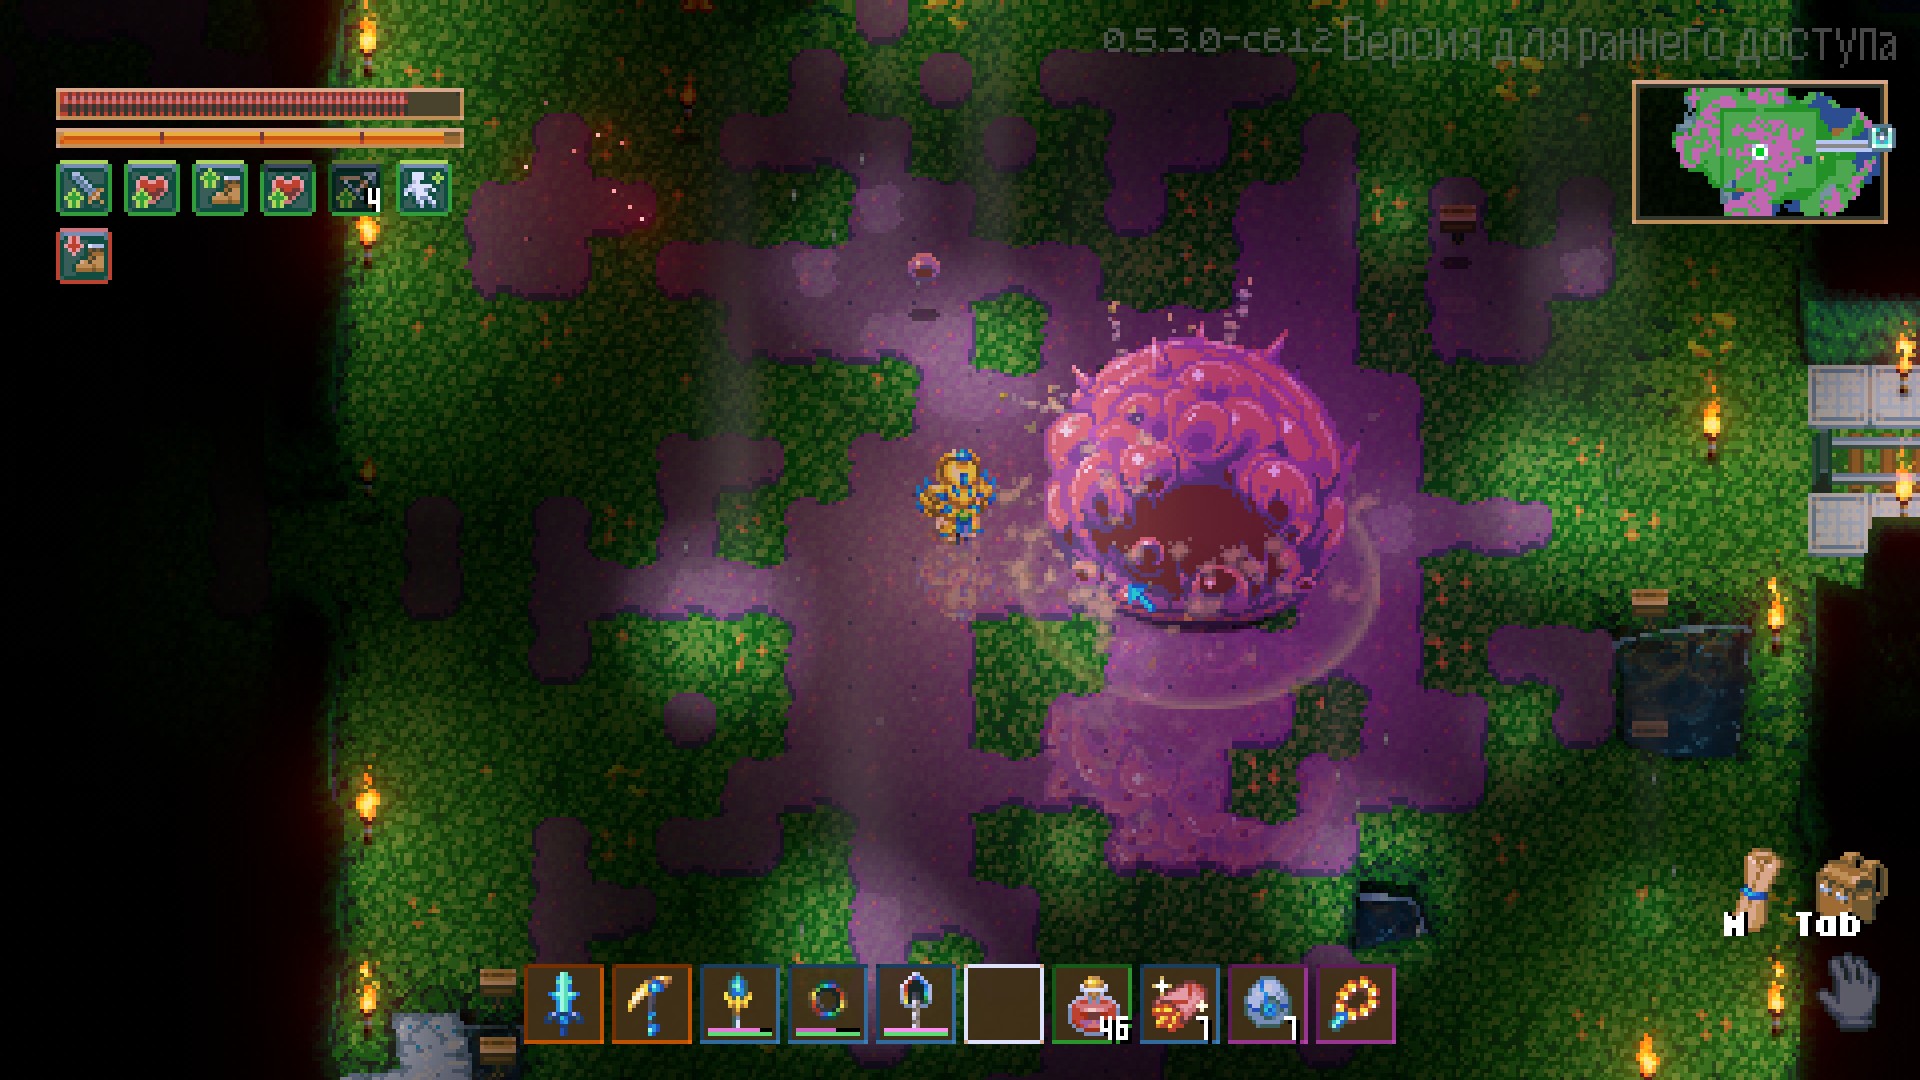
Boss Encounter
To make this fight easier, obtain an amulet that grants poison immunity. It drops from poisonous slimes while you're farming slime for the scanner, so you should get it easily.

Boss Attacks and Strategy
The sludge, like all slimes, jumps and spawns smaller slimes. Ivy has a second attack type—firing poisonous projectiles, which are easy to dodge.
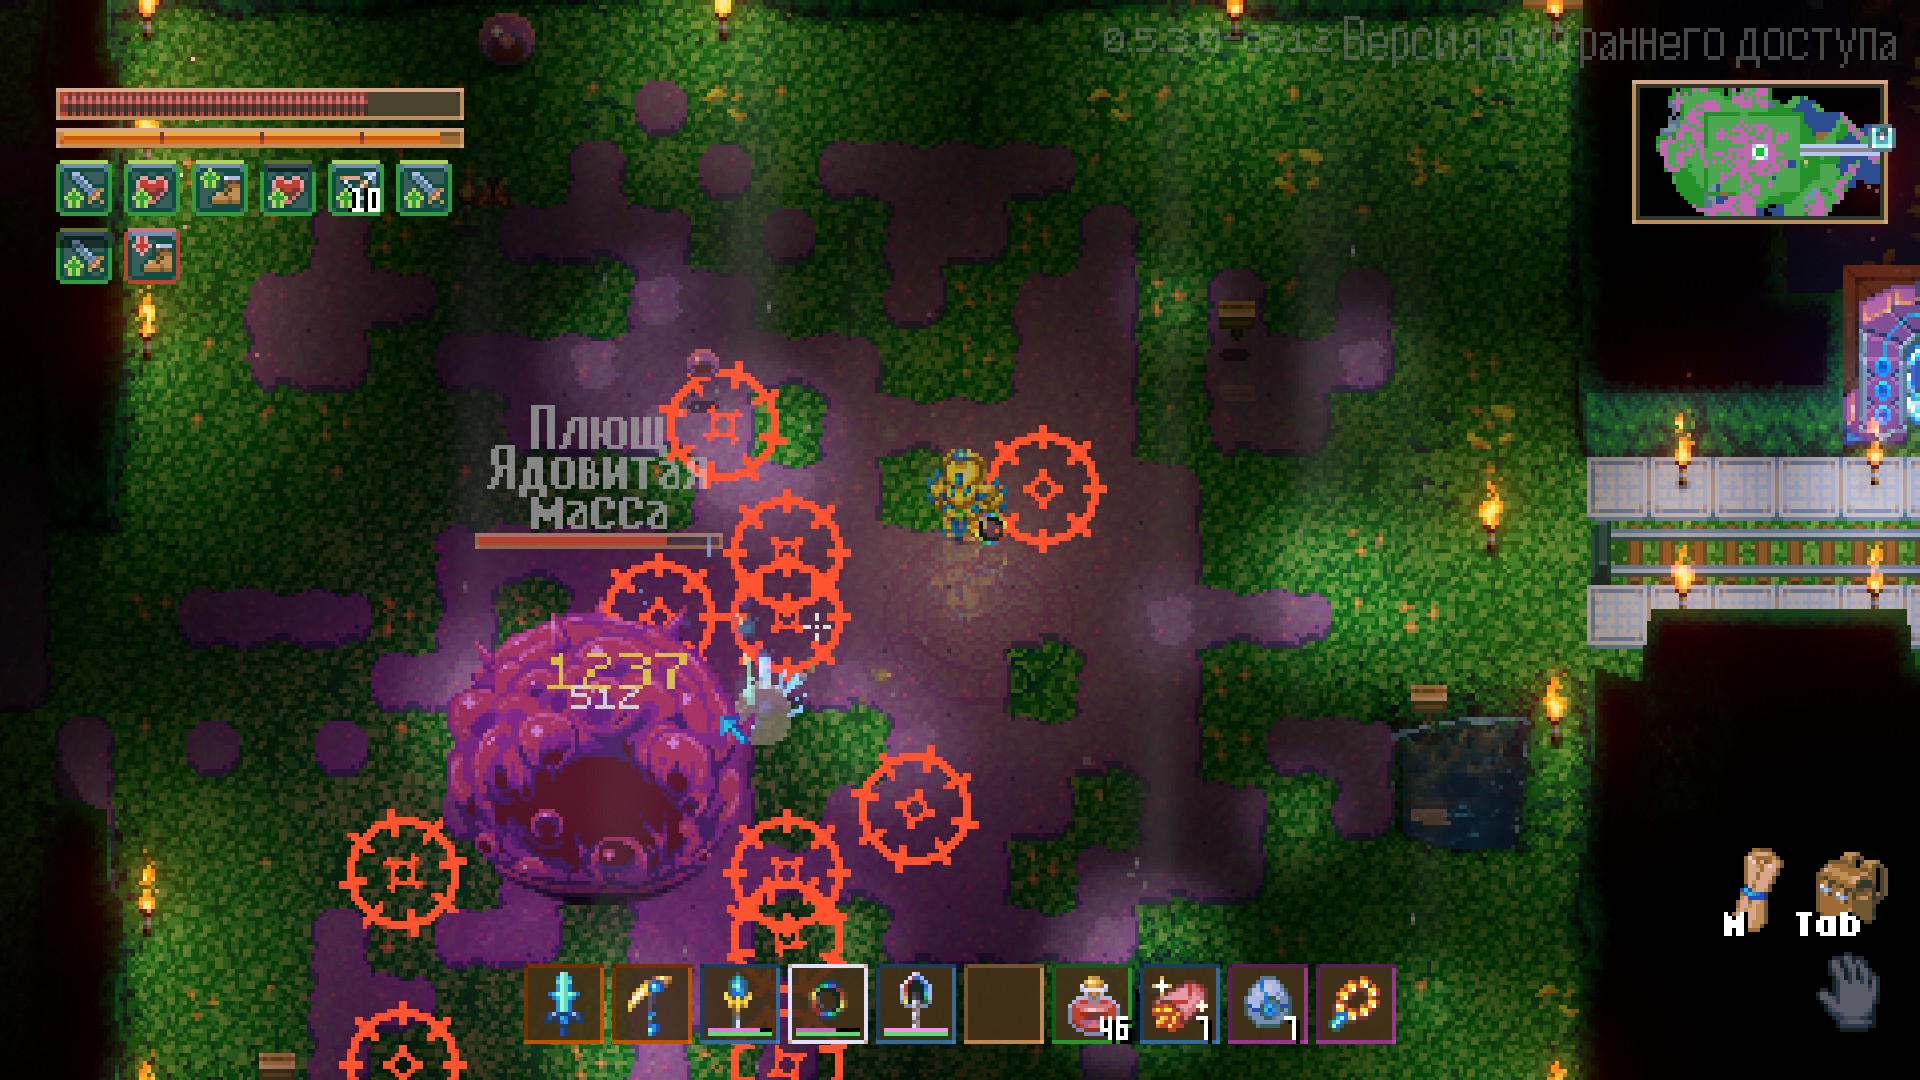
The boss is easy to beat if you have the amulet I mentioned earlier. You can use either melee or ranged attacks—whatever suits you best. And with that, you’ve beaten the second slime boss.
Giant Bird Boss
After defeating the first three bosses and activating all the statues, talk to the egg-shaped statue, and you'll be able to craft an "astral merchant." You can exchange a few ingredients for two items from this merchant.
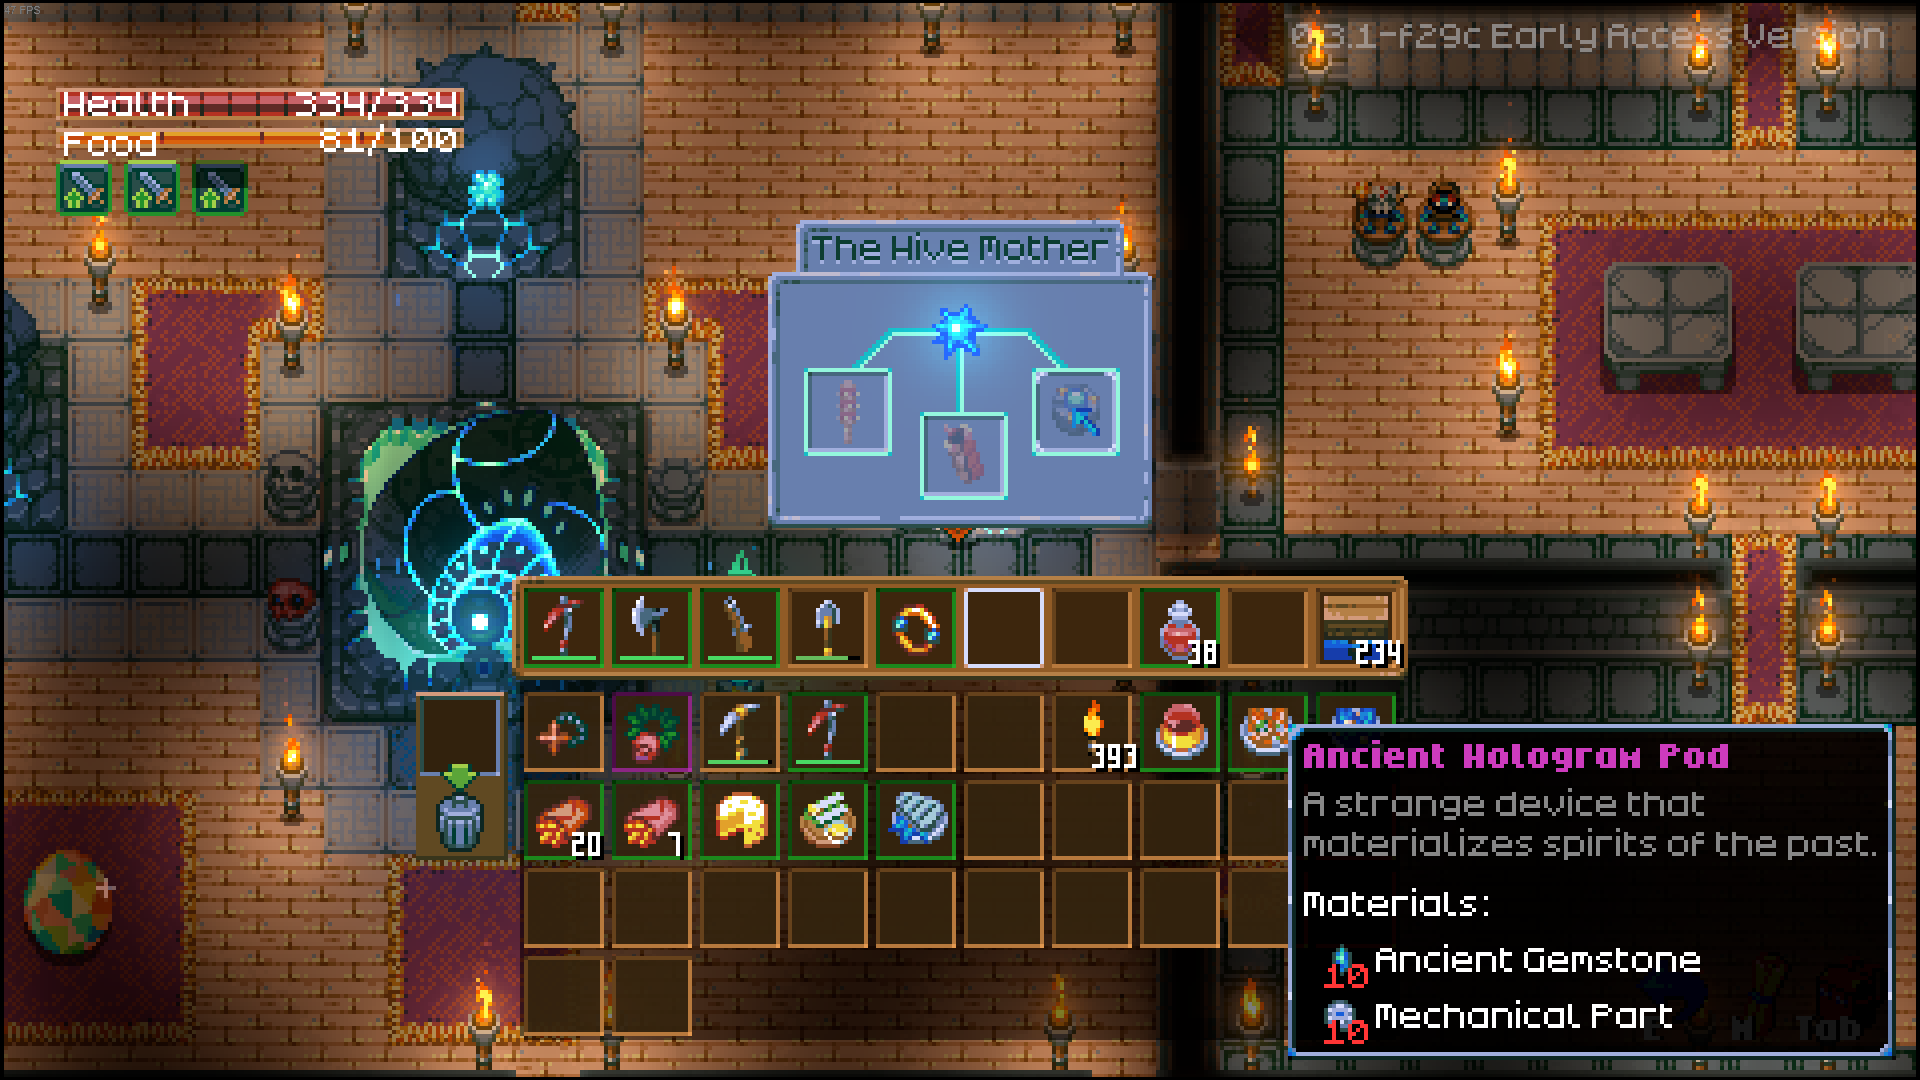
Craft the merchant at the obelisk from the Queen Larva.
The merchant sells two items:
- An item to track bosses.
- A decorative egg (no, not really decorative). The egg is needed to summon the boss, so don't be like me—I had to run back and forth twice.
To craft the tracker, you need feathers from the chicken boss. They're easy to find, scattered across the forest biome—just keep an eye on the ground.

Boss Encounter
Once you've crafted everything and located the chicken boss, head to its lair. It’s a large, open area with its feathers scattered around.
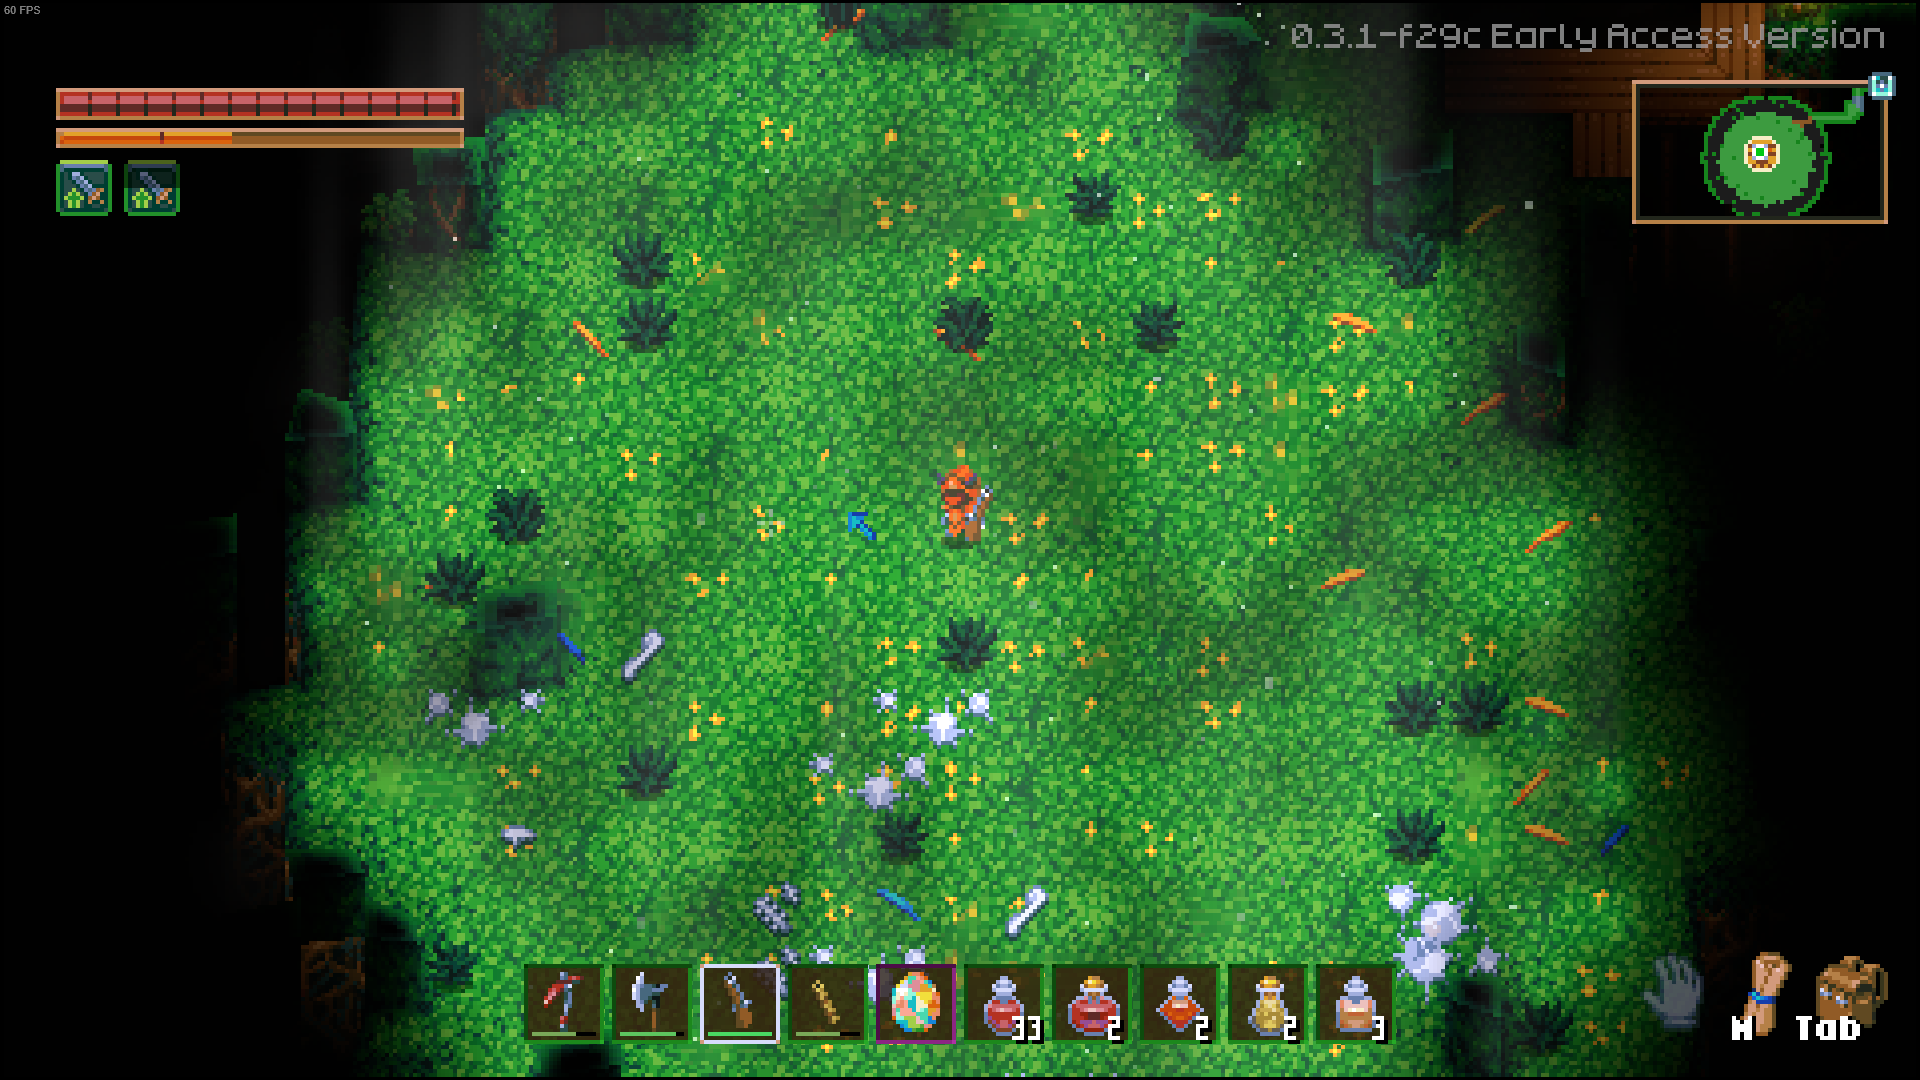
Place the egg on the ground, and voilà—the boss appears!
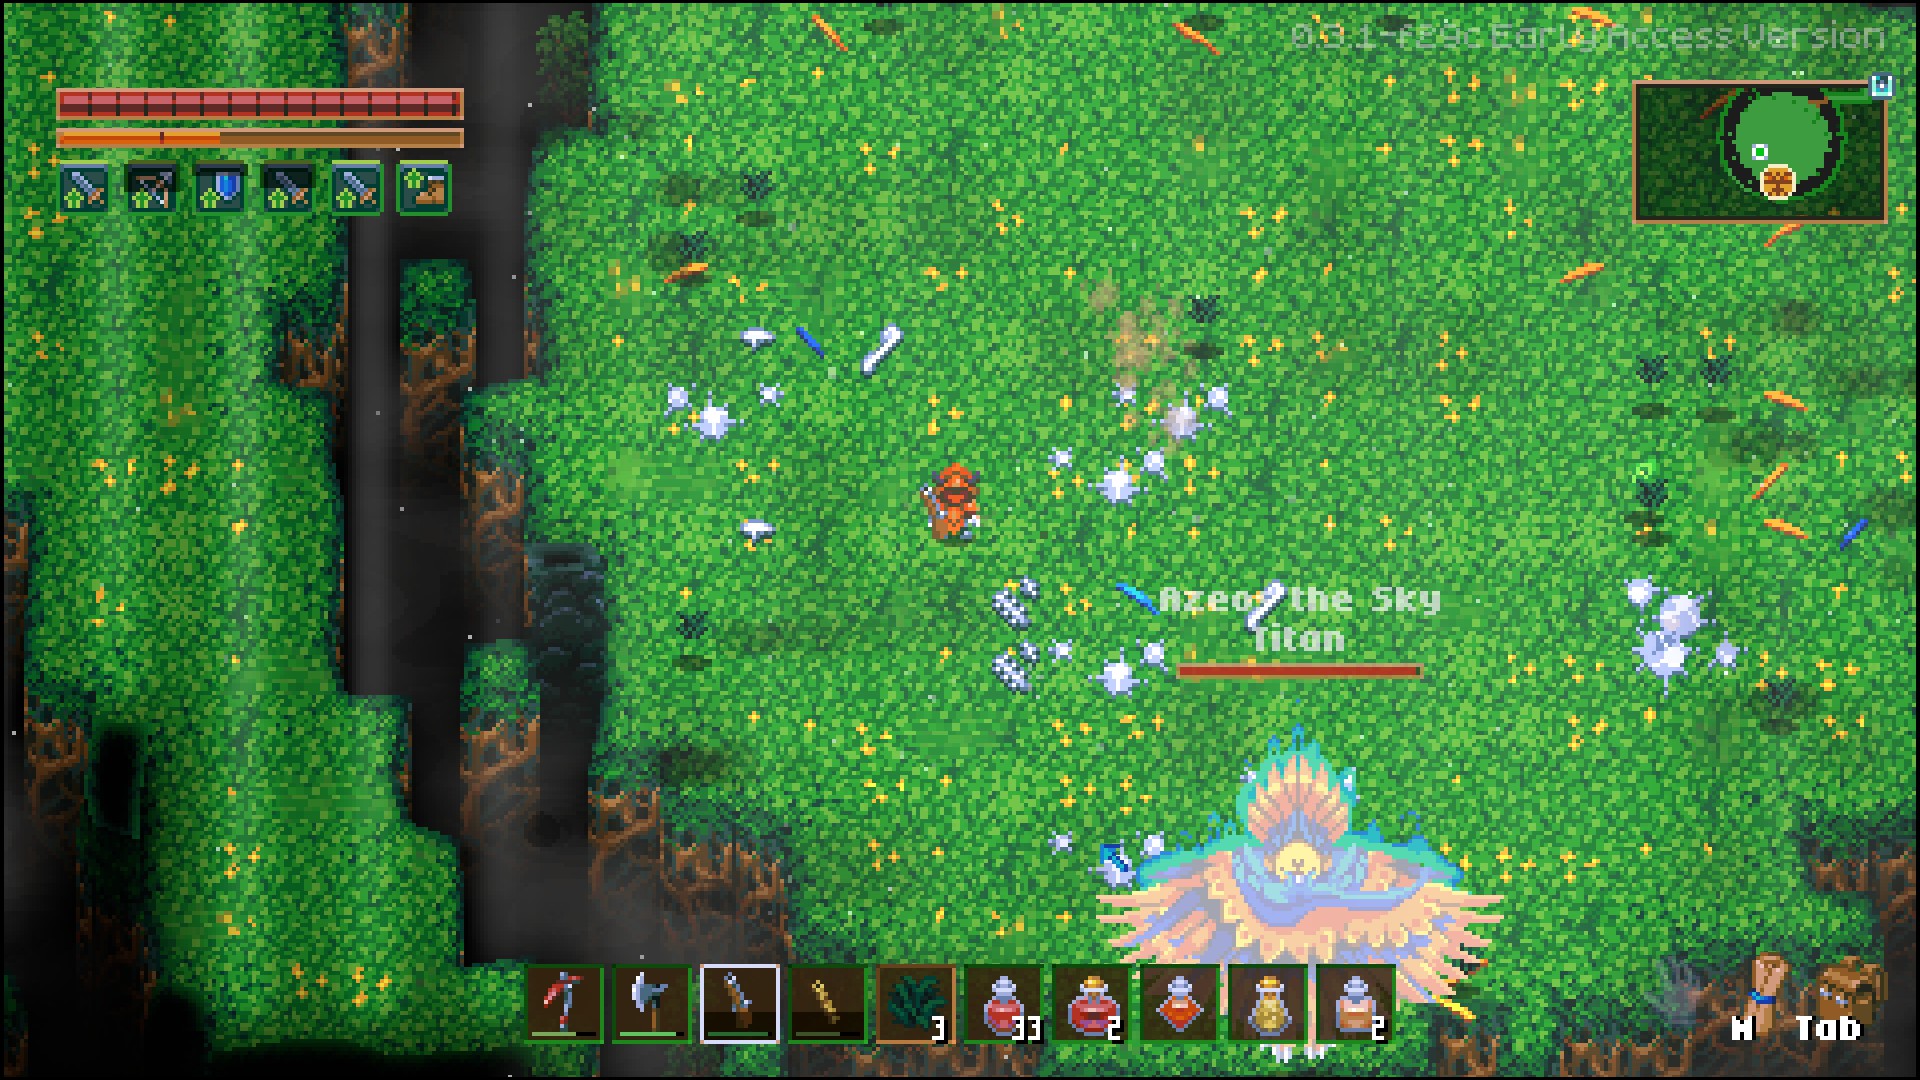
Boss Attacks and Strategy
- What to Bring
The boss seemed pretty easy. I was expecting more of a challenge, but it turned out to be straightforward. You can take whatever weapon you prefer, sword or axe (I personally used an axe since I dealt 290 damage with it). The sword's advantage is that if you collect a critical hit set, it can deal up to 300 damage, so it depends on your playstyle. I also used a dart-shooting blowgun due to its rate of fire.
- Attack Styles
The boss has two main attack types:
- It summons beams at regular intervals. Dodging them is simple, and even if one hits, it's not too painful—just a quick potion, and you're back to full health.
- The second feature is crystal summoning. These crystals heal the boss when it changes position. They're easy to break—just hit them with a pickaxe a few times to prevent healing. I wouldn't recommend ignoring them, as the boss can heal a significant amount from them. Once summoned, it's better to destroy the crystals immediately—they appear close by.
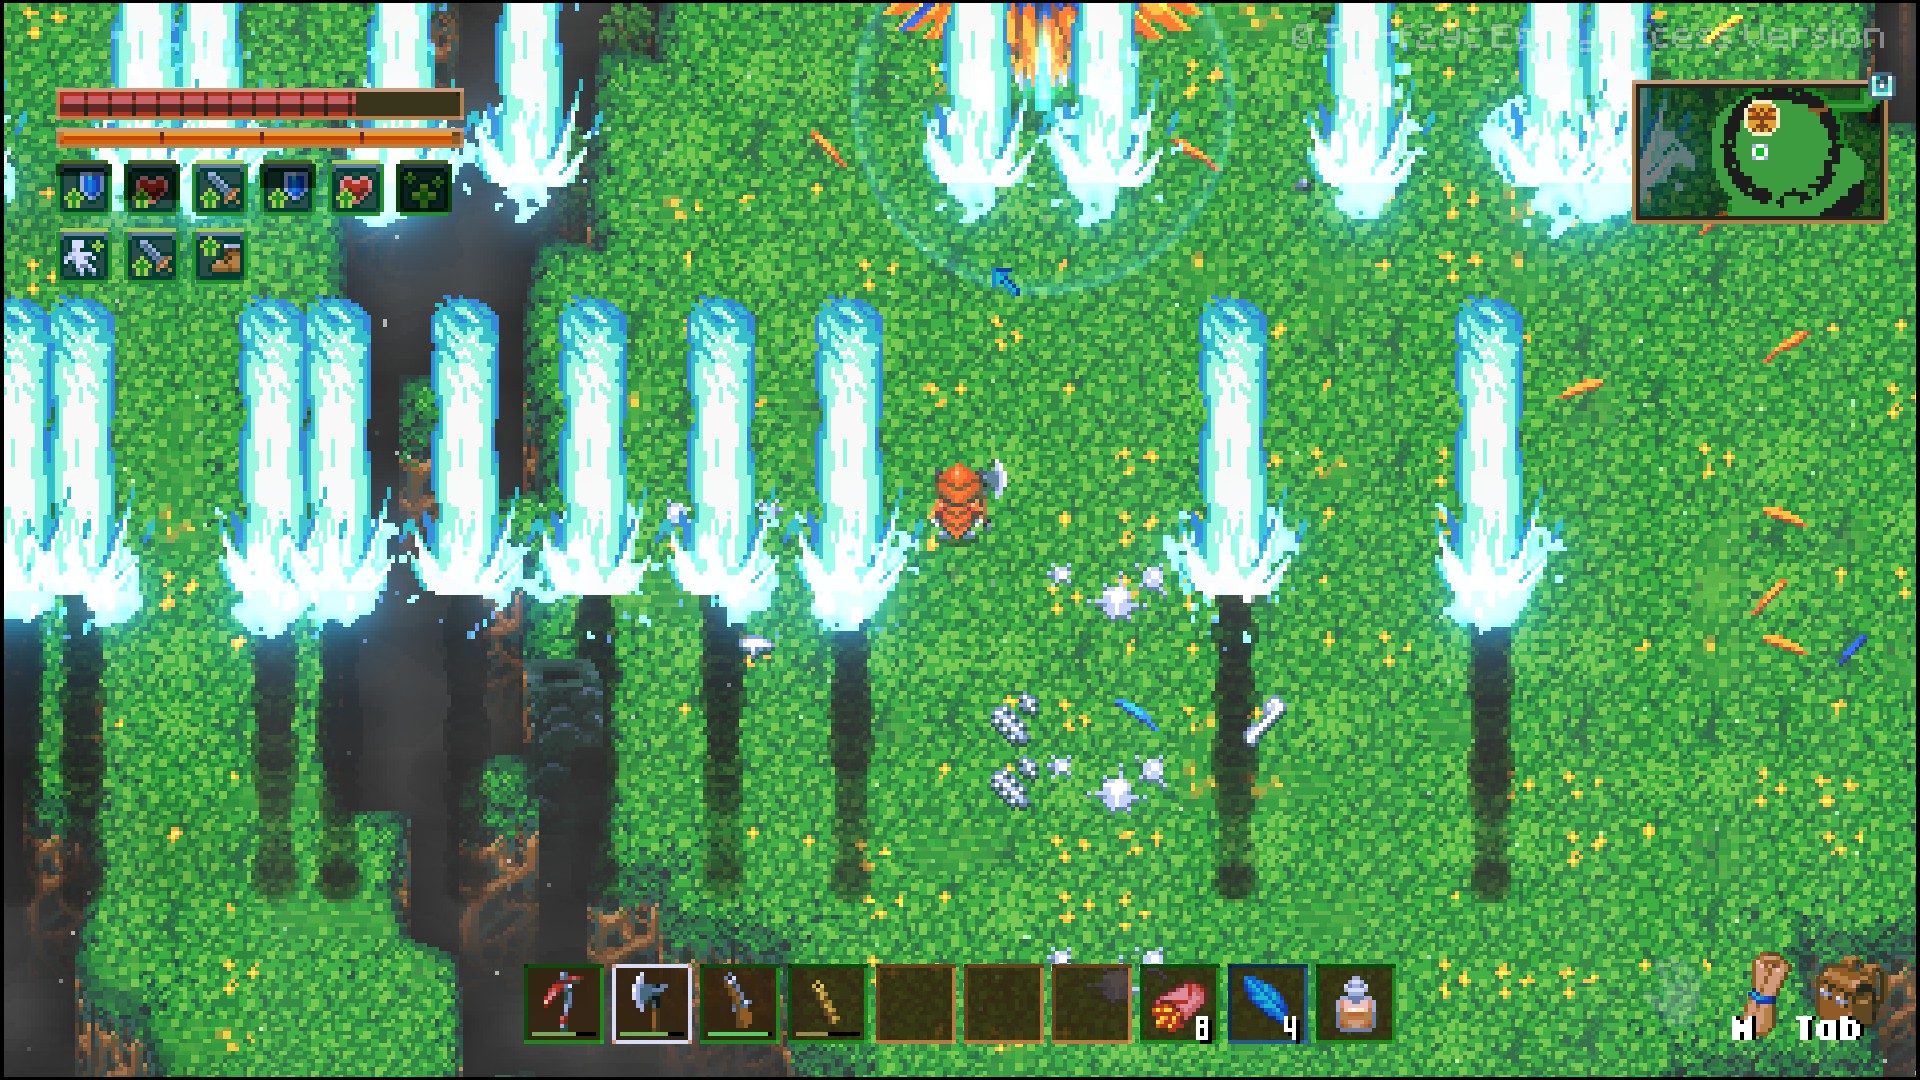
In summary, that’s the entire boss fight. It's not difficult, just bring healing items and food to your liking, and go pluck some feathers!
Stage 3 Bosses
Blue Slime Boss (Morpha)
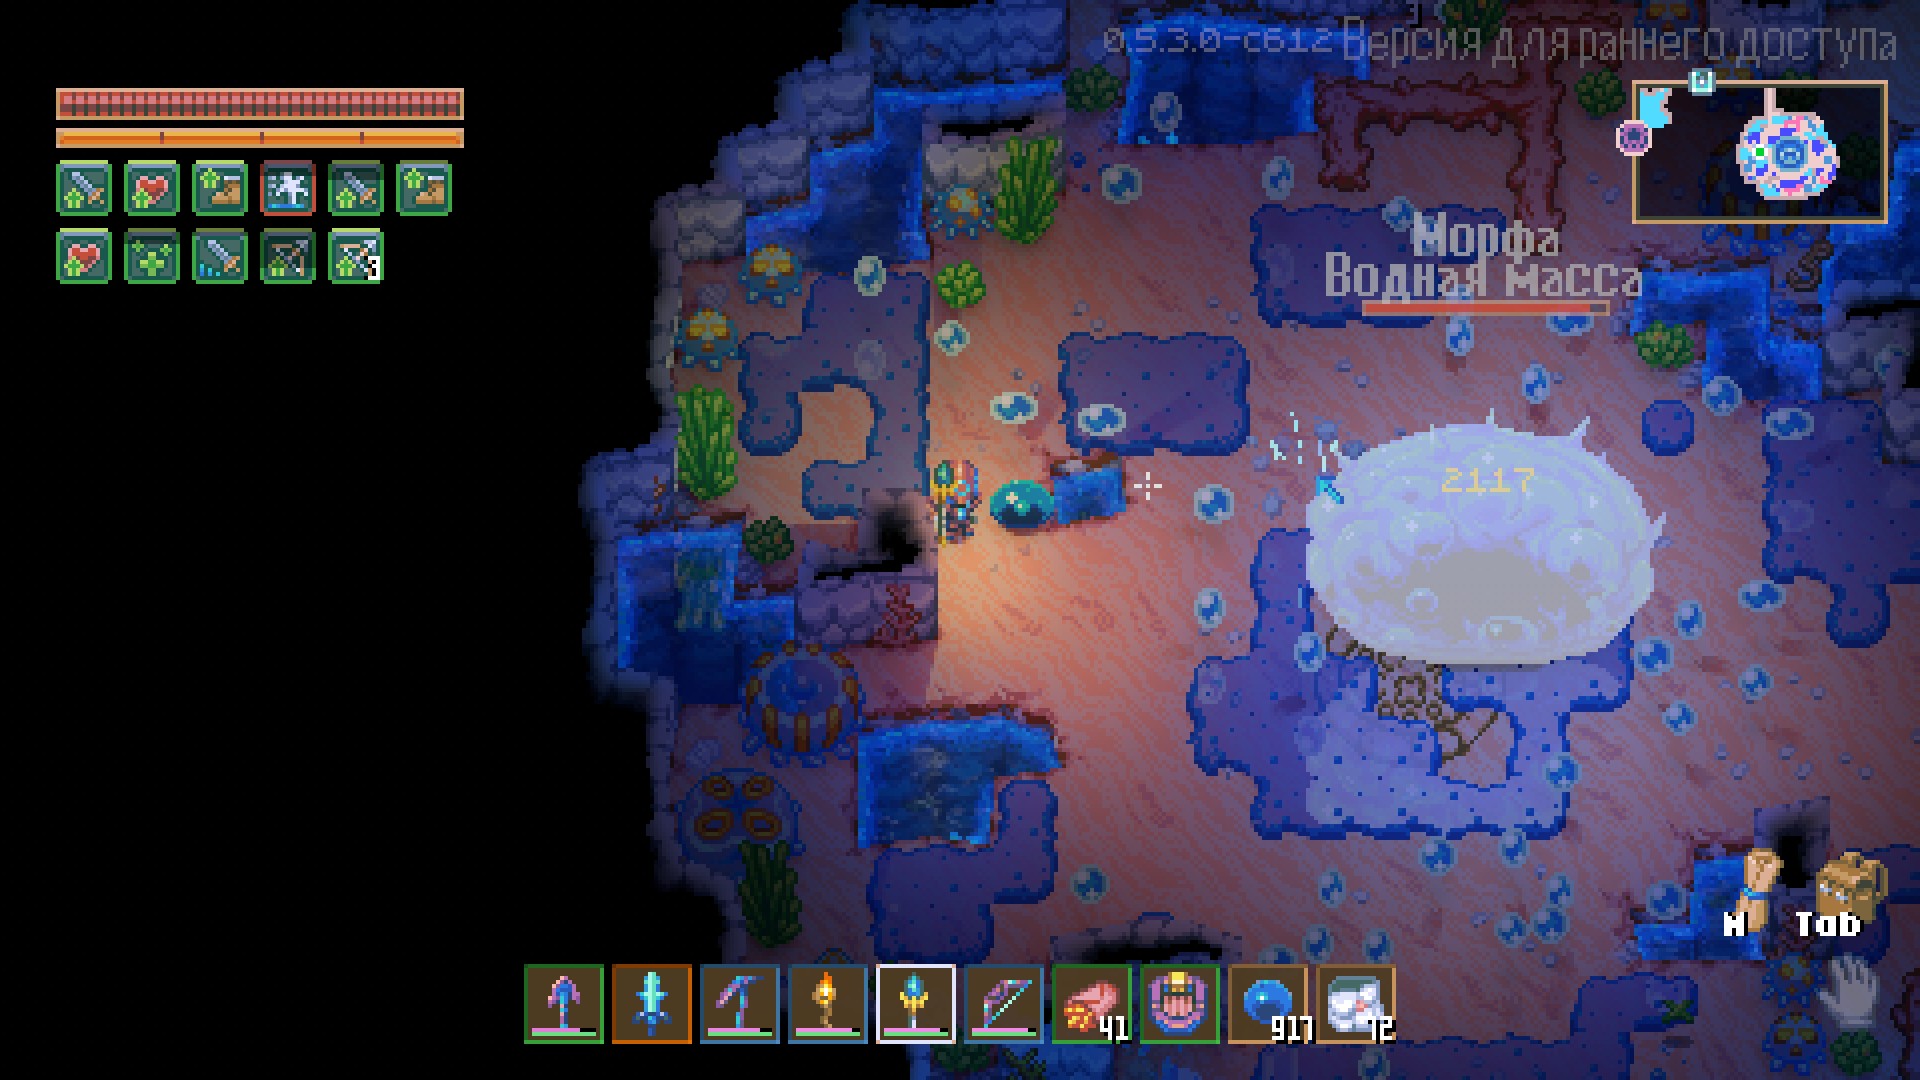
To find the blue slime, buy a boss scanner from the astral merchant and go hunt it down.
Or, if you prefer hardcore mode, you can search for it manually.
Boss Encounter
Once you've crafted everything and found its location, head there.
The area around the boss will be filled with slime, and if you've already obtained the set from blue slimes, it will give you an advantage, but it's not strictly necessary.
Boss Attacks and Strategy
- What to Bring
This boss is relatively simple. I used a staff from the sea wizards (they can be found in sea dungeons and drop it) or whatever ranged weapon you prefer—just don’t go melee, or you’ll regret it.
- Attack Styles
The boss has two attack types:
- It jumps, like all slimes, and launches annoying projectiles across the map that can hit you.
- Due to the slime's stickiness, dodging its jumps is easier than you might think.
In summary, the boss isn’t tough. Just keep running around, dodging jumps and bubbles, heal up as needed, and eat some food. Honestly, I had more trouble with the toxic slime…
Sea Titan Boss (Omorot)
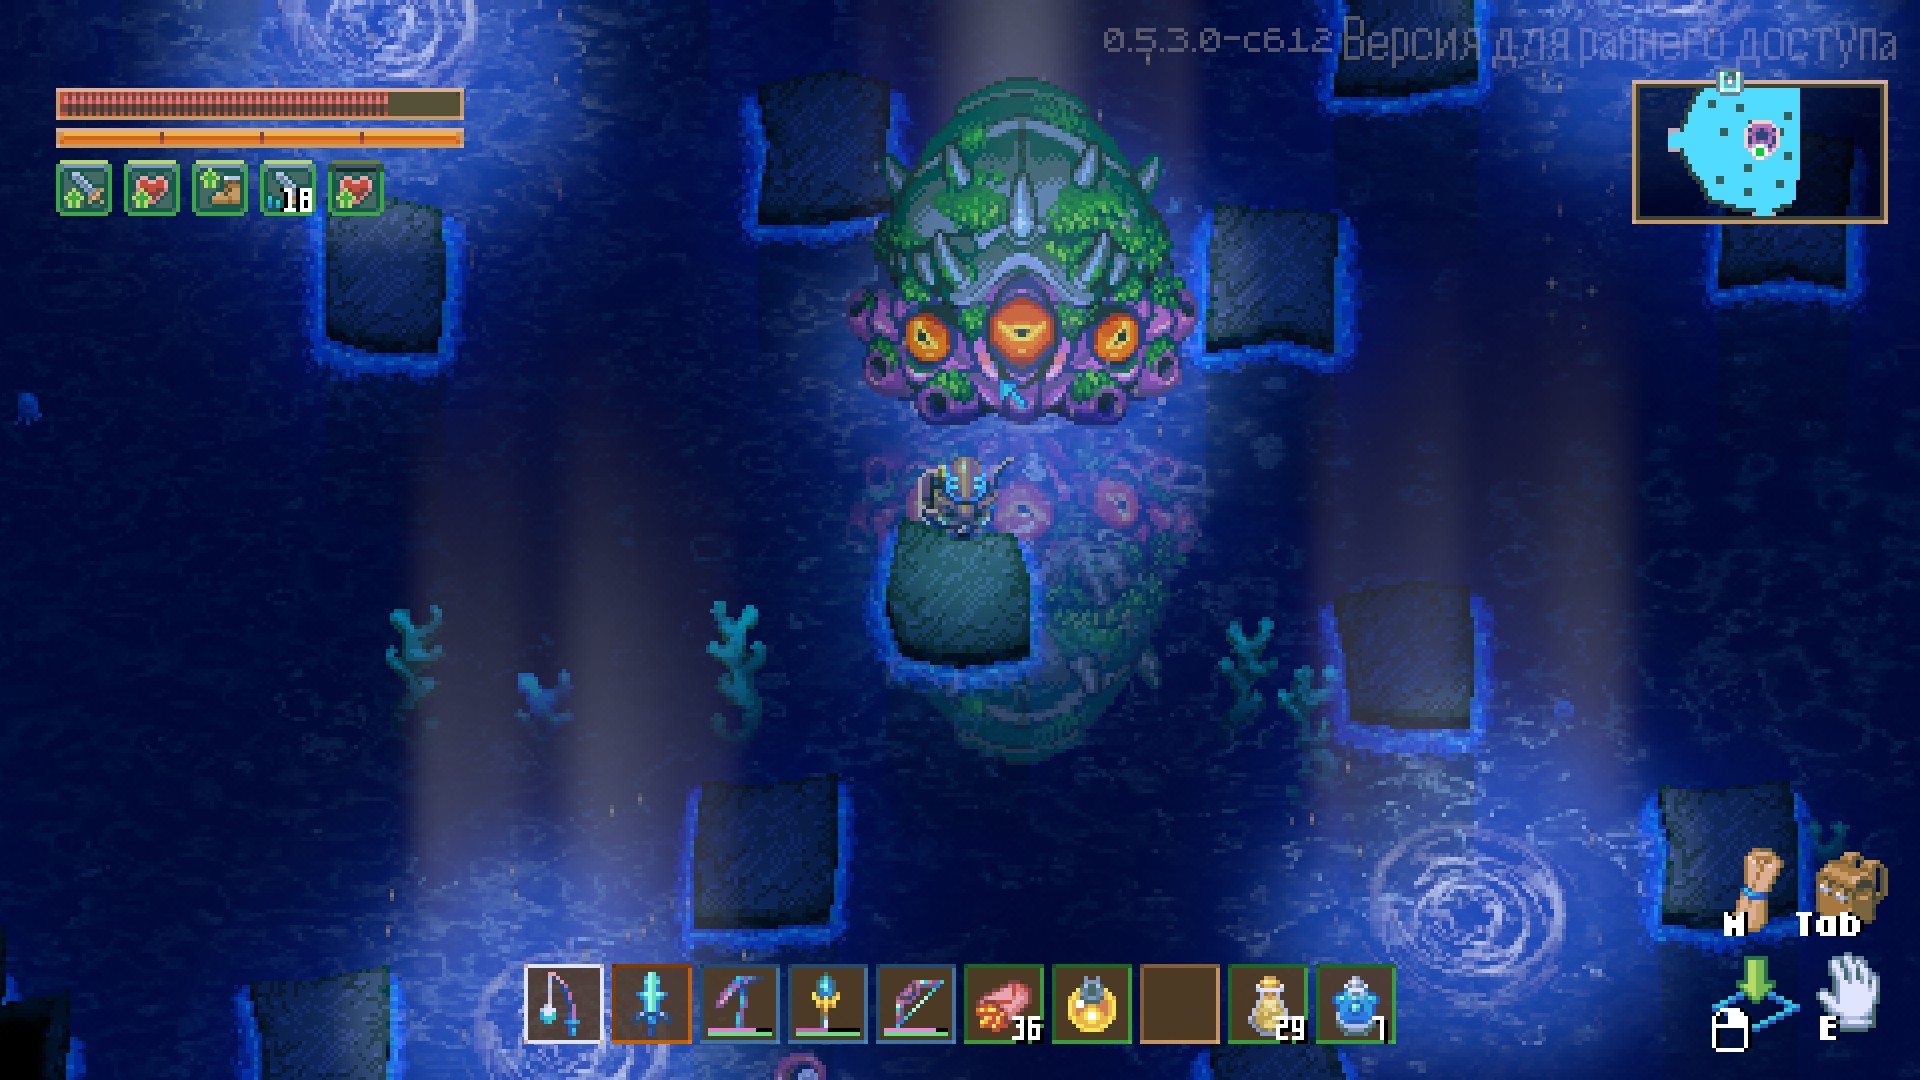
A giant Kraken-like creature. To fight this boss, you’ll need a scanner and bait. Don’t forget a fast boat.
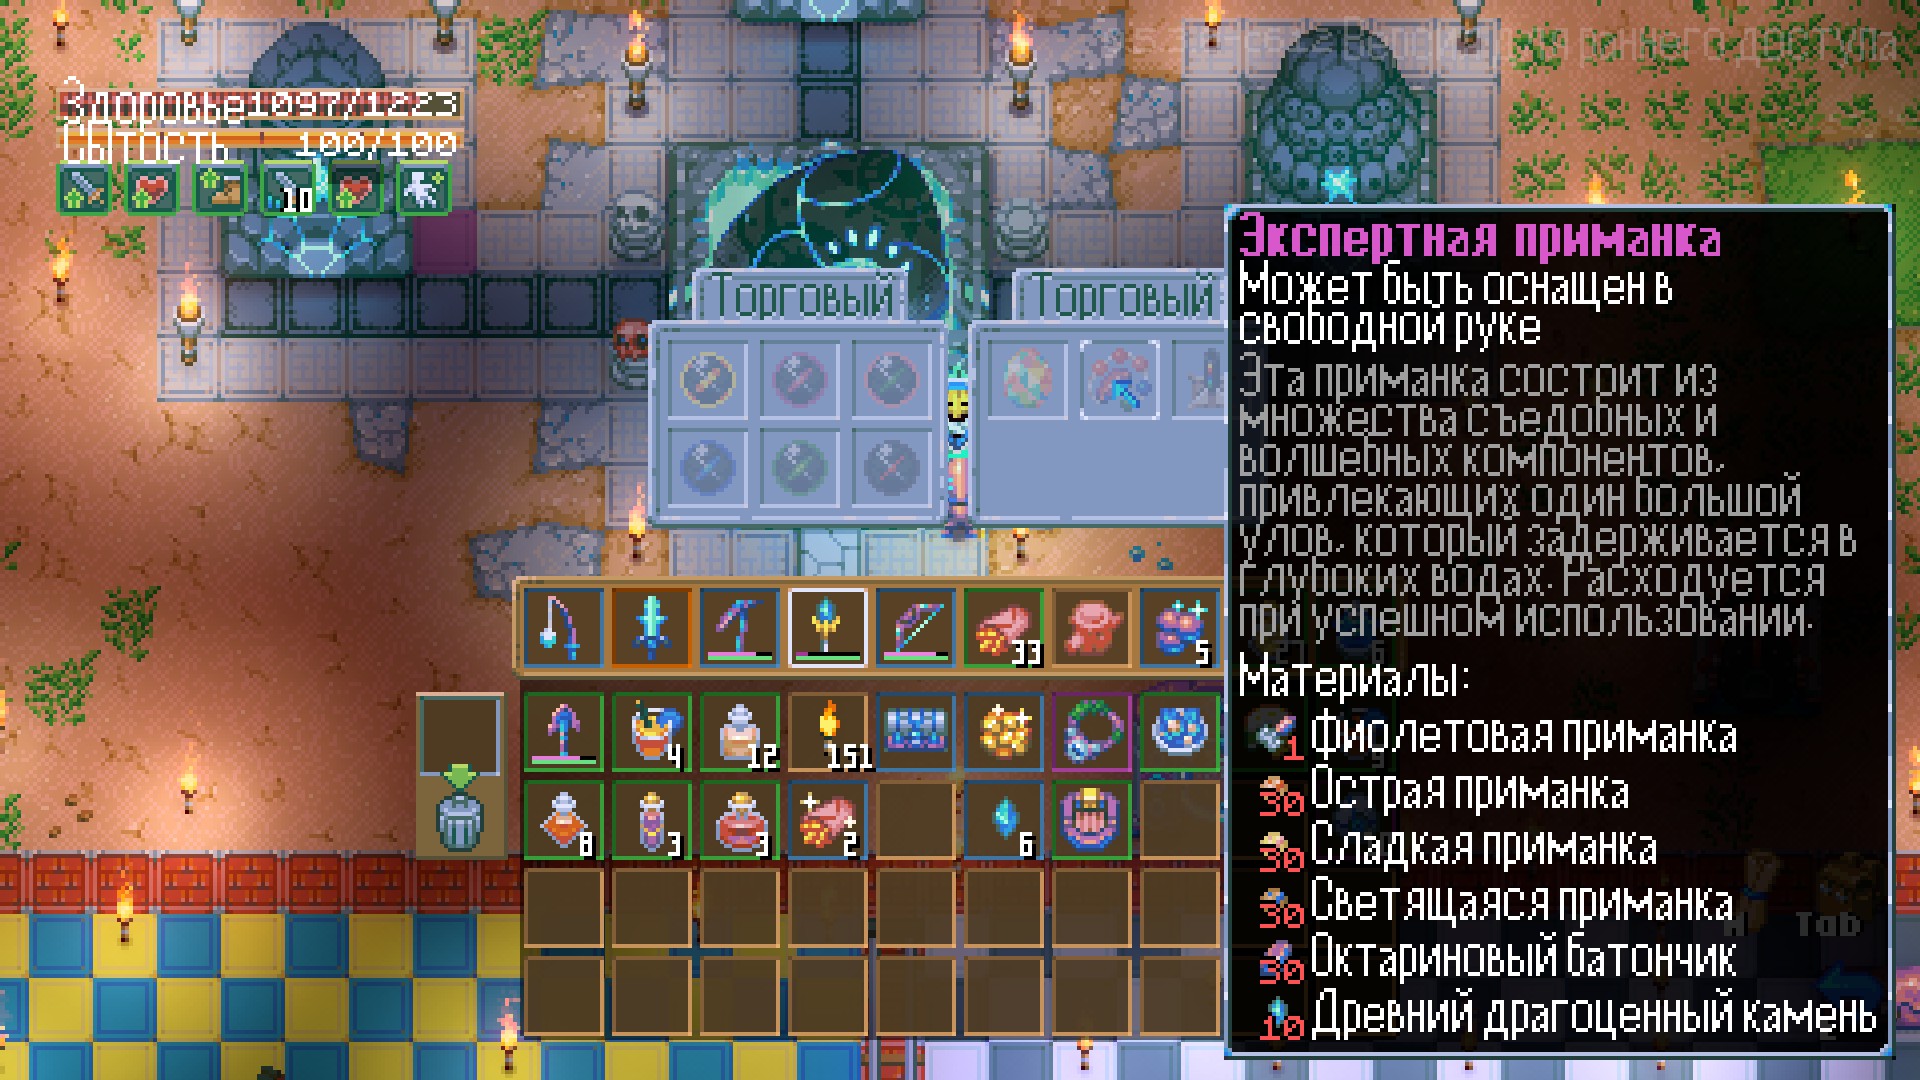
Boss Encounter
Once you’ve bought everything and located this shellfish, it’s time to take it down. Equip the bait, cast your line, and within a few seconds, the massive sea titan will take the bait. Time to battle!
Boss Attacks and Strategy
This boss is quite straightforward—attack it from a distance with ranged gear, food, and potions.
The boss has two attack types. First, it summons storms that fly toward your last known location, but dodging them is easy. Just swim in circles, and they’ll miss.
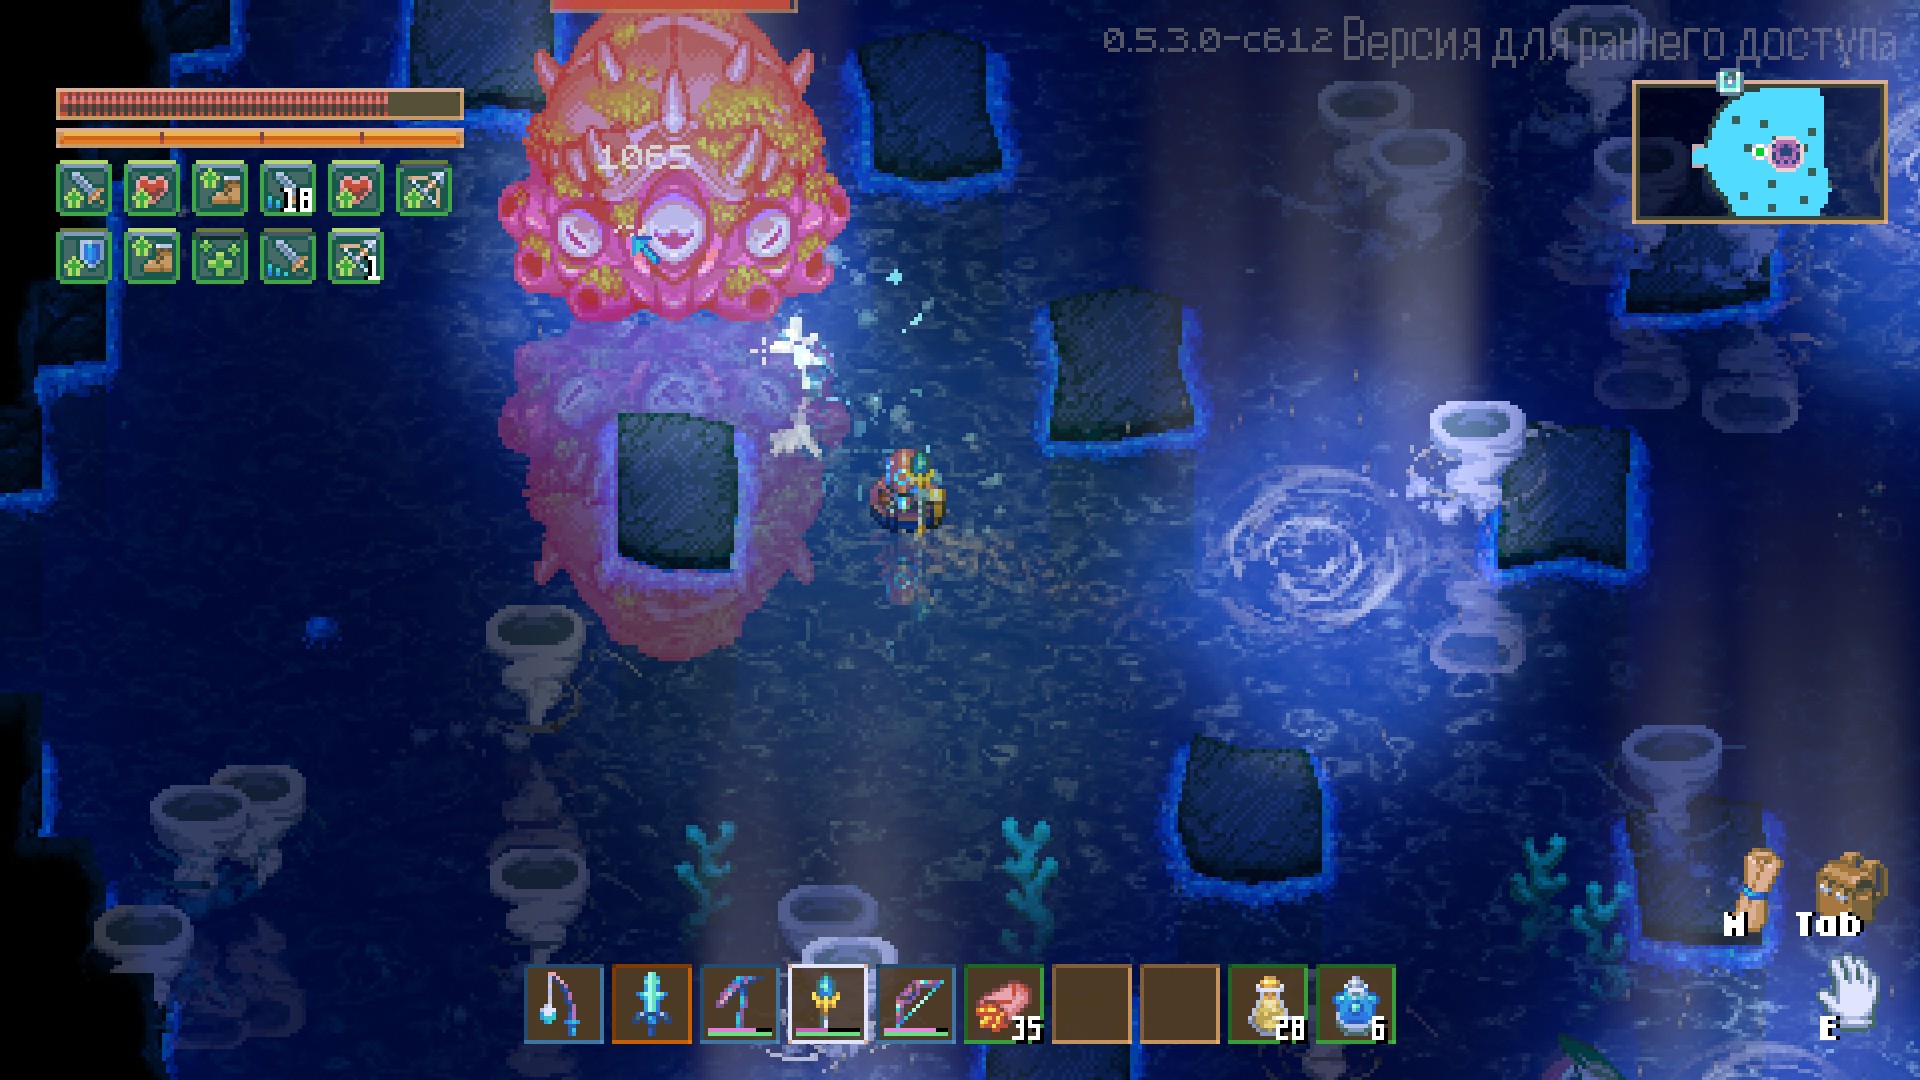
The Kraken also summons tentacles that attack when you swim nearby. You can kill them or just avoid them like I did. Occasionally, take out a few if they’re in your way—no screenshot, I was too lazy to take one.
In conclusion, the Kraken is easy. Just keep swimming and shooting.
Stage 4 Bosses
Magma Sludge Boss (Mass)
To find this boss, once again buy (or craft) a scanner from the astral merchant.
This sludge is the most annoying of all the bosses. It took me a while to figure out its healing mechanic—it healed back to full health twice before I caught on. Here’s the sludge itself:
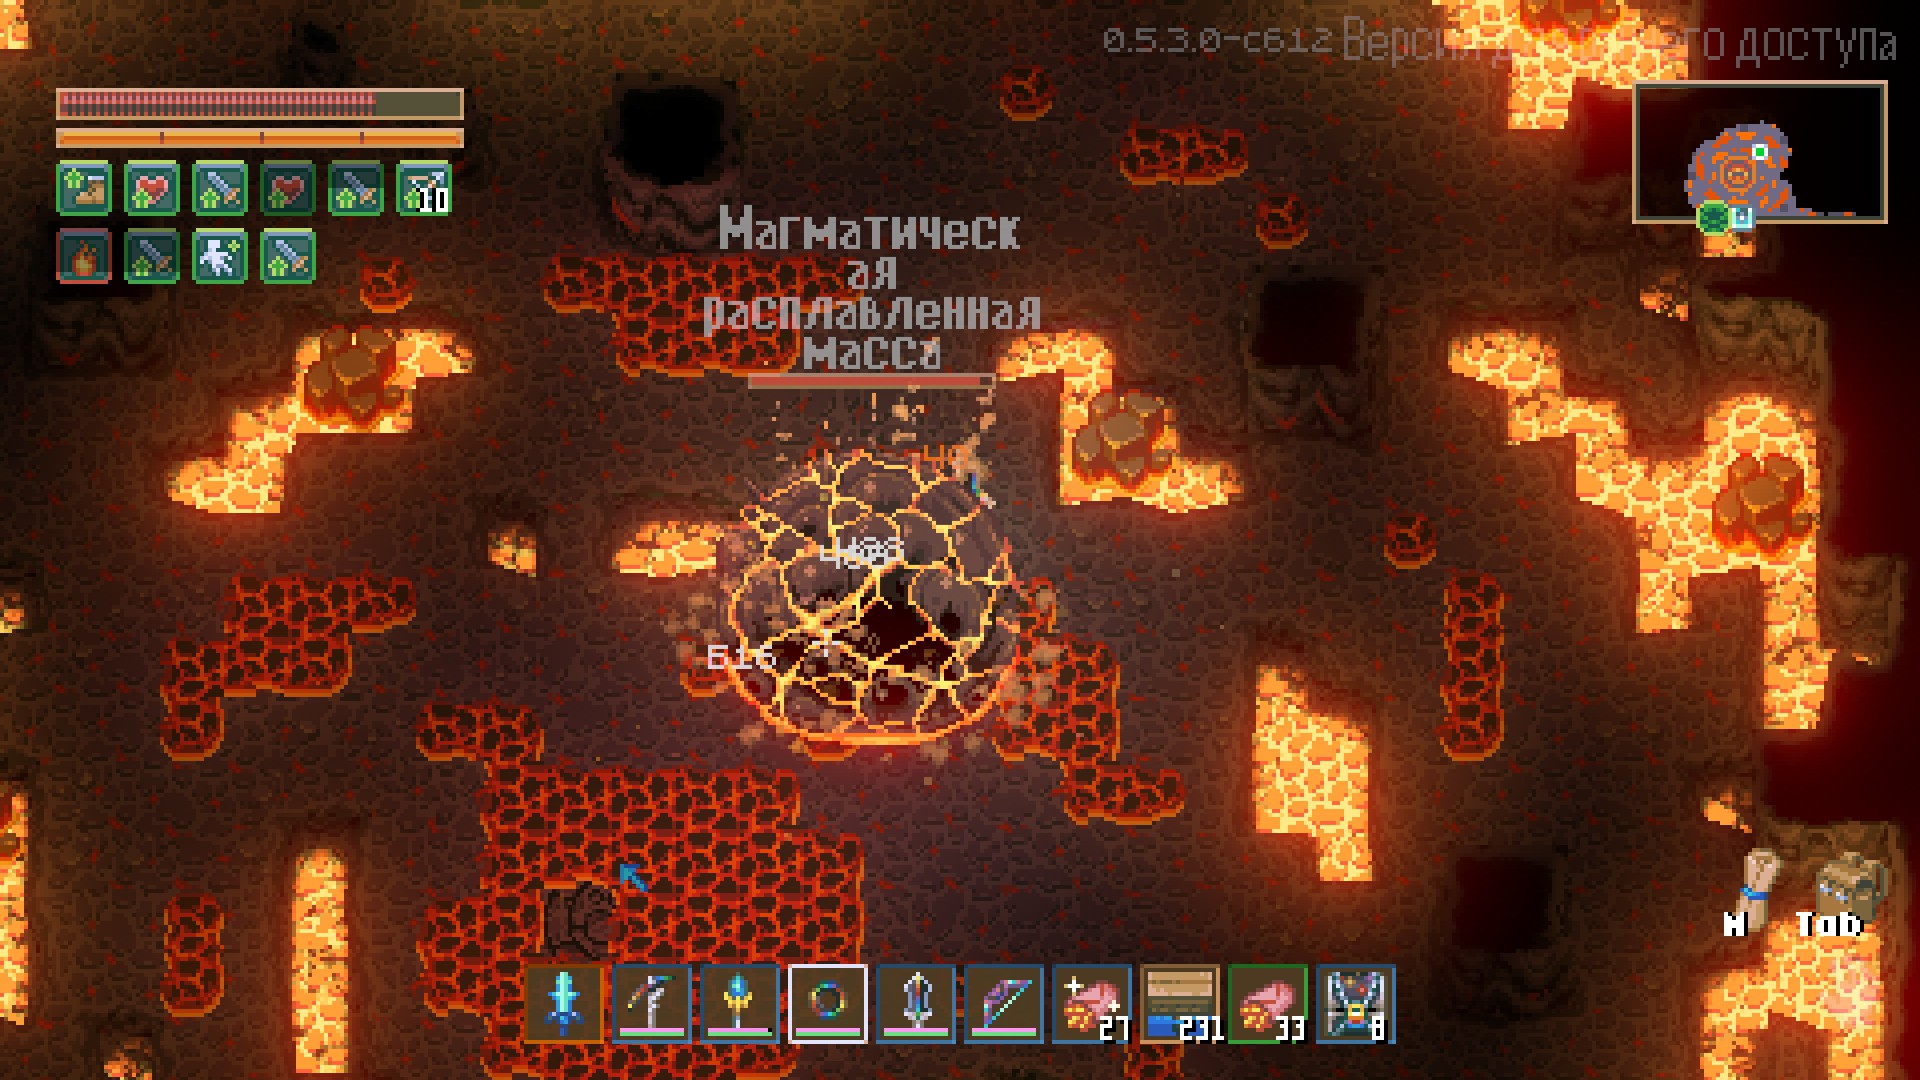
Boss Encounter
If you’ve gotten the fire slime jewelry set, use it. It helps reduce damage from the fire, which can be quite annoying. As usual, stick to ranged attacks, healing potions, and food.
Boss Attacks and Strategy
This boss really irritated me. It jumps around like a bouncy ball and shoots small fireballs (poorly aimed).
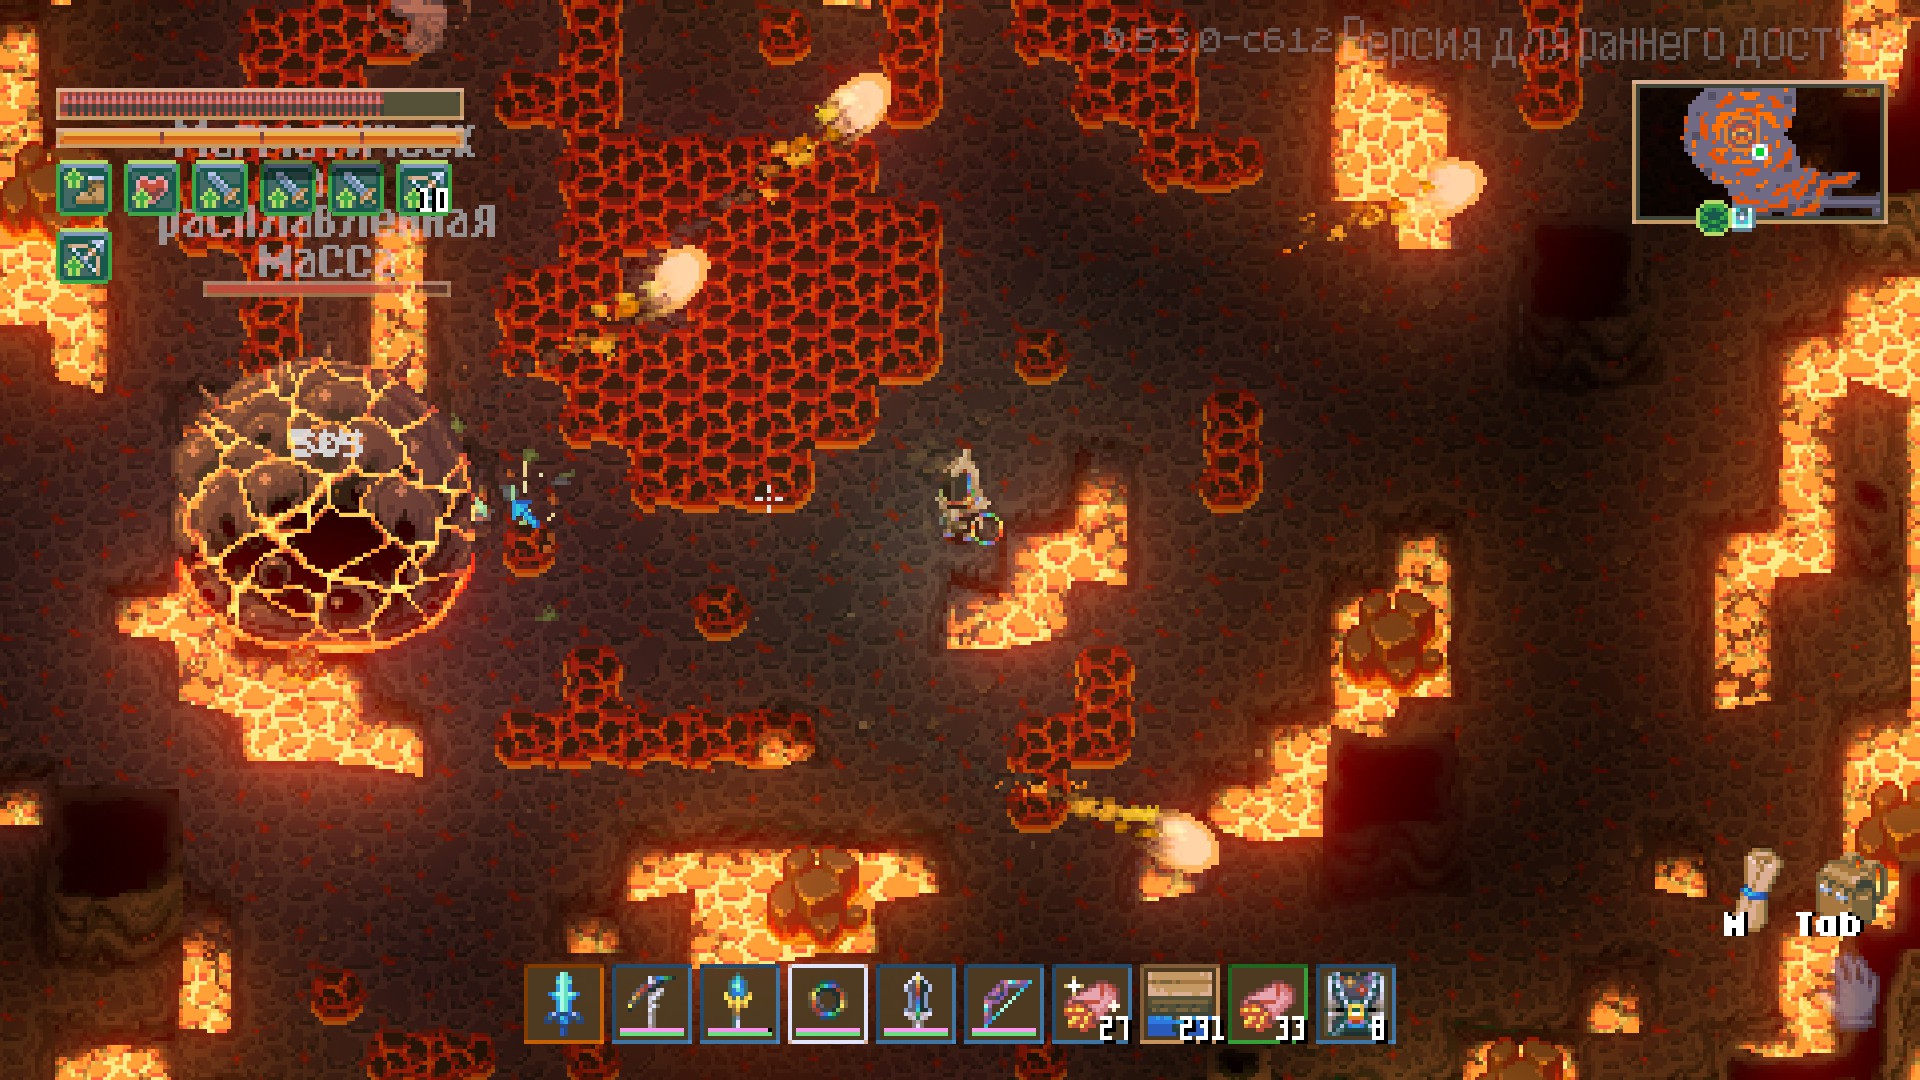
Additionally, when its health gets low, it summons fireballs or meteors—nonsense, really. As soon as you see them, break them immediately! If you don’t, the boss will heal back to full health, and you’ll have to start over. Here's the nonsense I’m talking about, near my character—destroy them right away, whether with melee or ranged attacks. Just break them!
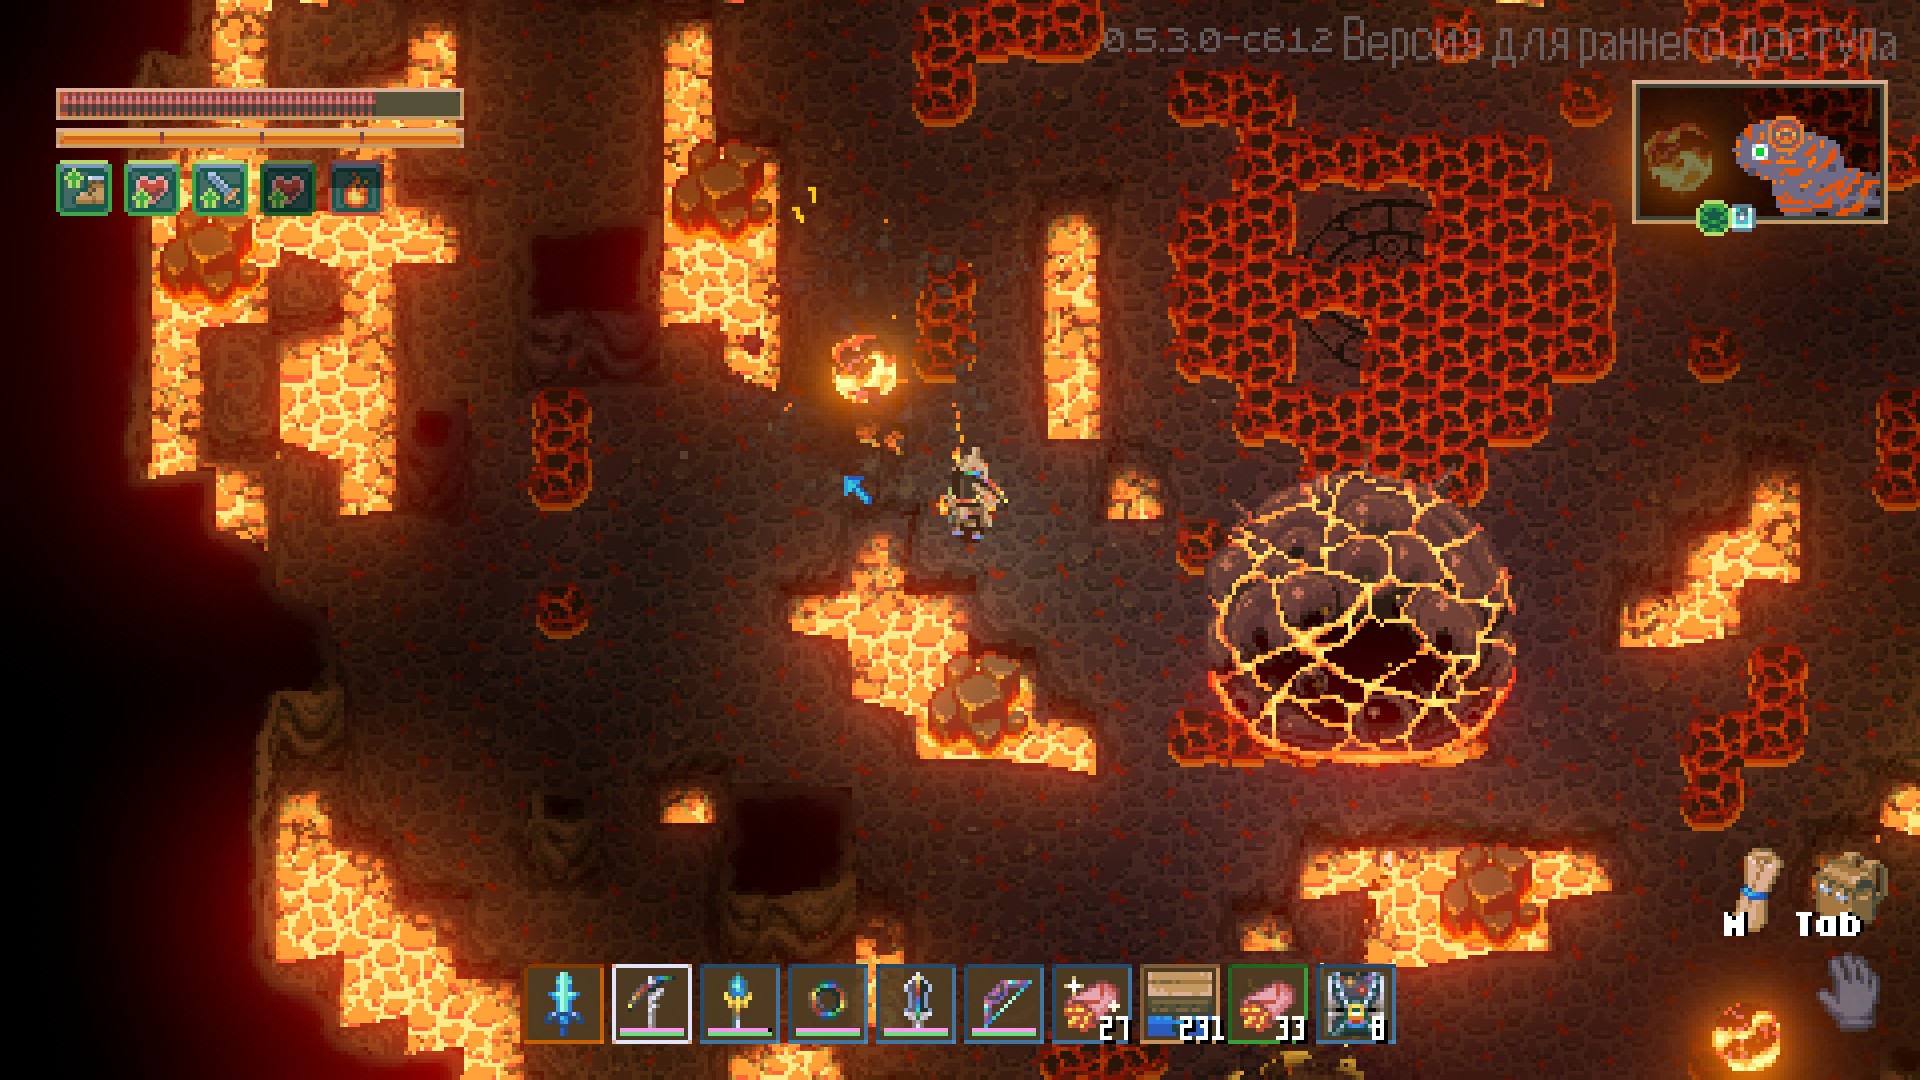
If you’ve read all of this, you won’t have any problems. Don’t make my mistakes (I had to fight it three times before figuring out what was going on).
Sand Titan Boss (Ra-Akar, the Stinky Bug)
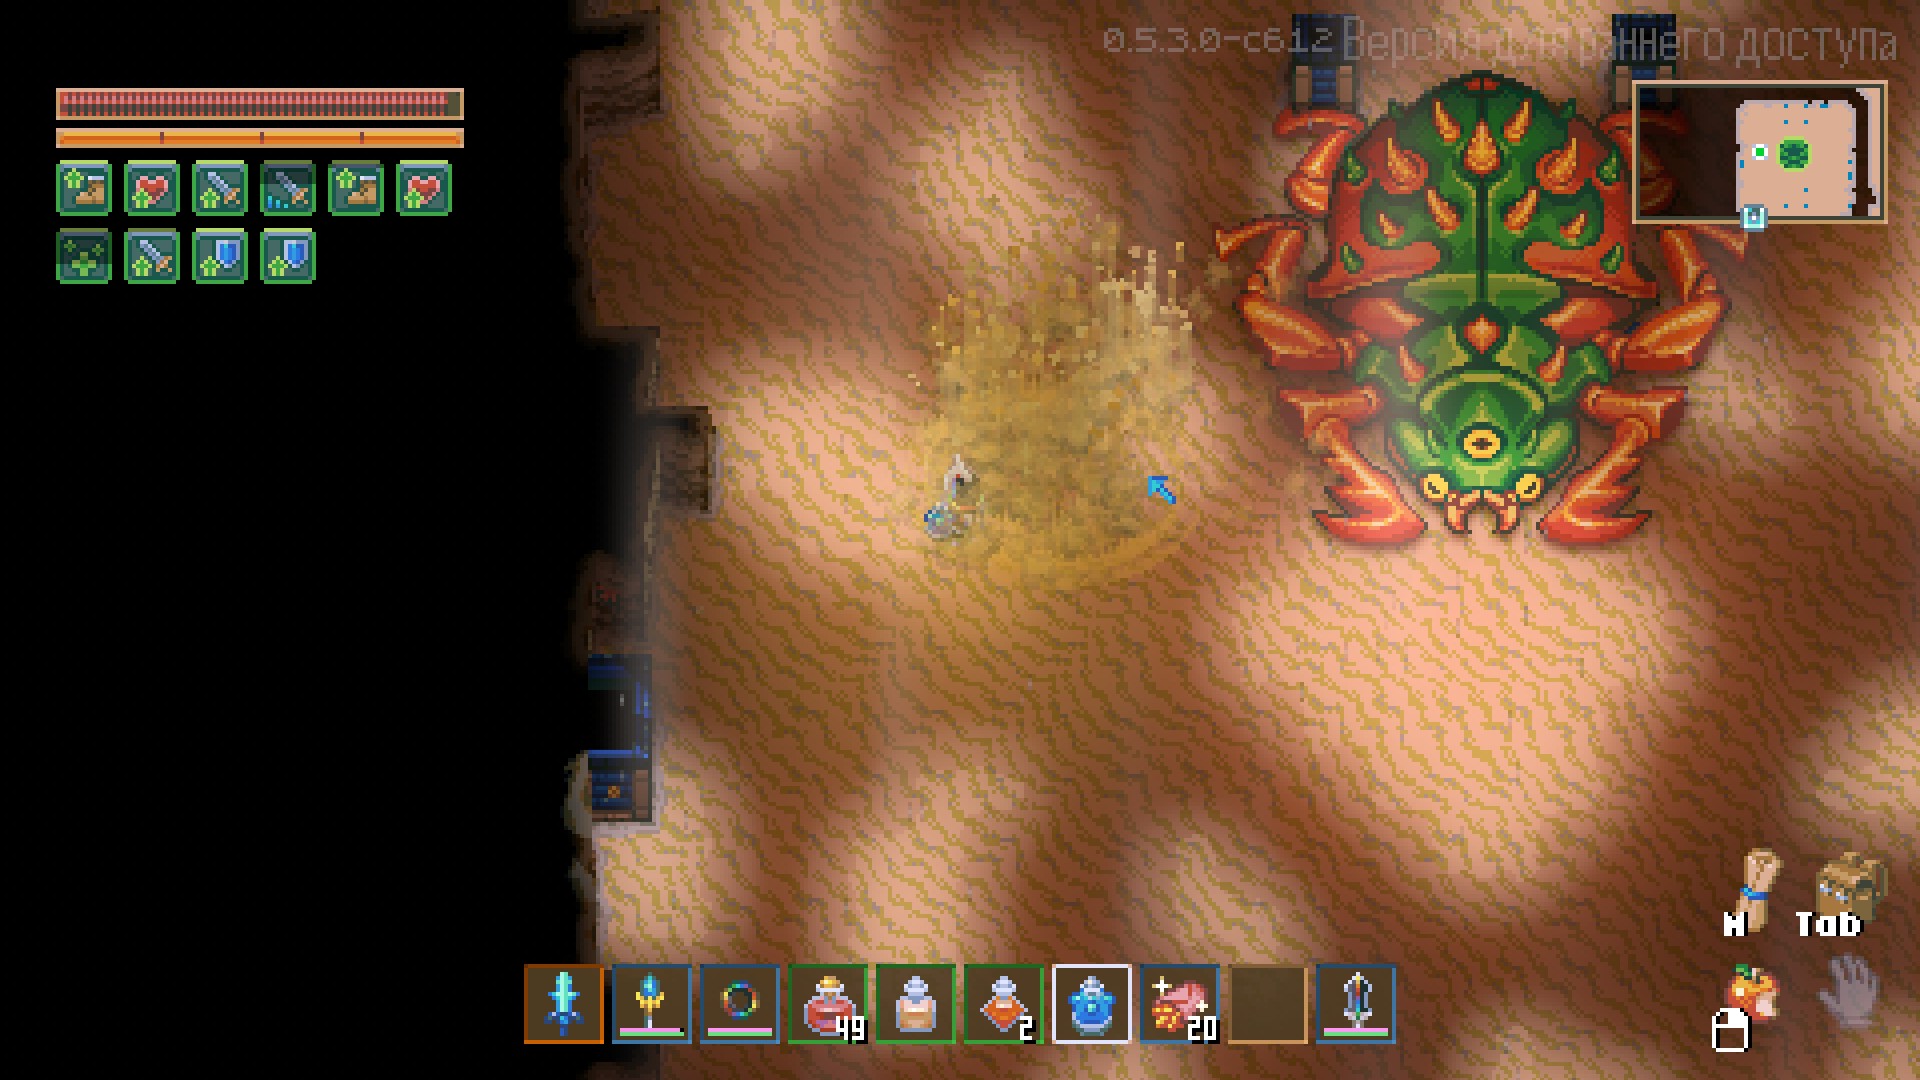
As usual, craft a scanner and summoning item. Here’s the boss itself—simply place the summoning item in the area.
The bug makes its grand appearance!
Boss Attacks and Strategy
As always, bring good guns, food, and potions.
The boss has three attack types:
- It releases sand pulses, first from itself, then in a circle that hits the character.
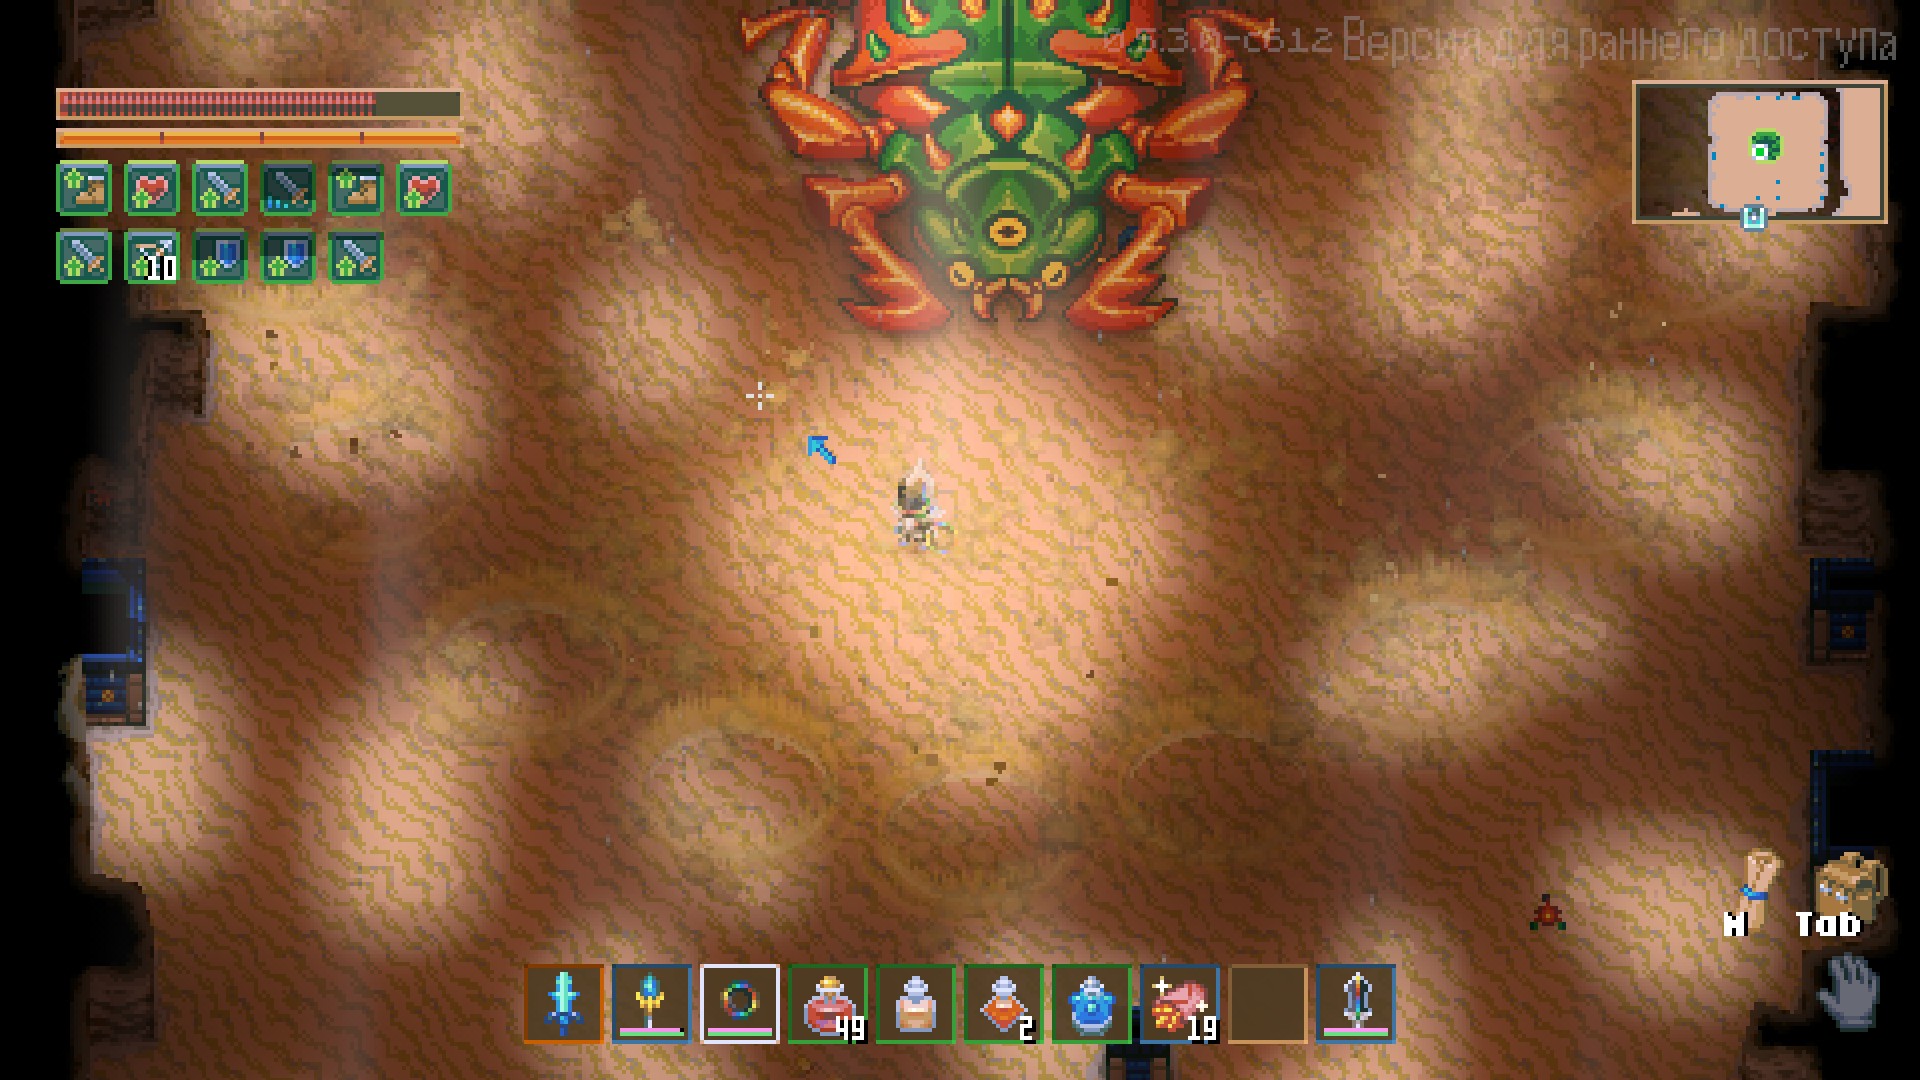
- It launches pulse balls at you. Dodging them can take a while, or you might get hit in the face. To reduce the damage, get a shield from the magma slime—it reduces damage by 70%. Use it when the balls are coming at you.
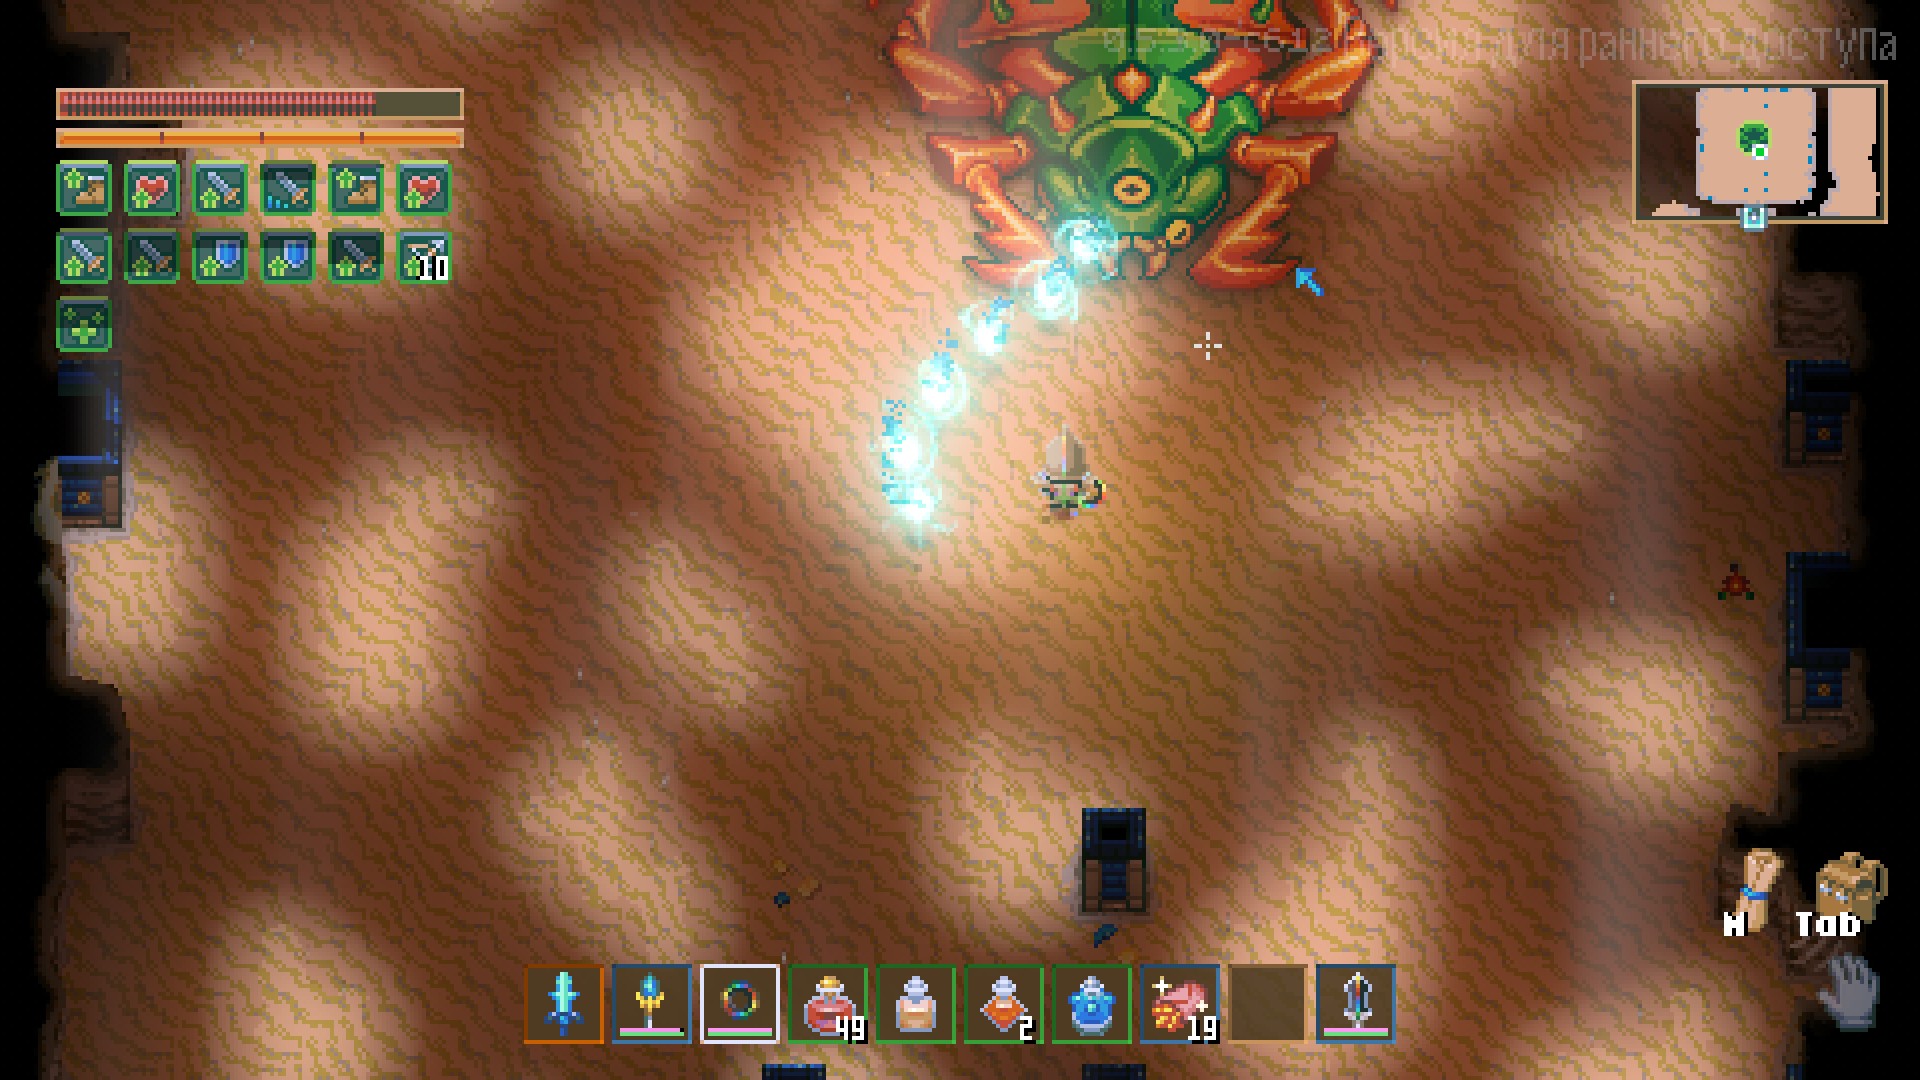
- Toward the end, it summons scarabs—annoying, but not critical (no screenshot, I was too lazy).
In conclusion, the boss is a tank in terms of health but can be defeated easily if you’re well-prepared. That’s all.
Stage 5 Bosses
Water Worm Boss
To find this worm, once again buy (or craft) a scanner from the astral merchant.
To summon the worm, you need bait, which can be purchased from a new NPC. To summon it, first, find the new biome and a platform for fighting strange creatures.
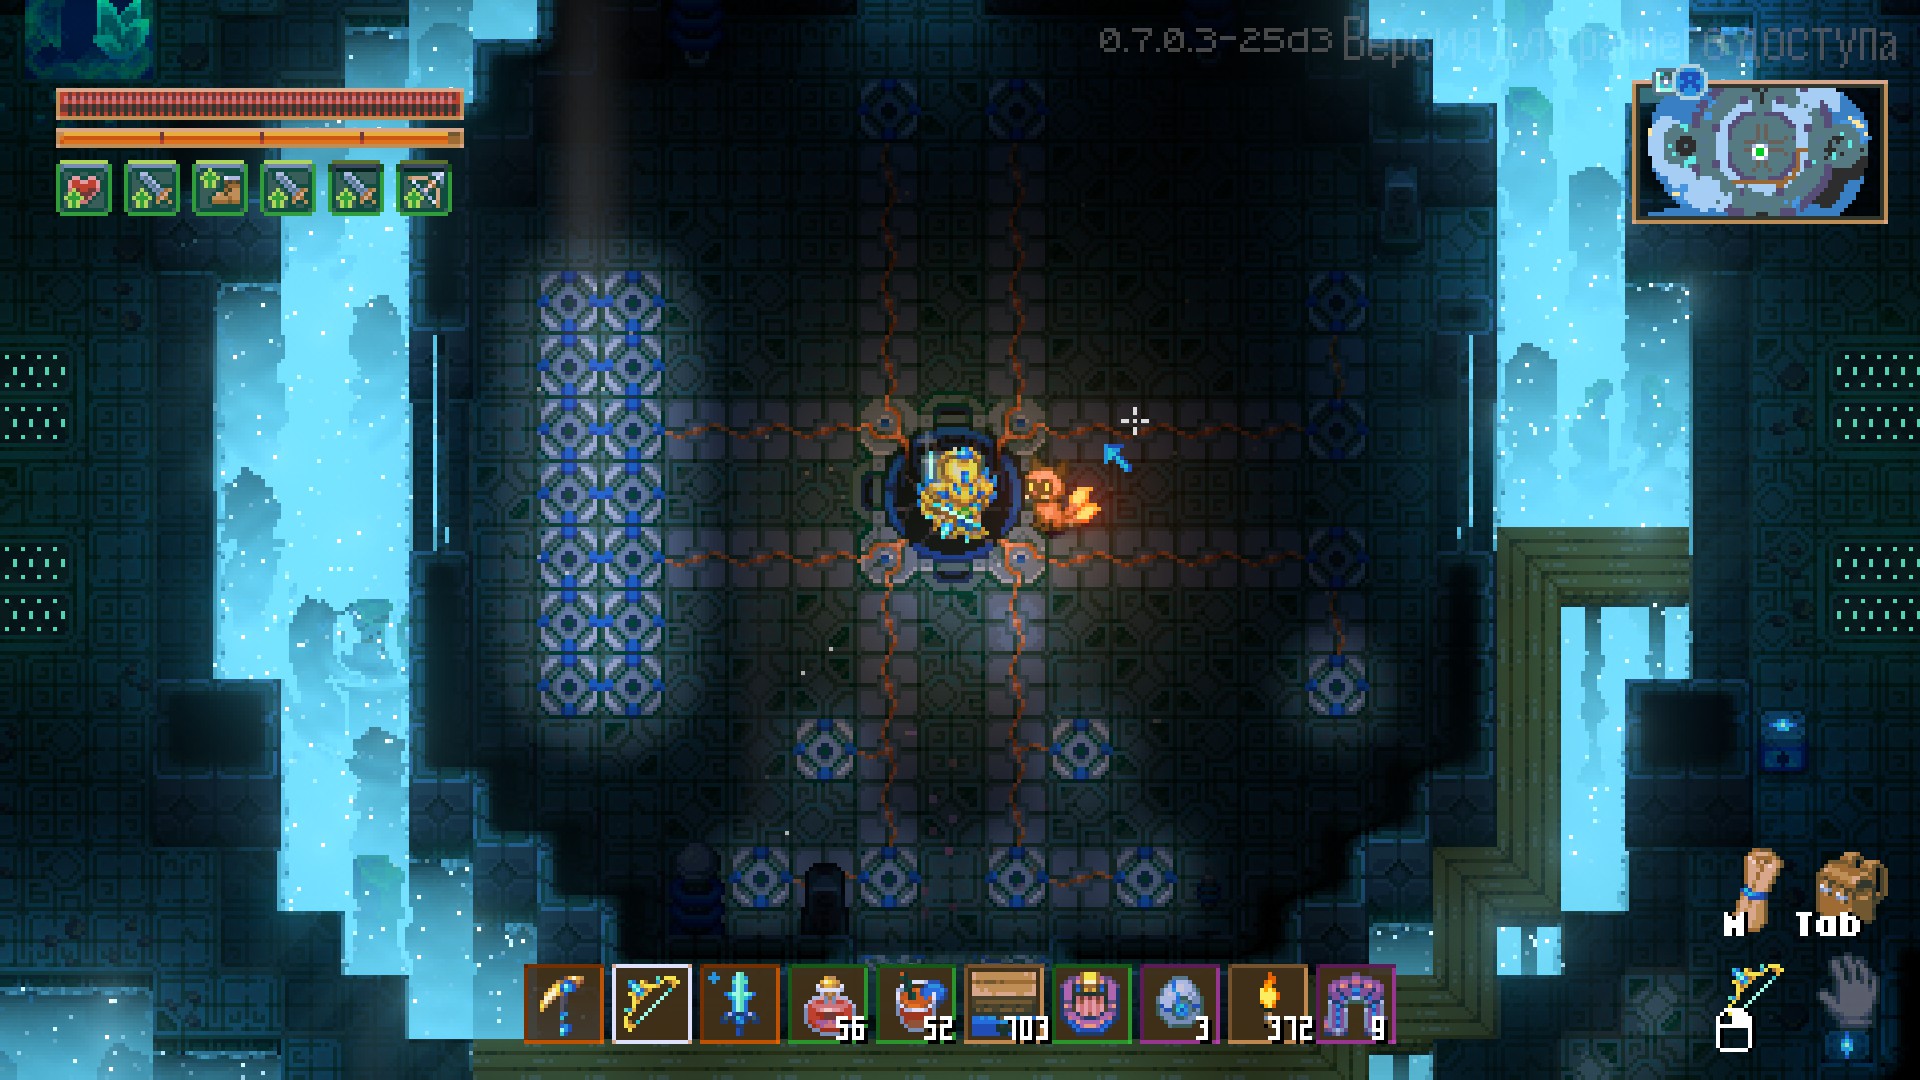
After the battle, a chest will appear, containing resources for upgrading items and a battery to summon the new NPC.
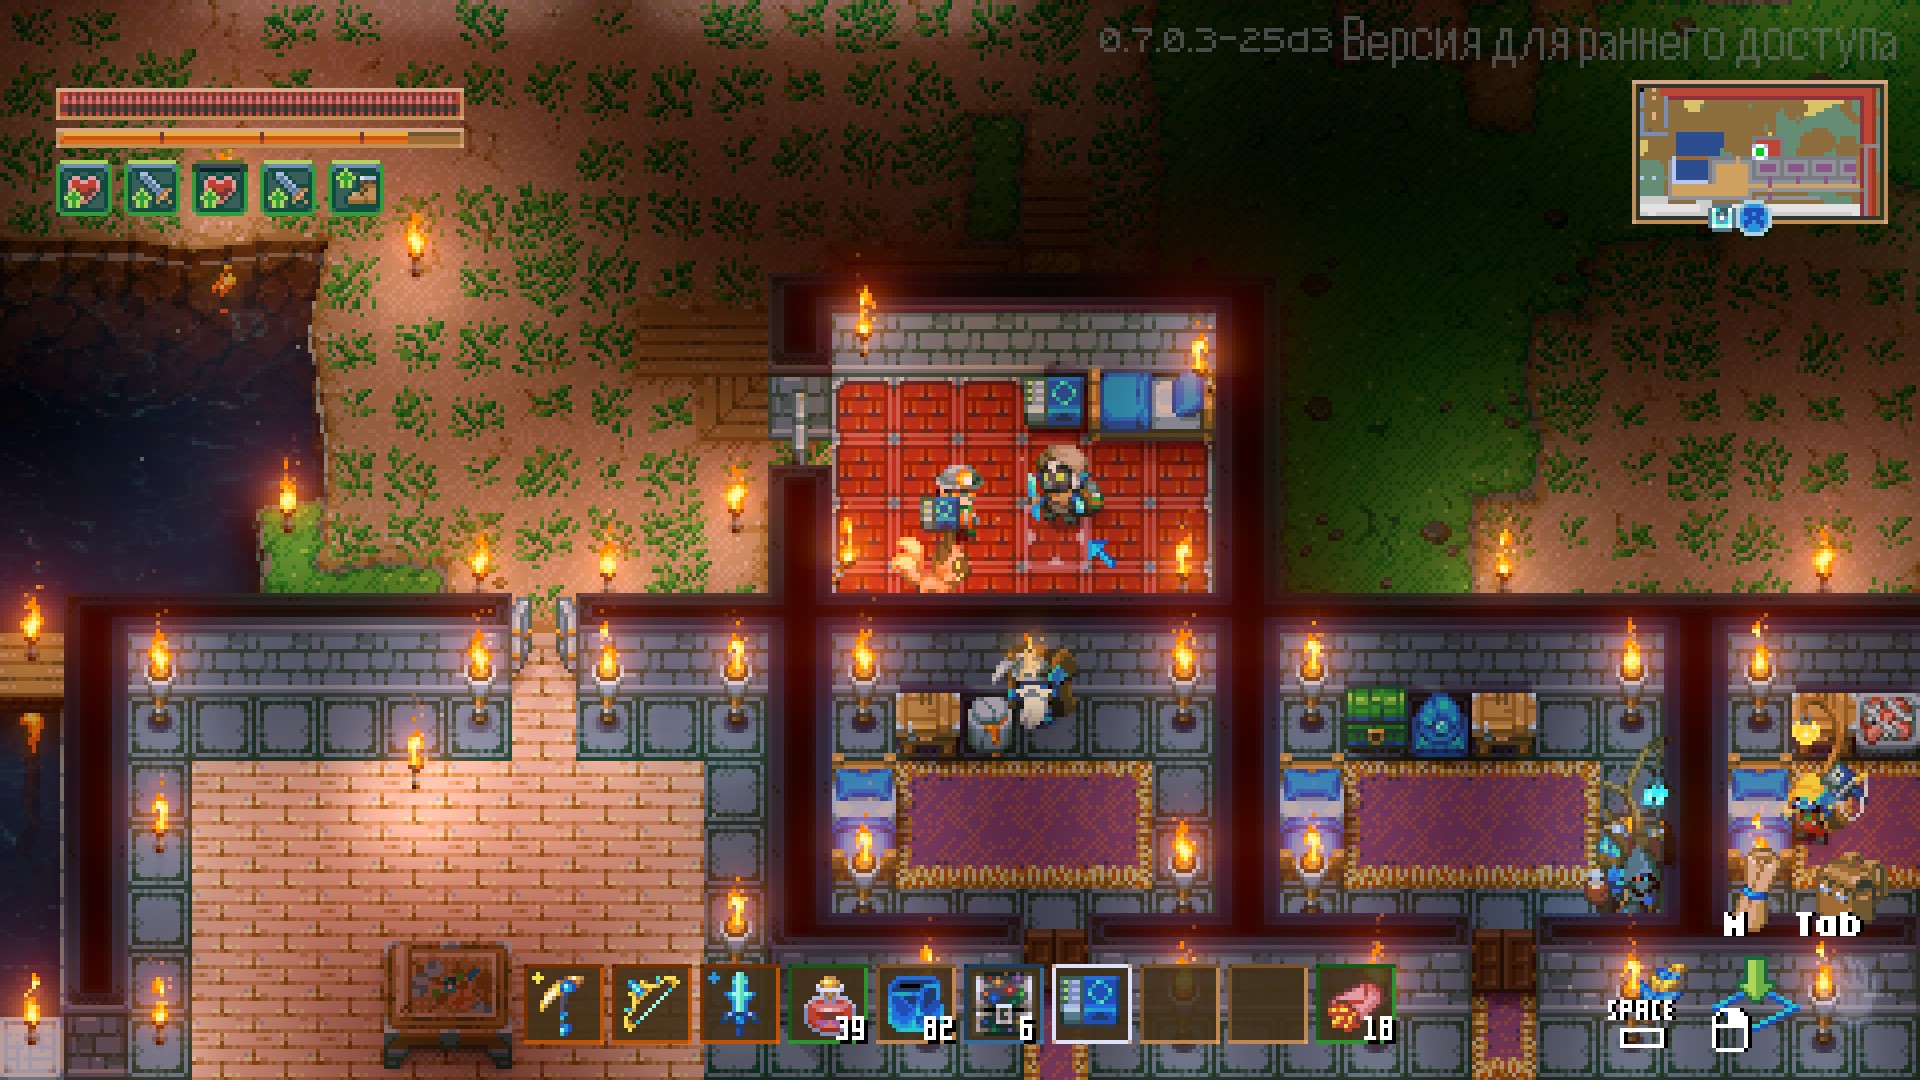
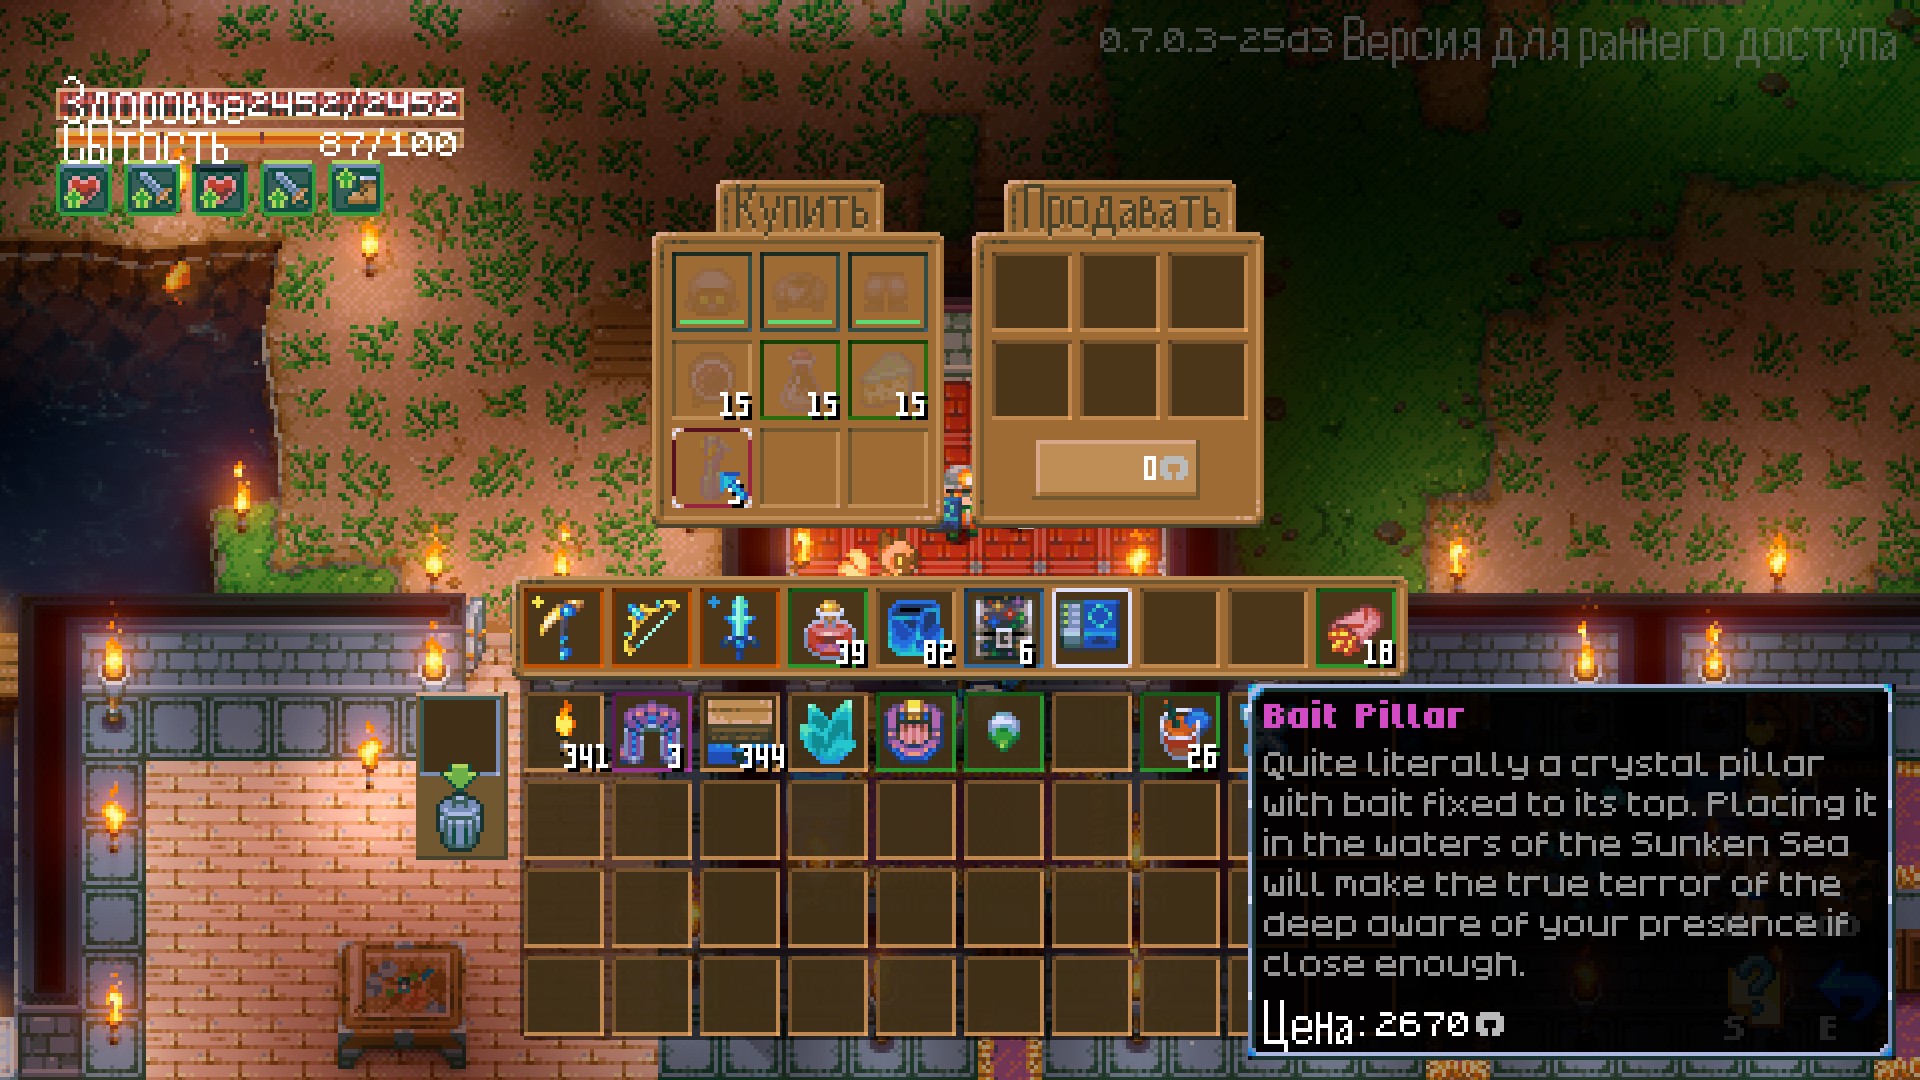
Buy the bait from the NPC and sail to the new worm.
Boss Encounter
The boss doesn’t seem hard, as long as you don’t let too many of its forms spawn, and don’t get caught in its jaws, or it’s a one-shot kill (trust me, it’s not fun). This creature also destroys islands and blocks when summoned.
Boss Attacks and Strategy
At the start, the boss simply swims toward you, trying to hit you. But if you have a fast boat, you’ll be fine.
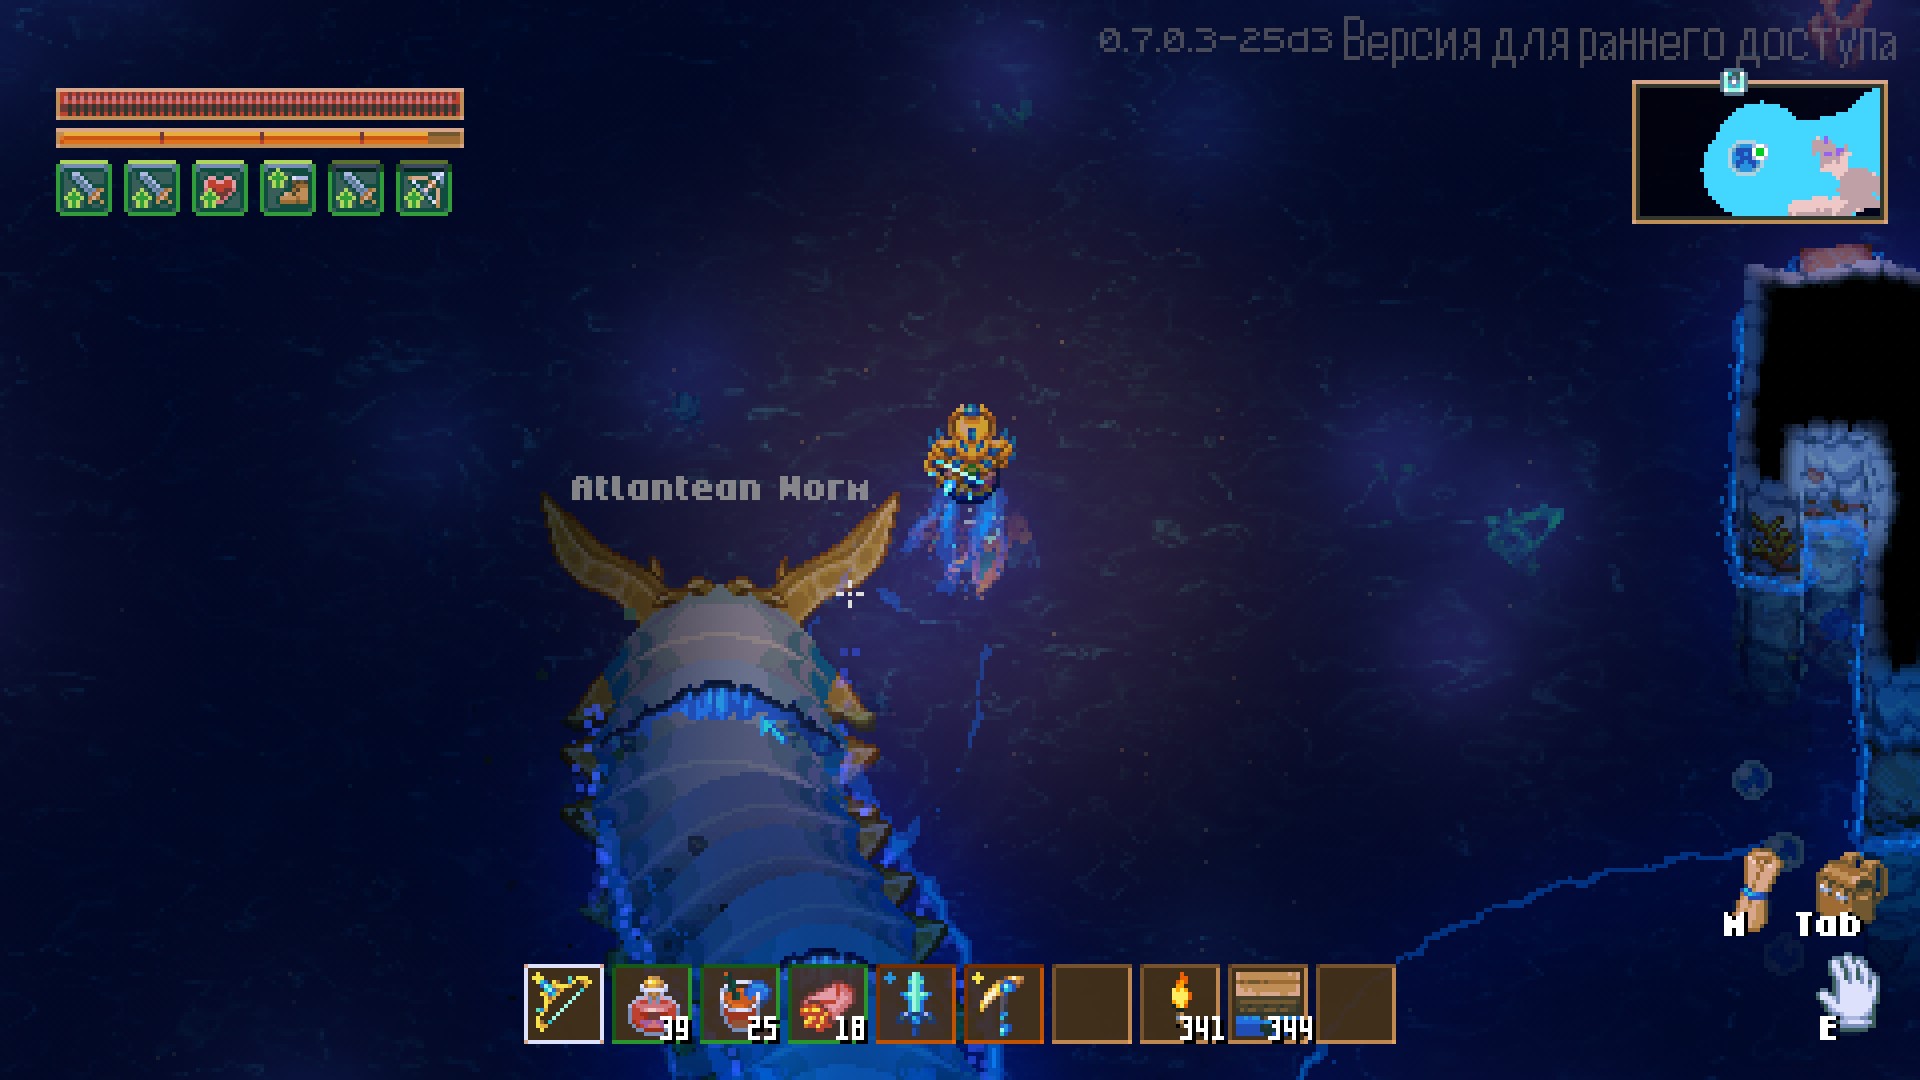
Its weak spots are the cracks on its body. Shoot them and enjoy the fight. The trick is to shoot from the tail first, as it will split into smaller worms that shoot energy in all directions. If you’re standing too close to its jaws when it fires, you’re done.
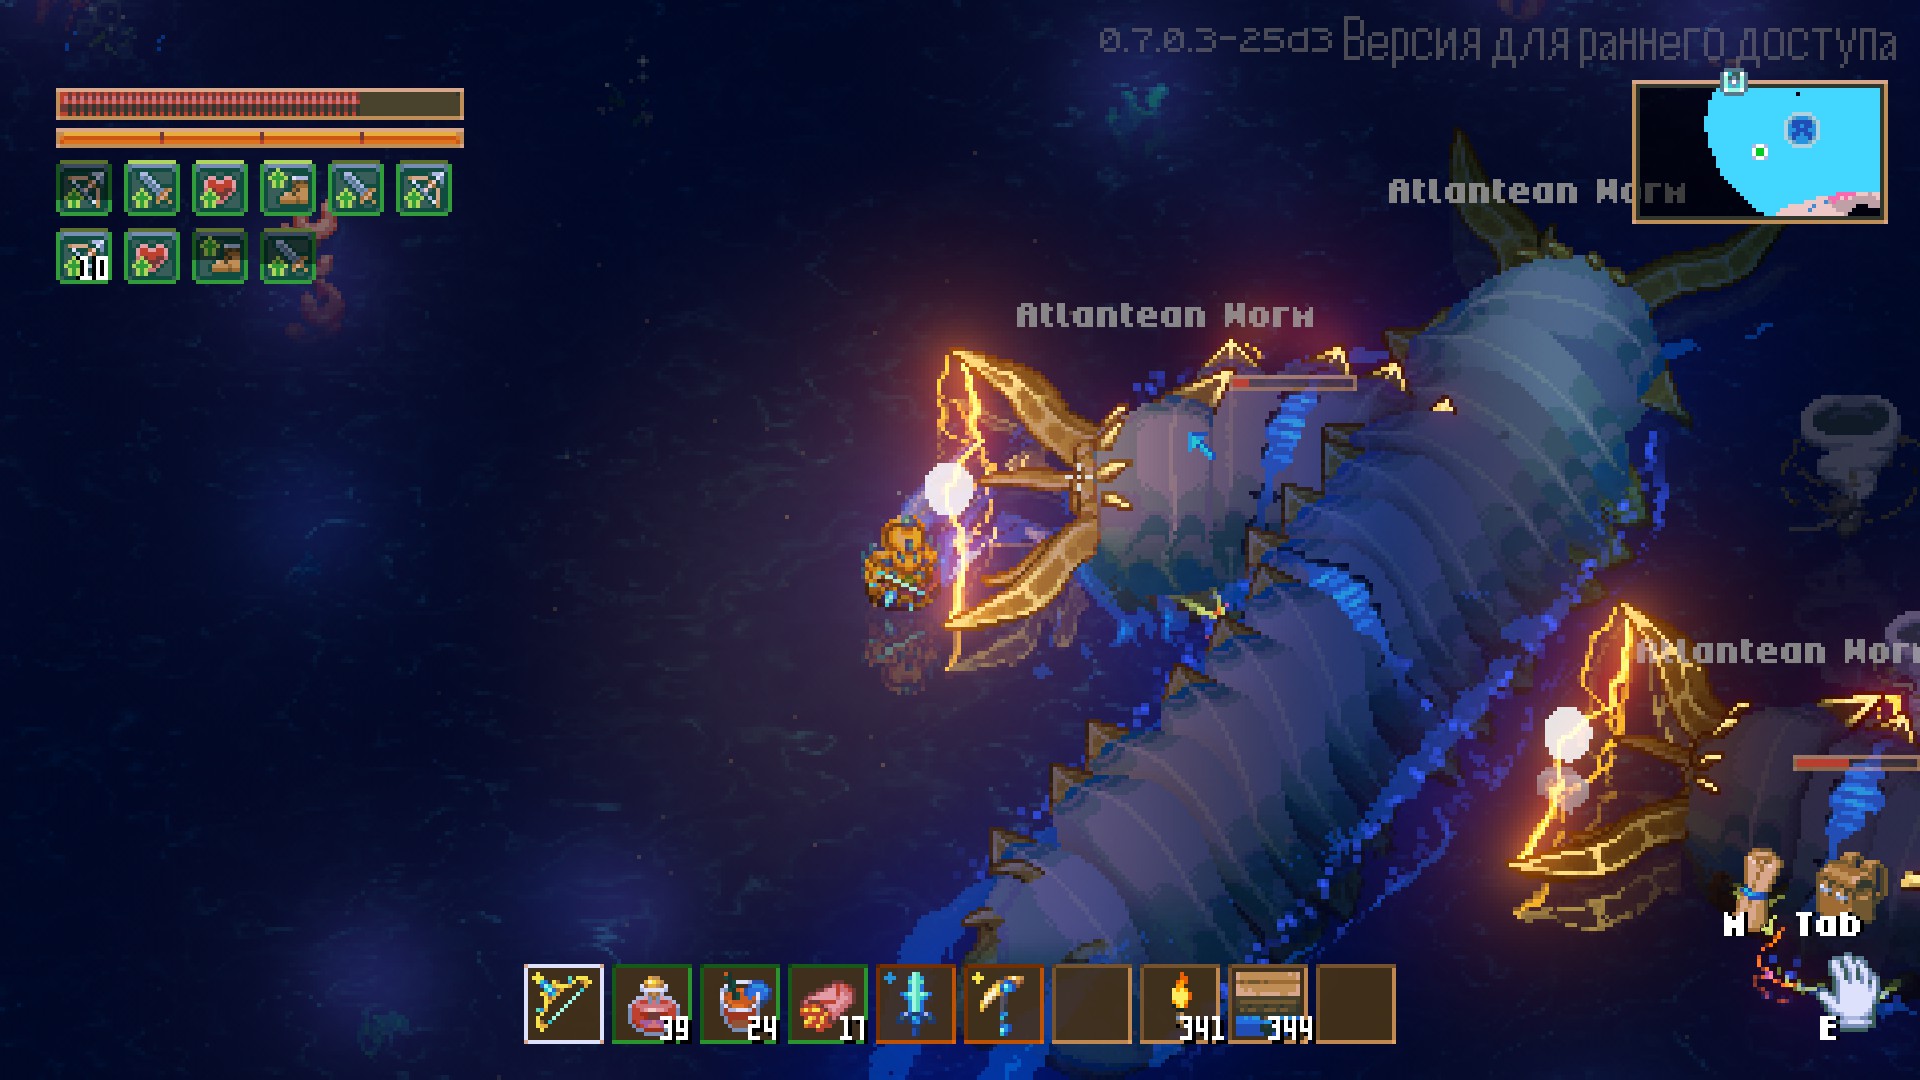
Here’s a pro tip: start by breaking the area near the head so that mini versions don’t spawn immediately (this works two times). After that, kill it. If there are too many of its mini-versions, it can be a hassle and make the fight more difficult. Overall, it’s an easy boss—just avoid getting swallowed. That’s it, good luck beating the new boss!
Stage 6 Bosses - The 3 Hydras
Introduction
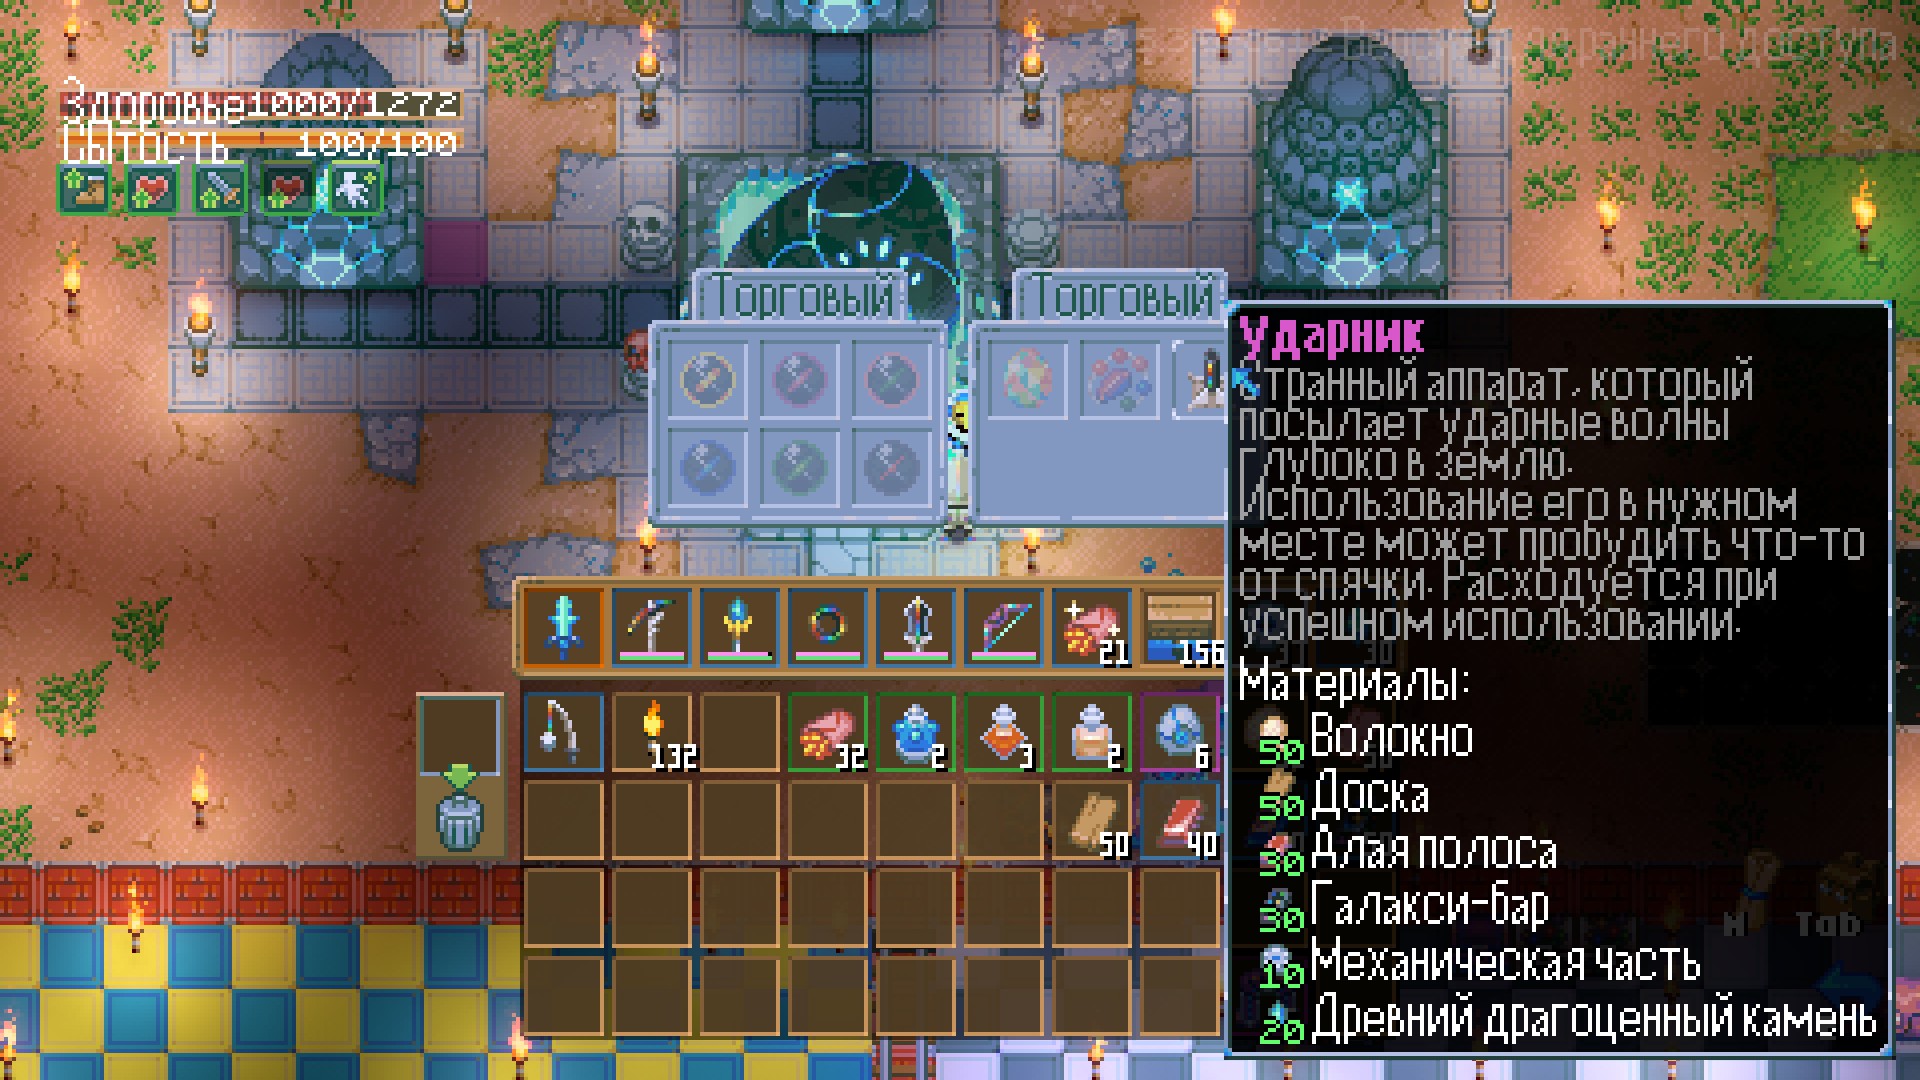
After defeating the main bosses, you’ll gain the ability to fight the three Hydras. To find them, as always, craft a scanner. The resources and description are in the screenshot.

After crafting and using the scanner, the Hydra’s location will appear on the map, moving within its biome.
- Druidra - Forest biome
- Crydra - Sea biome
- Flamdra - Desert biome
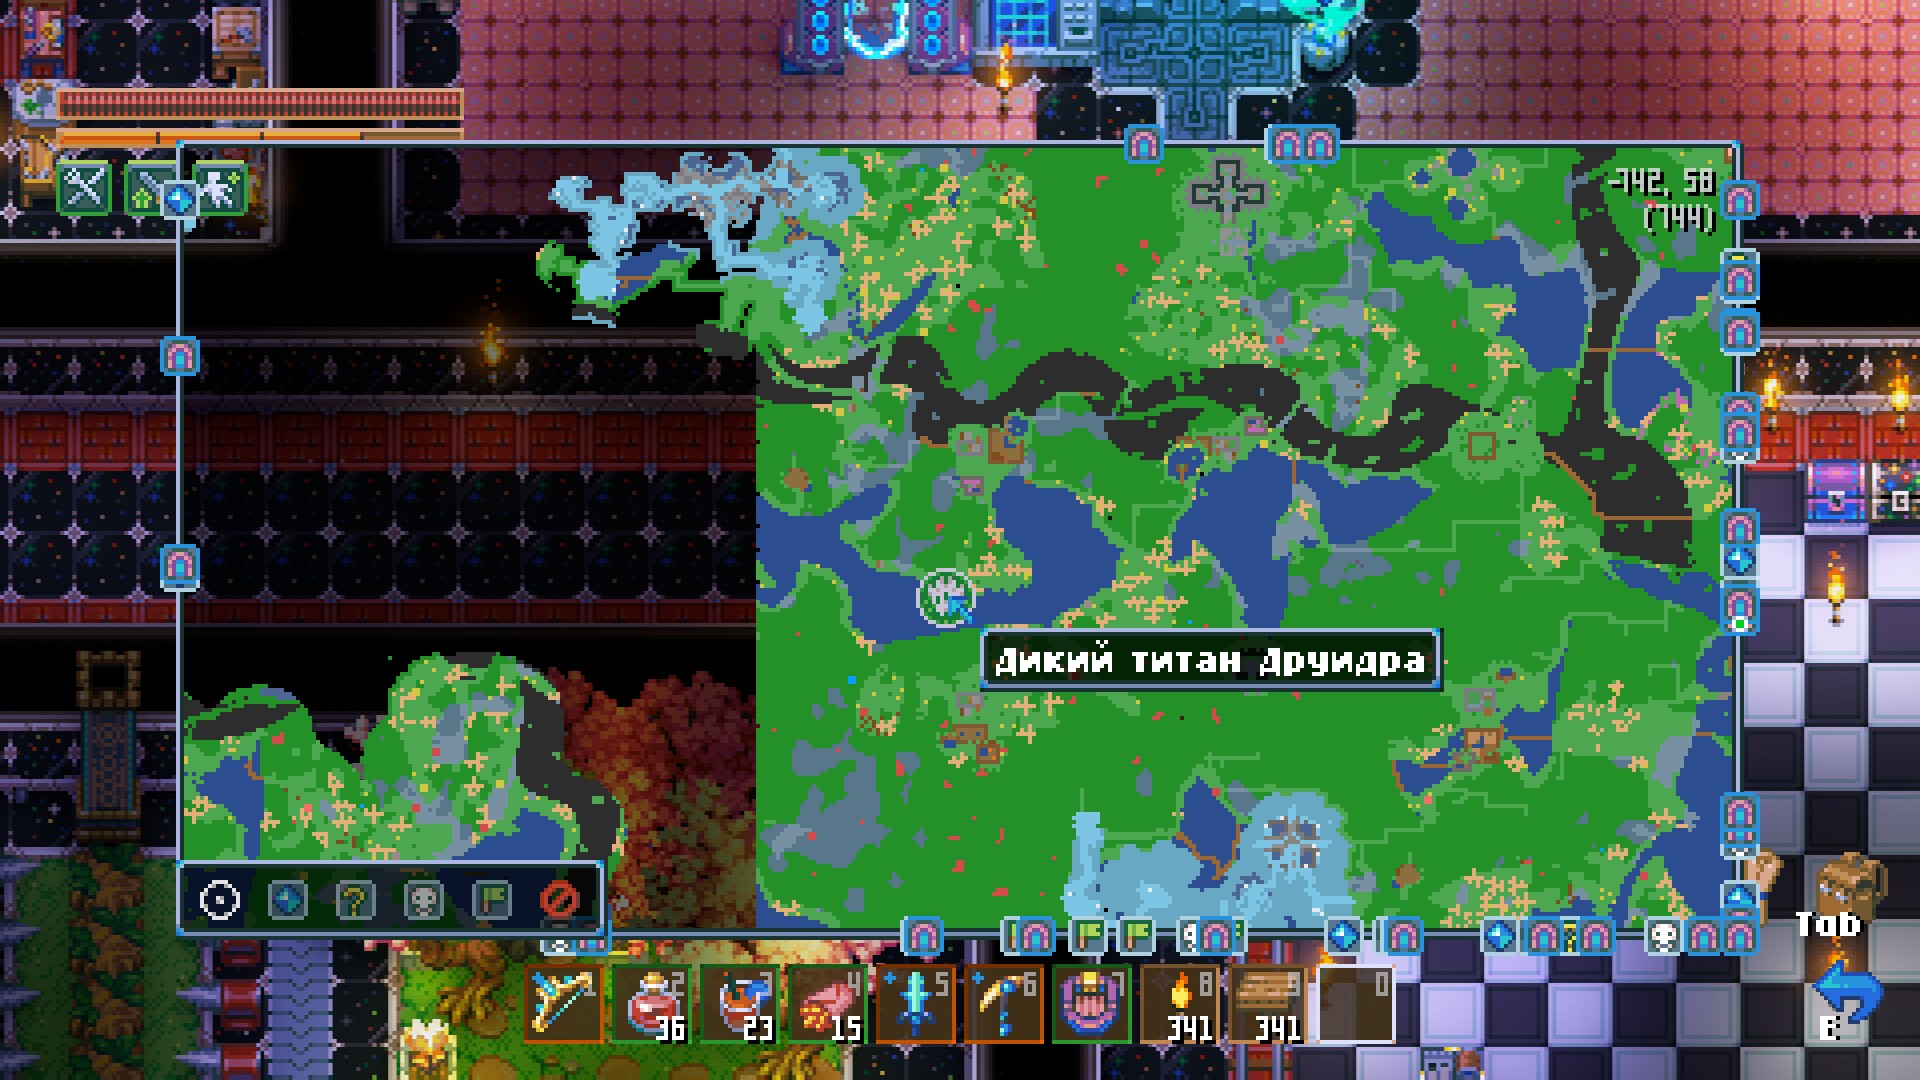
Great! We’ve completed half the process. Next, we need to craft a new table to summon the bosses. To craft the table, you need the bug’s brain, which drops from the desert beetle boss. If, like me, you’re still playing in an old world, you’ll need to defeat it again. It drops 100% after its defeat. Each summoning item is crafted in sequence—kill the first Hydra, get three Hydra eyes, and craft the next item.
Congratulations! You’re now informed of what you need ahead of time. Let’s move on to the bosses themselves!
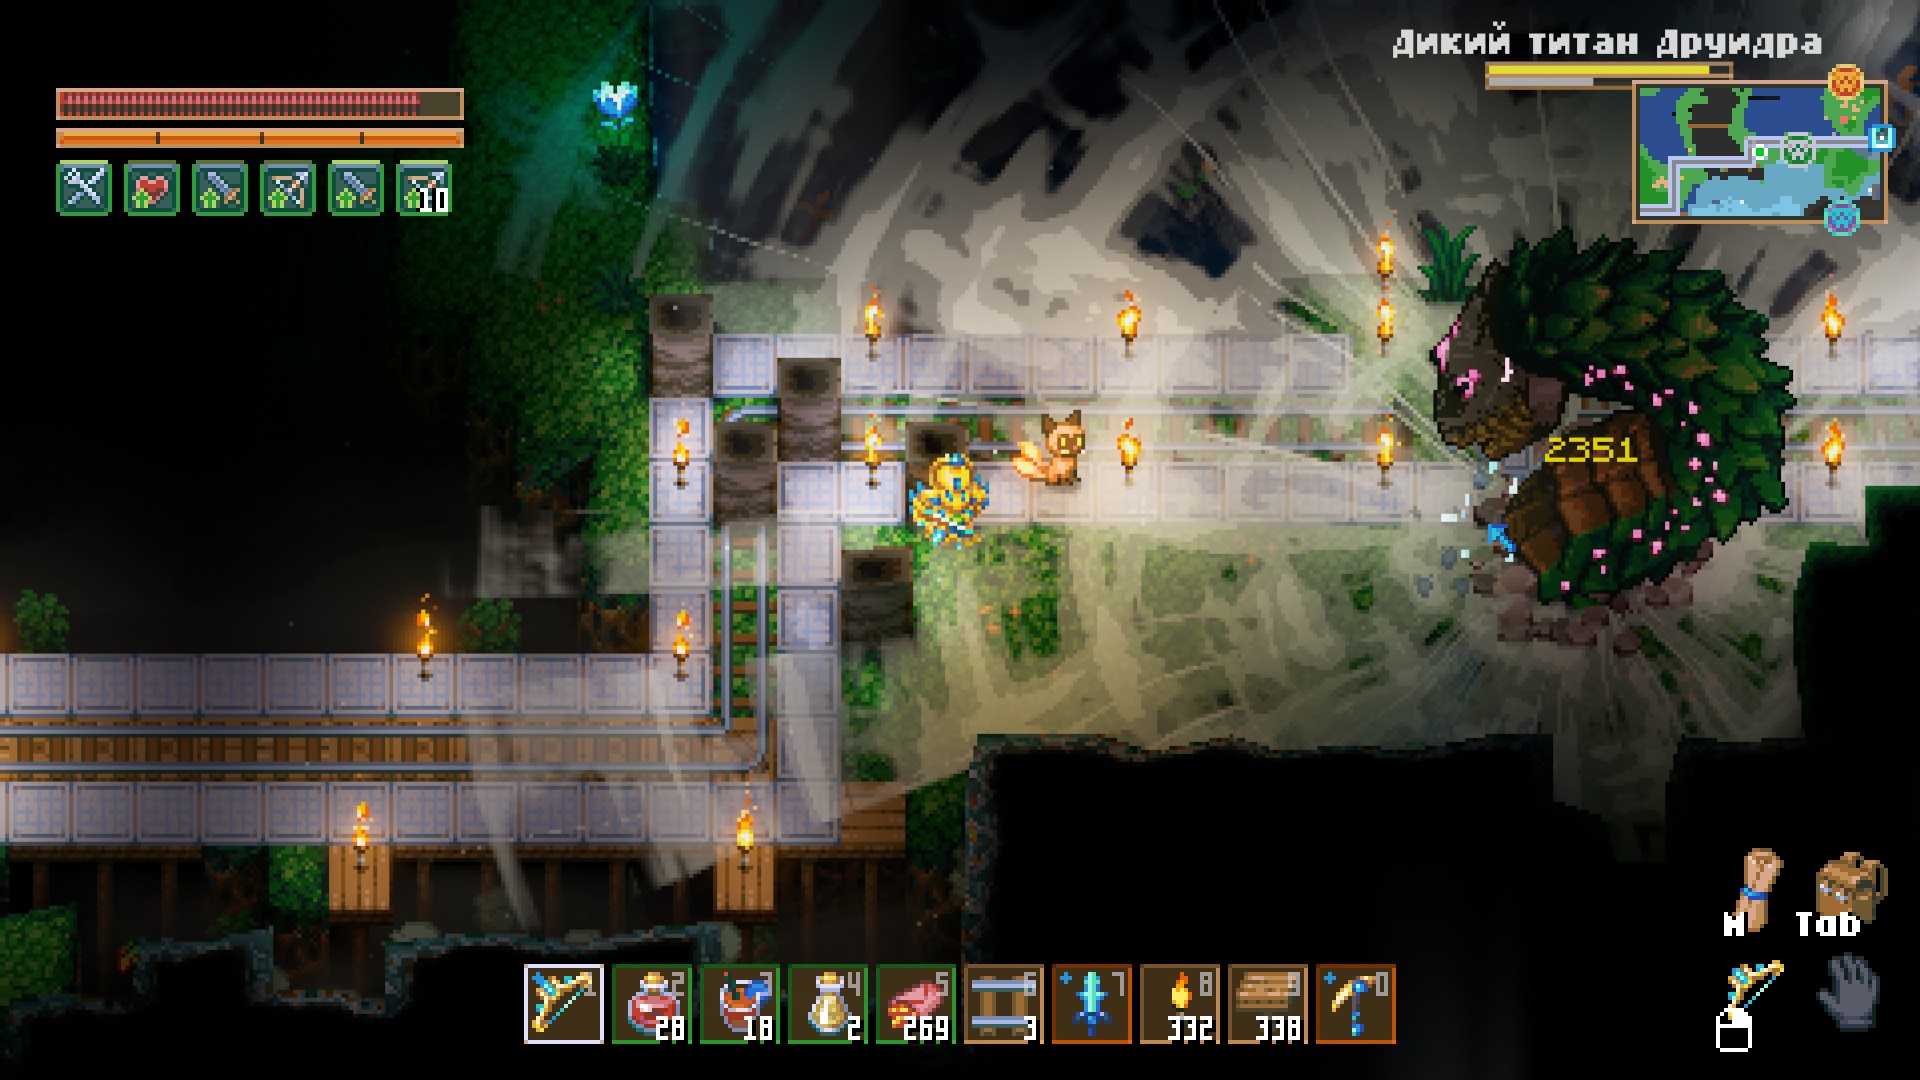
1. Hydra Druidra
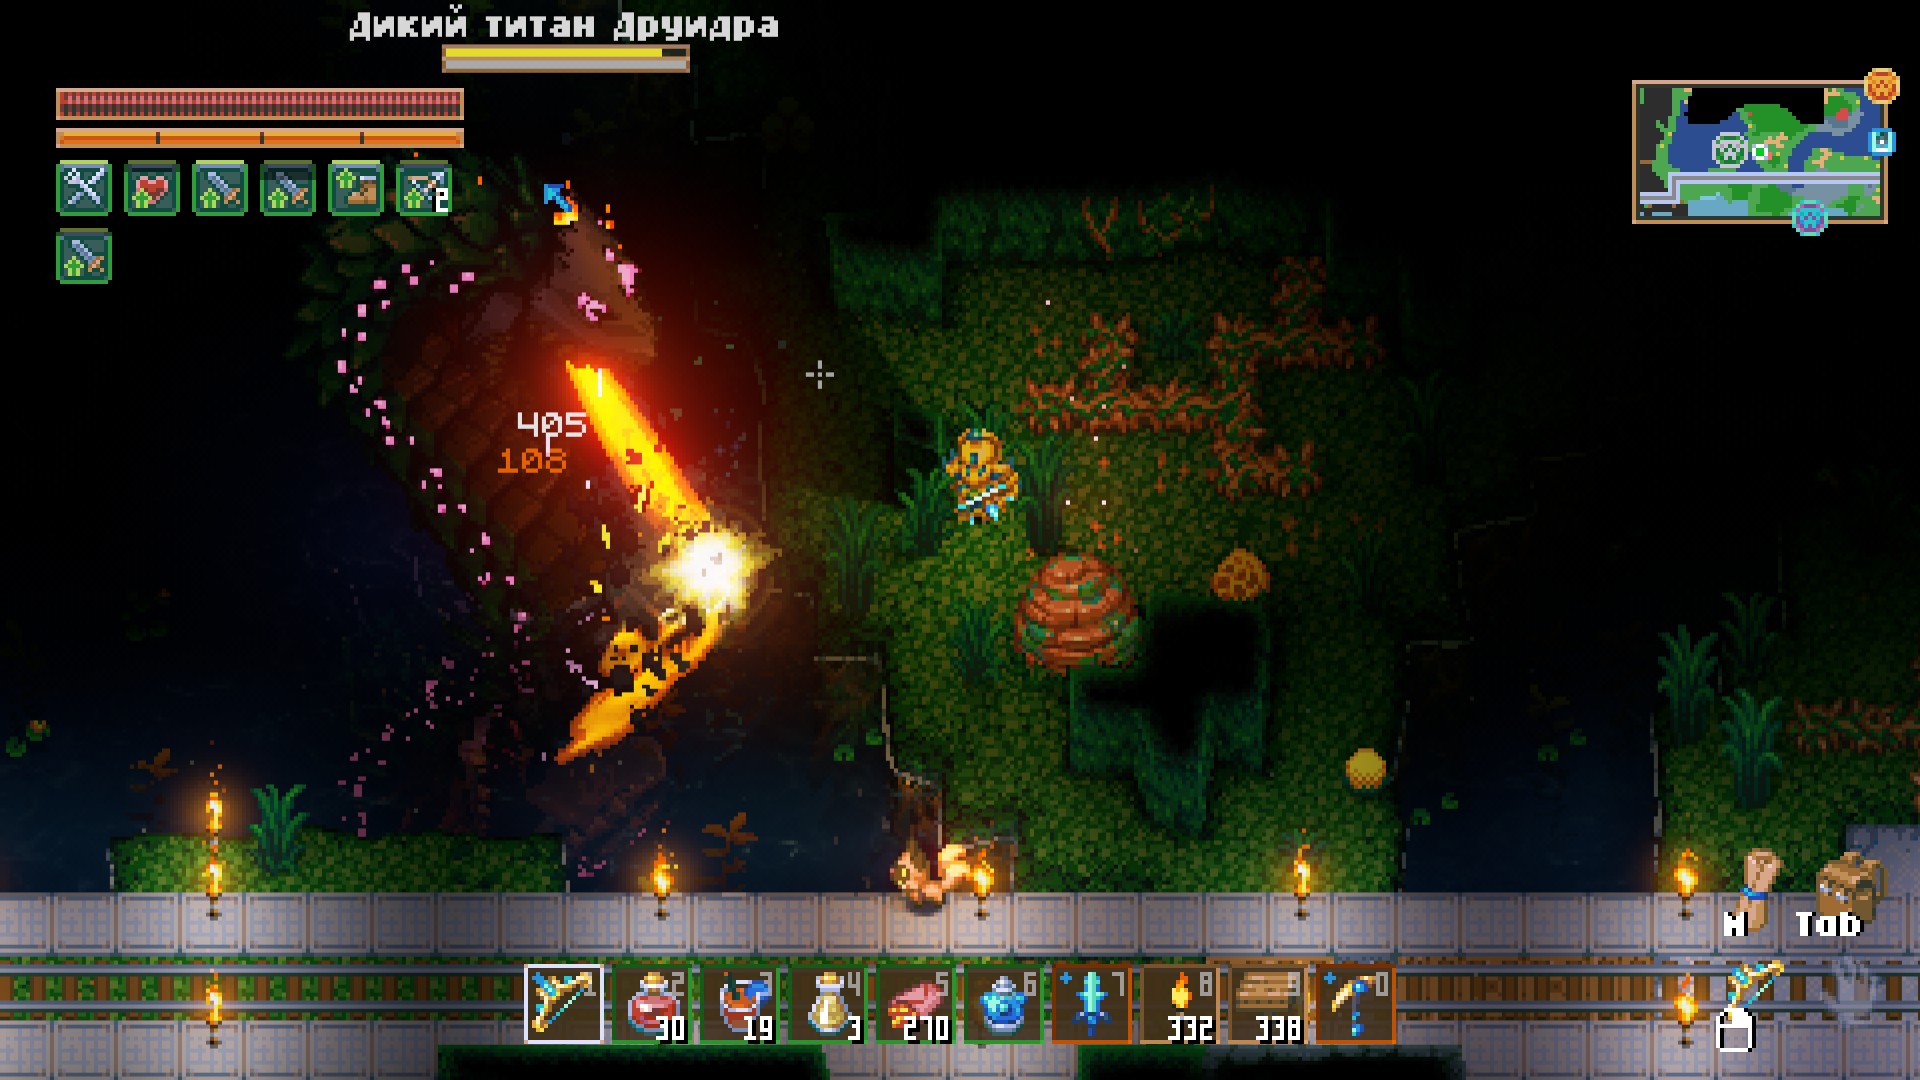
We’ve scanned the boss’s location, crafted the summoning item, and are ready to head to the boss. You don’t need to be near the boss—just place the summoning item when the boss is about 500 blocks away. I recommend fighting the boss in a pre-cleared area to dodge its laser. The boss has four types of attacks:
- A simple bite when you’re close.
- A laser beam that tracks you.
- A roar that pulls you in, followed by falling rocks from the ceiling.
- Vines that erupt from the ground, sometimes spawning a snake.
Additionally, new bosses have two bars. One is like armor—when it’s reduced to zero, the boss is knocked down, and you can deal damage to its health. The boss takes more damage to its health than to its armor.
Here are images of the boss and its attacks:
After knocking out the boss and collecting the loot, craft the summoning item for the second boss.
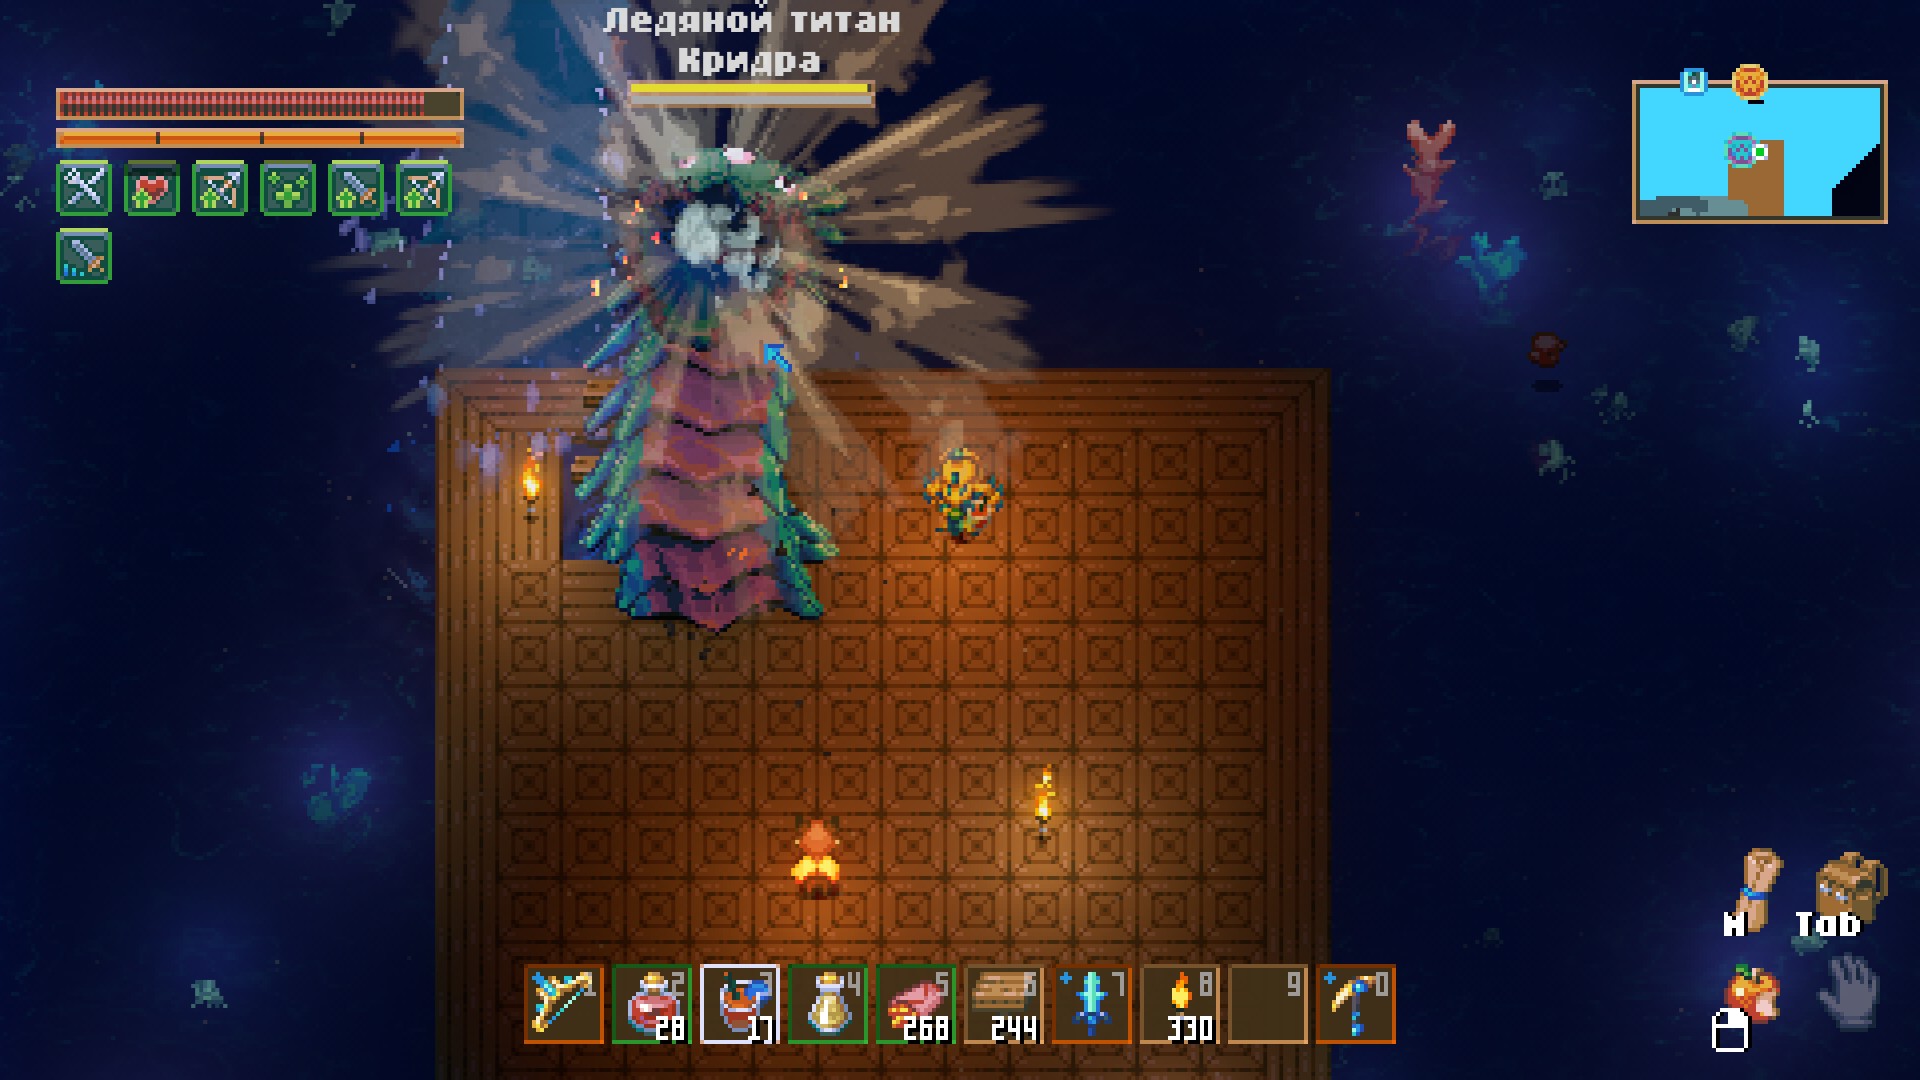
2. Hydra Crydra
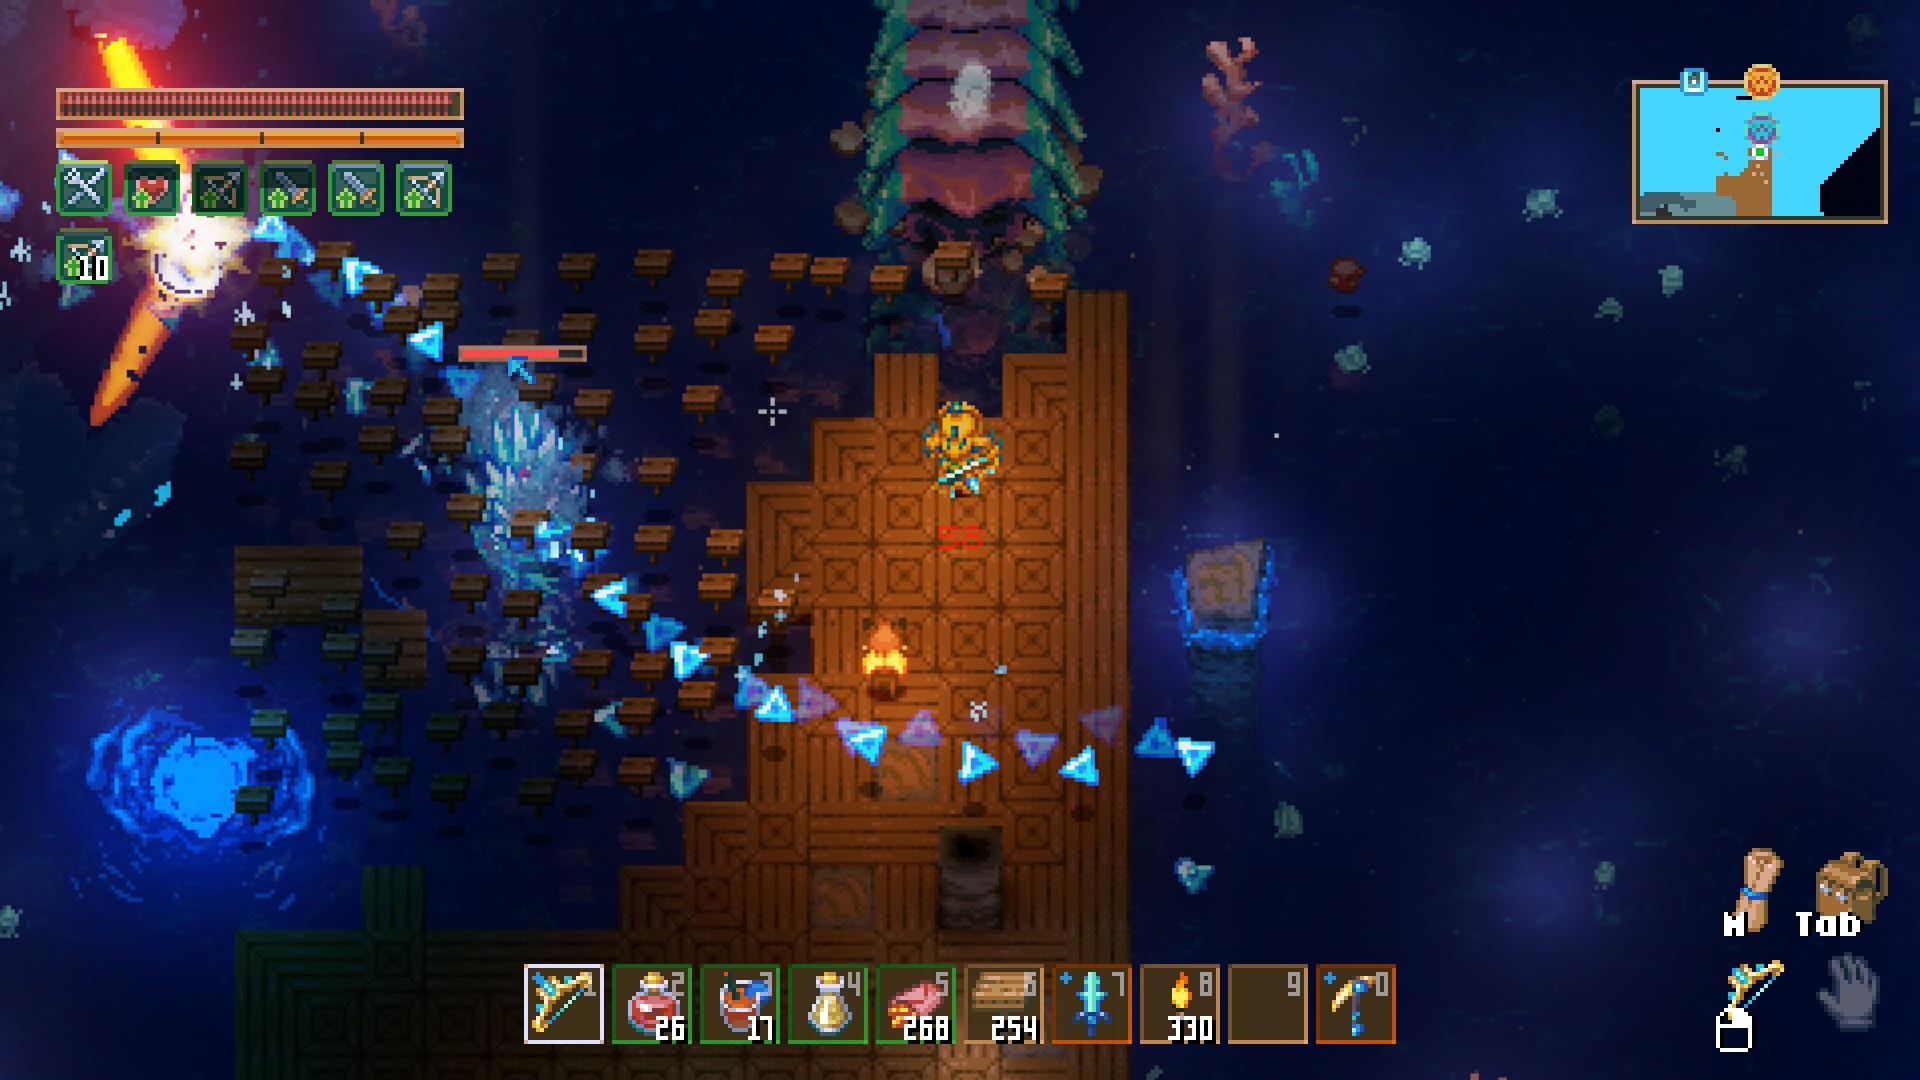
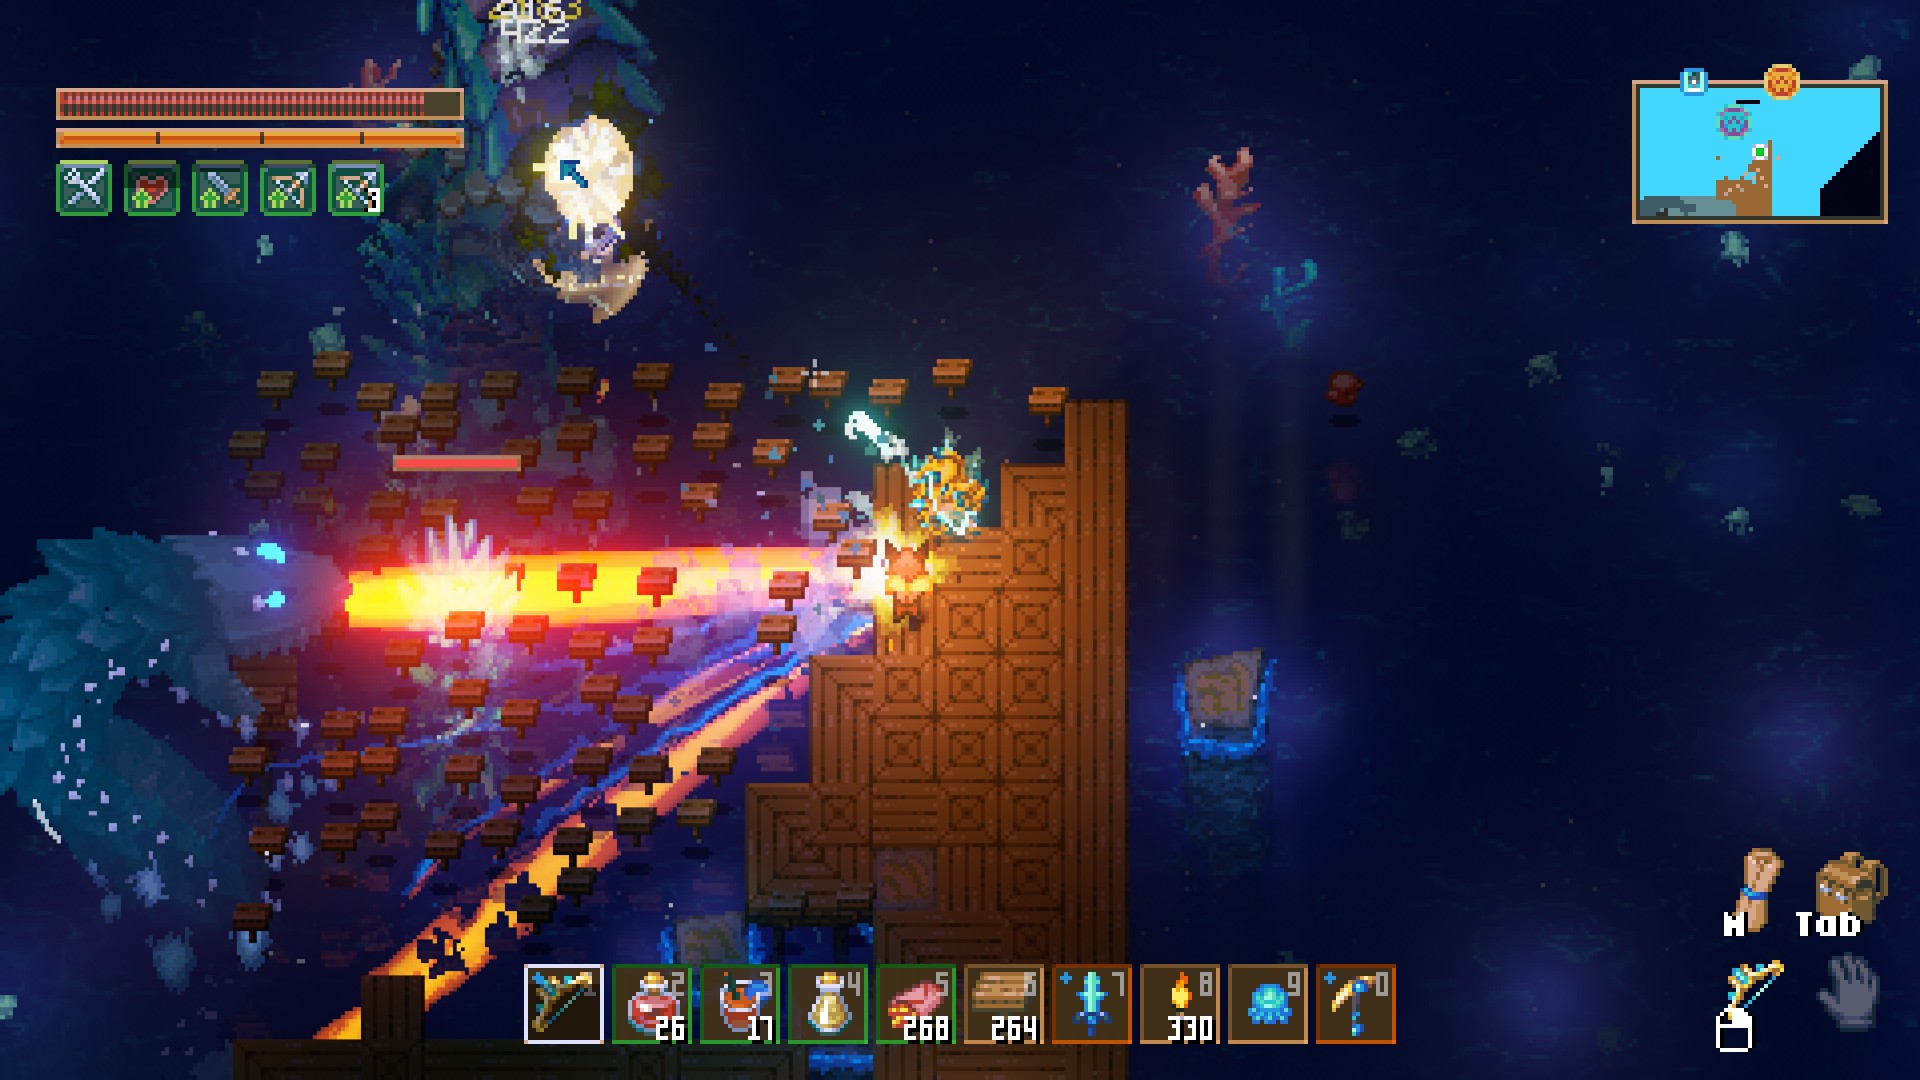
Now, we’re approaching the second Hydra. The attacks are mostly the same, except it replaces the vines with a mob that shoots icy spikes in a circle. There’s also a special feature of the second and third Hydras: after defeating each one, the previous Hydra will appear as a shadow and attack with its abilities. In Crydra’s case, Druidra helps out, and in Flamdra’s case, both previous Hydras will join in.
Here’s the updated attack list for Crydra:
- A simple bite when you’re close.
- A laser beam that tracks you.
- A roar that pulls you in, followed by falling rocks from the ceiling.
- A mob that shoots icy spikes in a circle.
- Druidra with its own attacks.
I recommend fighting the boss on a pre-cleared island. It can destroy platforms and blocks—learned this the hard way. Alternatively, you can fight from a boat, whichever suits you best.
Here are images of the boss and its attacks:
3. Hydra Flamdra
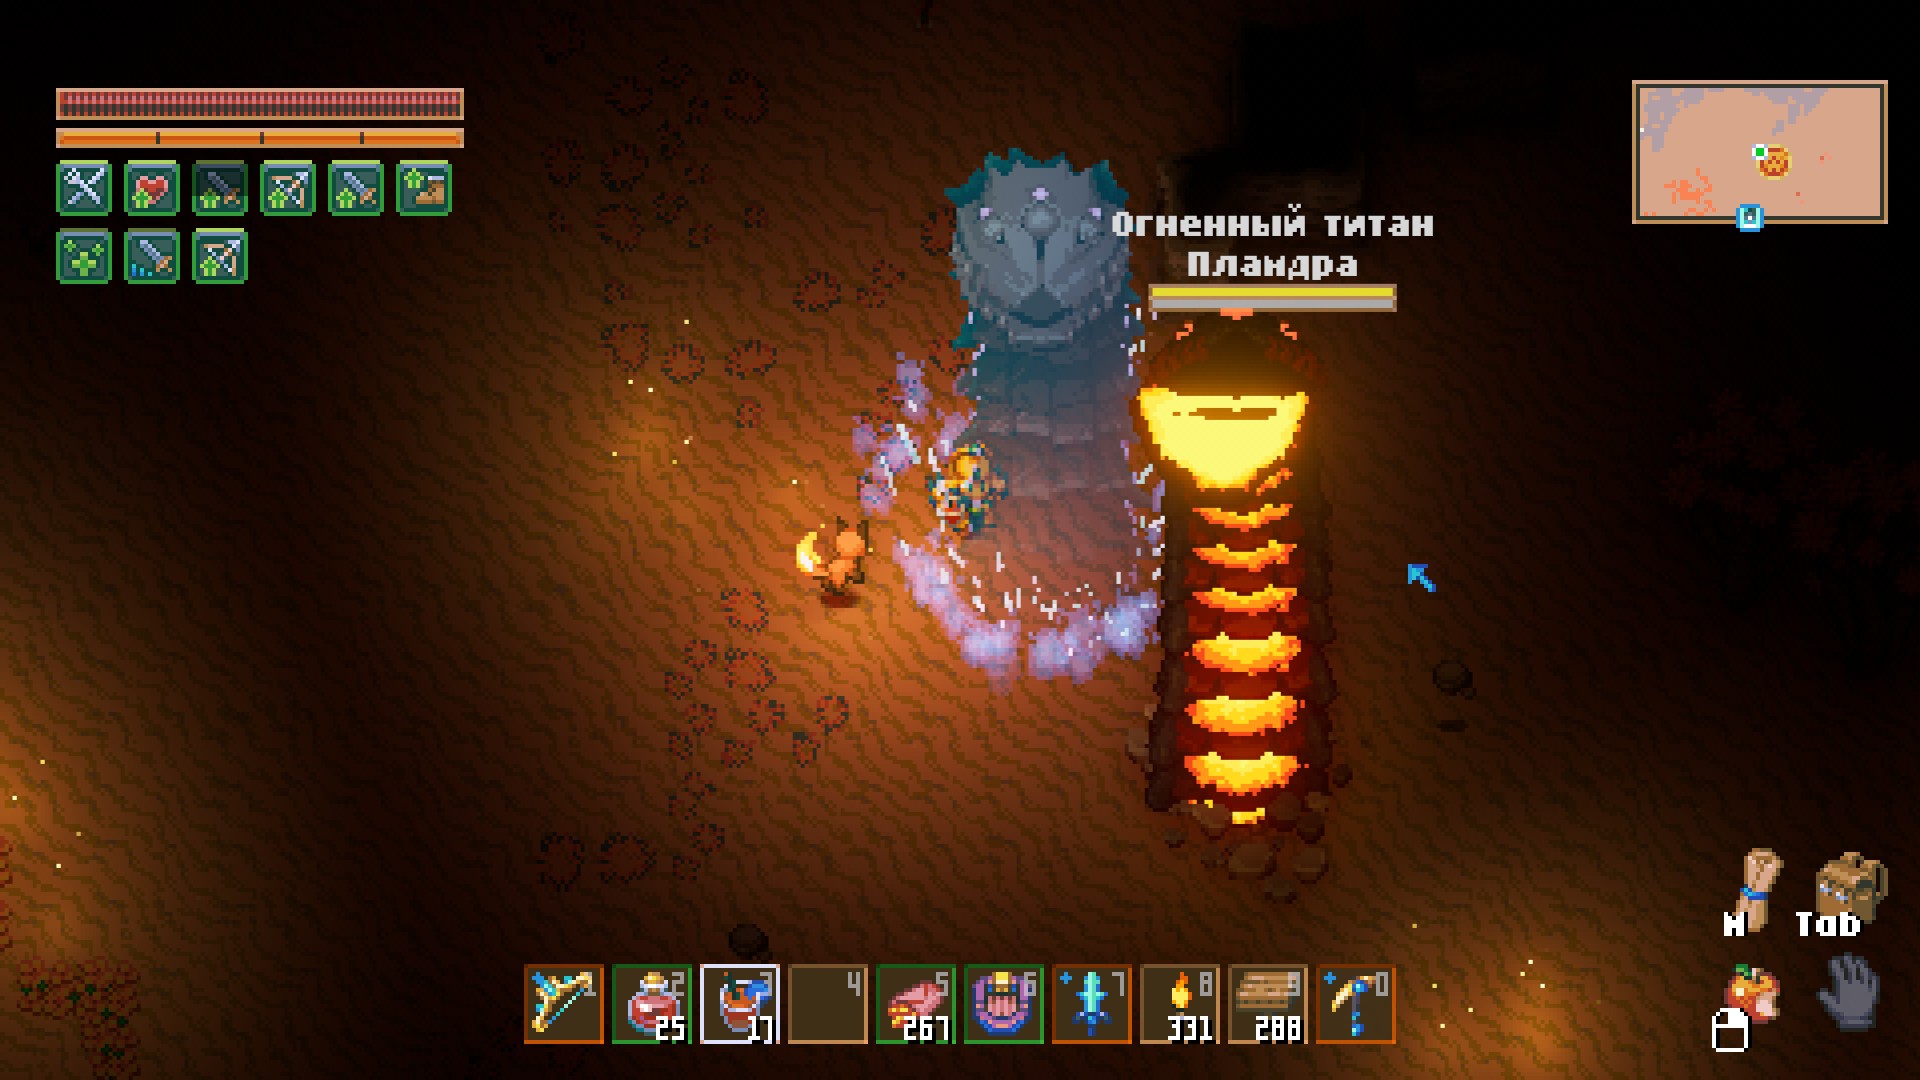
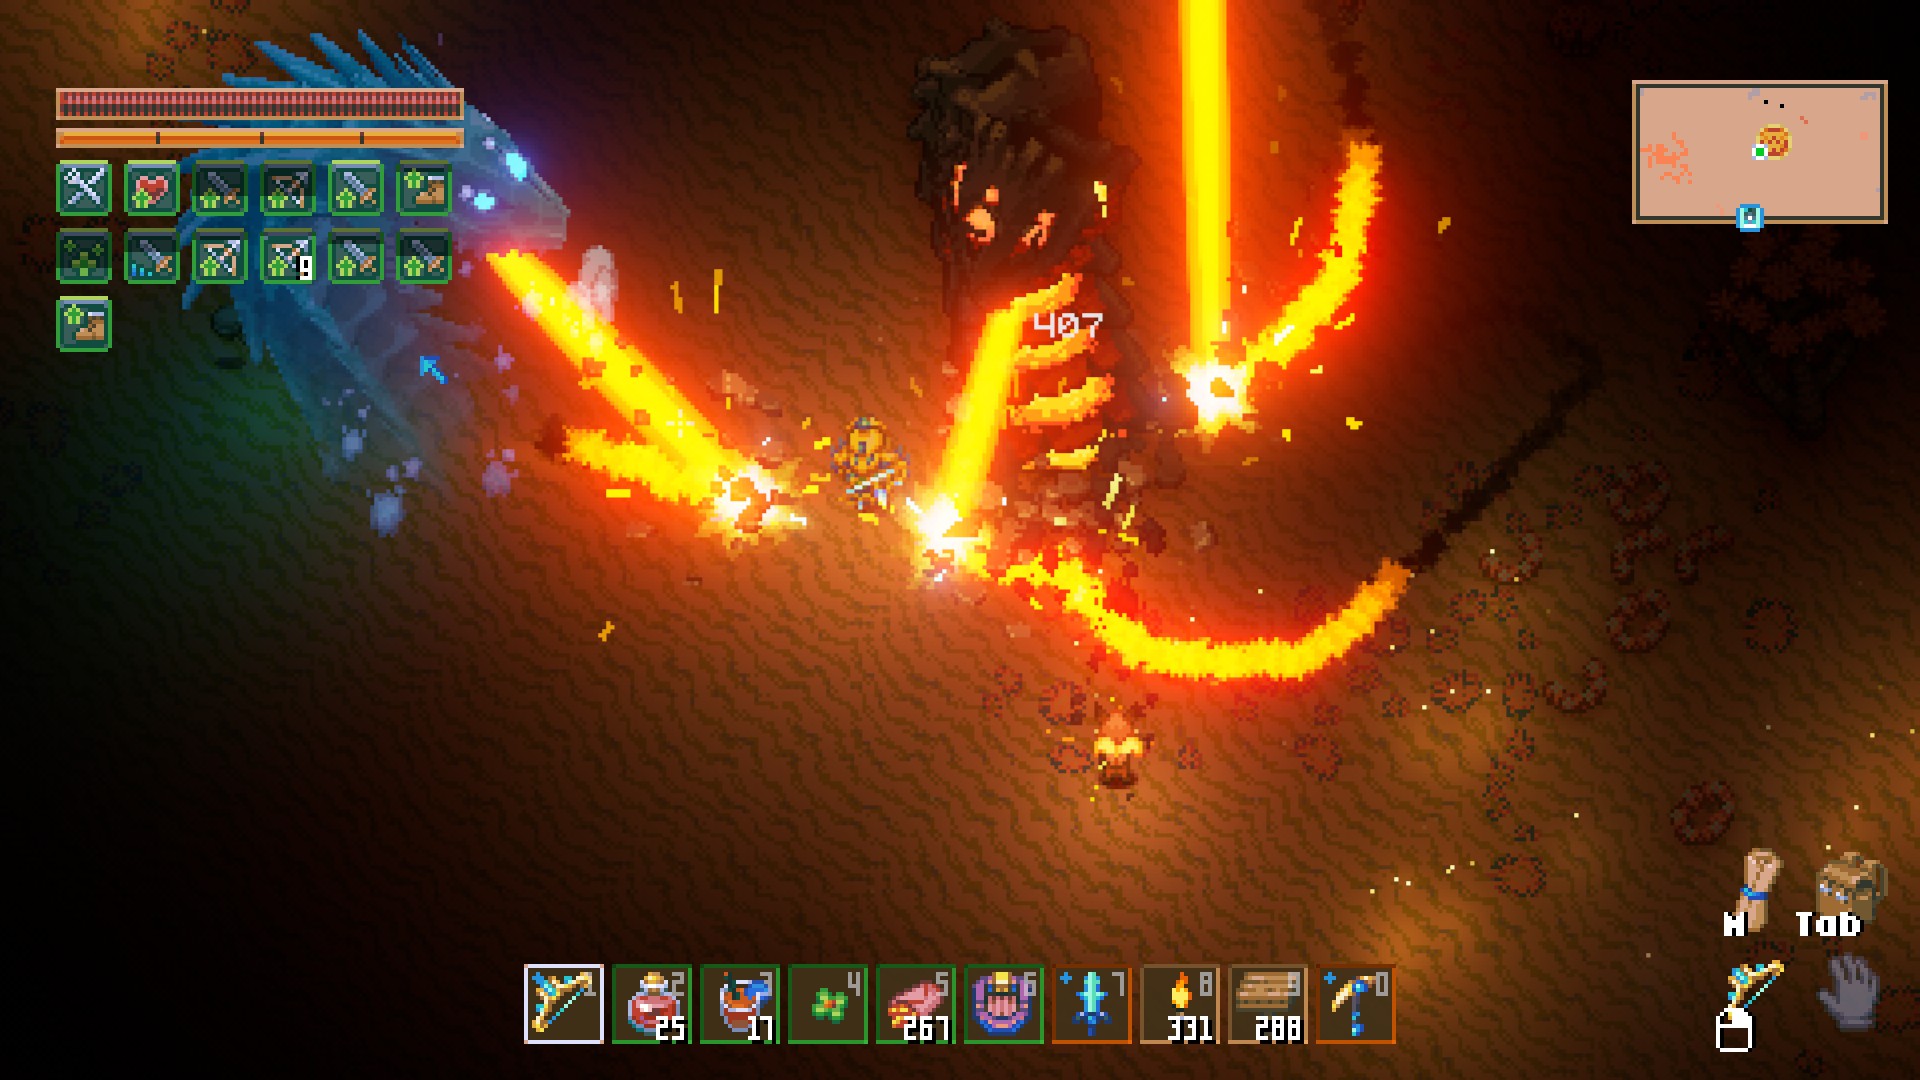
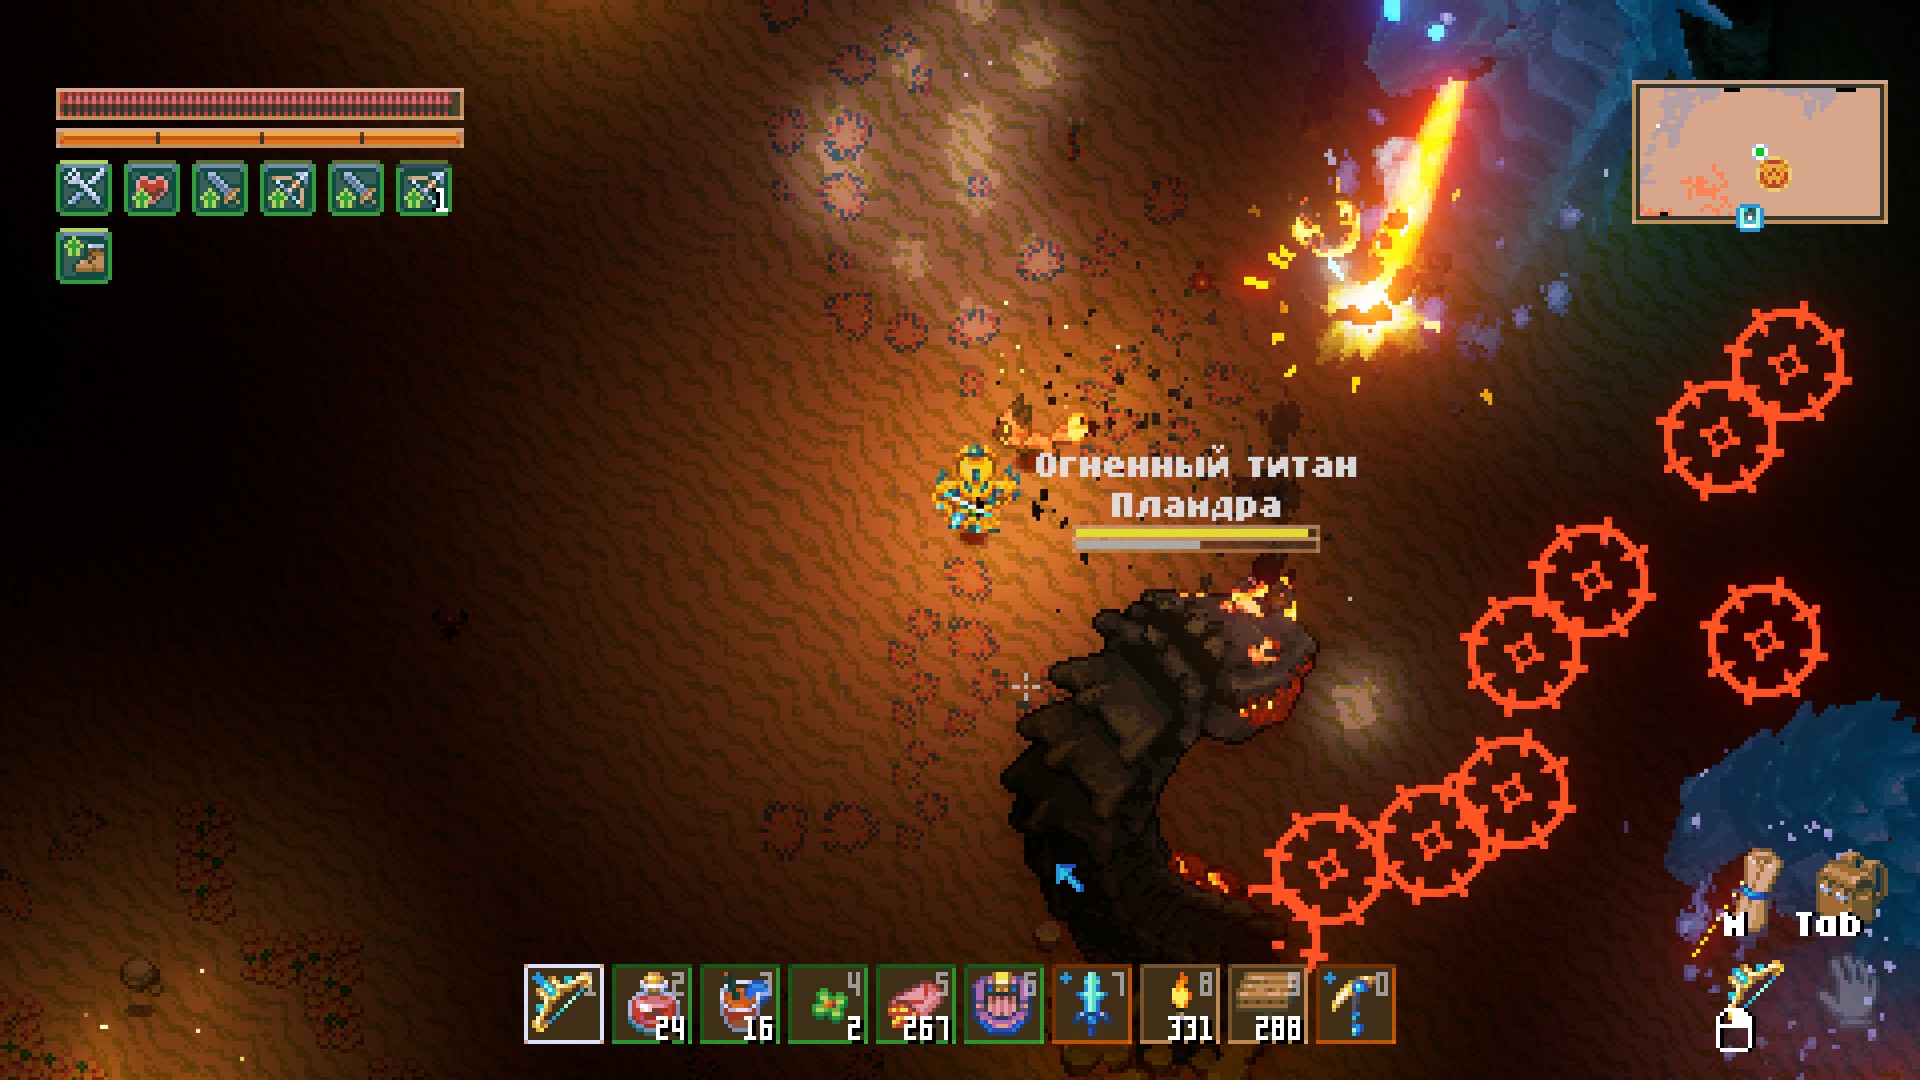
And here’s the final Hydra. This one was a bit easier to fight due to the open desert terrain, making it simpler to dodge attacks. However, the two helper Hydras can still be a nuisance. It also has a new attack: spitting fireballs at the player, which are easy to dodge.
Here’s Flamdra’s attack list:
- A simple bite when you’re close.
- A laser beam that tracks you.
- A roar that pulls you in, followed by falling rocks from the ceiling.
- Fireball spit at the player.
- The previous two Hydras with their attacks.
Here are images of the boss and its attacks:
Conclusion
The bosses weren’t too difficult, likely due to my armor and weapons. I think you’ll have no trouble either. In terms of preparation, bring food that boosts damage, a few potions for extra damage against bosses, and some for bow damage. I’d also like to add that a pet is really helpful in dealing extra damage to the bosses, making the fights easier and faster.
After defeating the Hydras, head back to base and talk to the egg, unlocking the location of the final boss.
Final Boss
Introduction
You’ve now become a boss-killing machine, taking down everything in your path and unlocking the final boss’s location—congratulations! I’ll warn you in advance: this boss is harder than the others. Even with top-tier armor, I lost a significant amount of health from some attacks. But don't worry, dodging them is easy.
Core Commander
Let’s get to the exciting part—the final boss. After defeating the three Hydras and talking to the egg, you’ll get a marker on the map indicating the boss’s location.
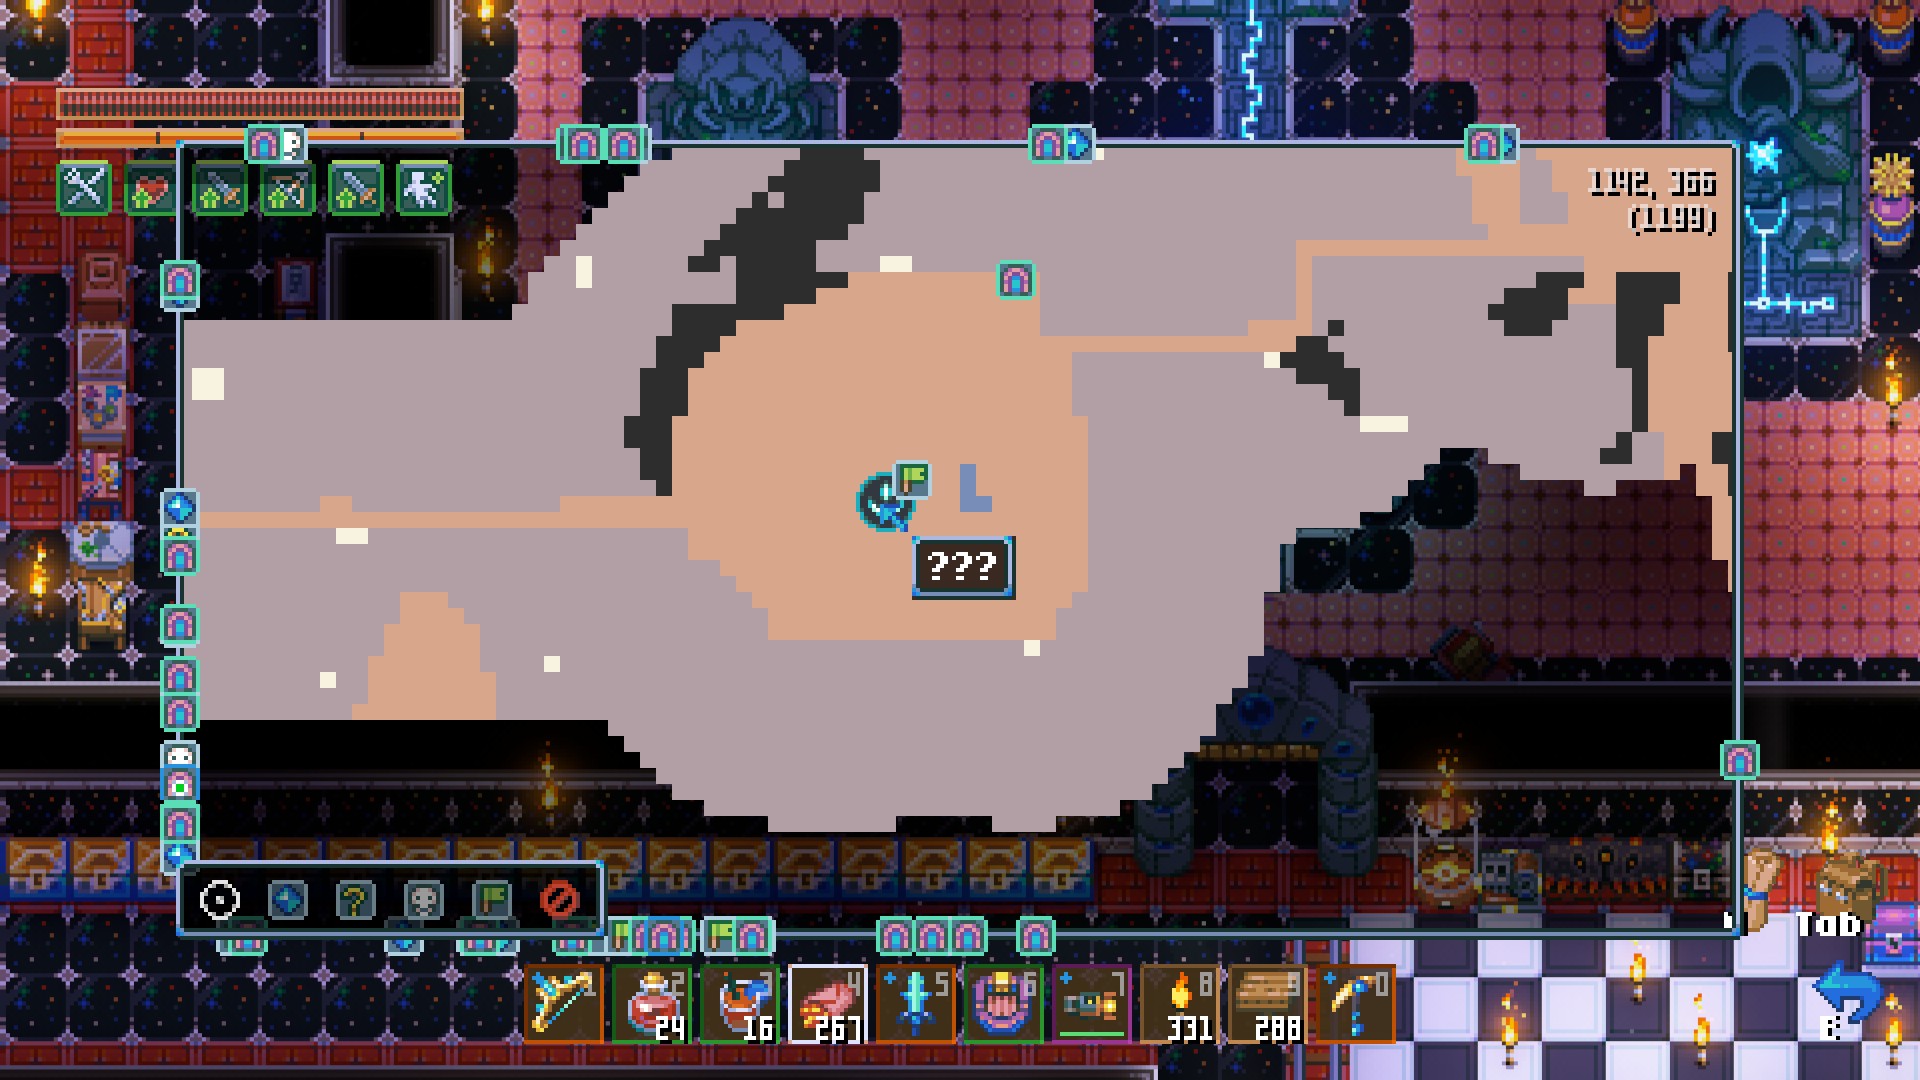
Rush to the indicated location, and you’ll see a huge crystal radiating energy. If you've explored the wastelands, you might have stumbled upon this spot and even tried drilling into it out of curiosity (like I did).
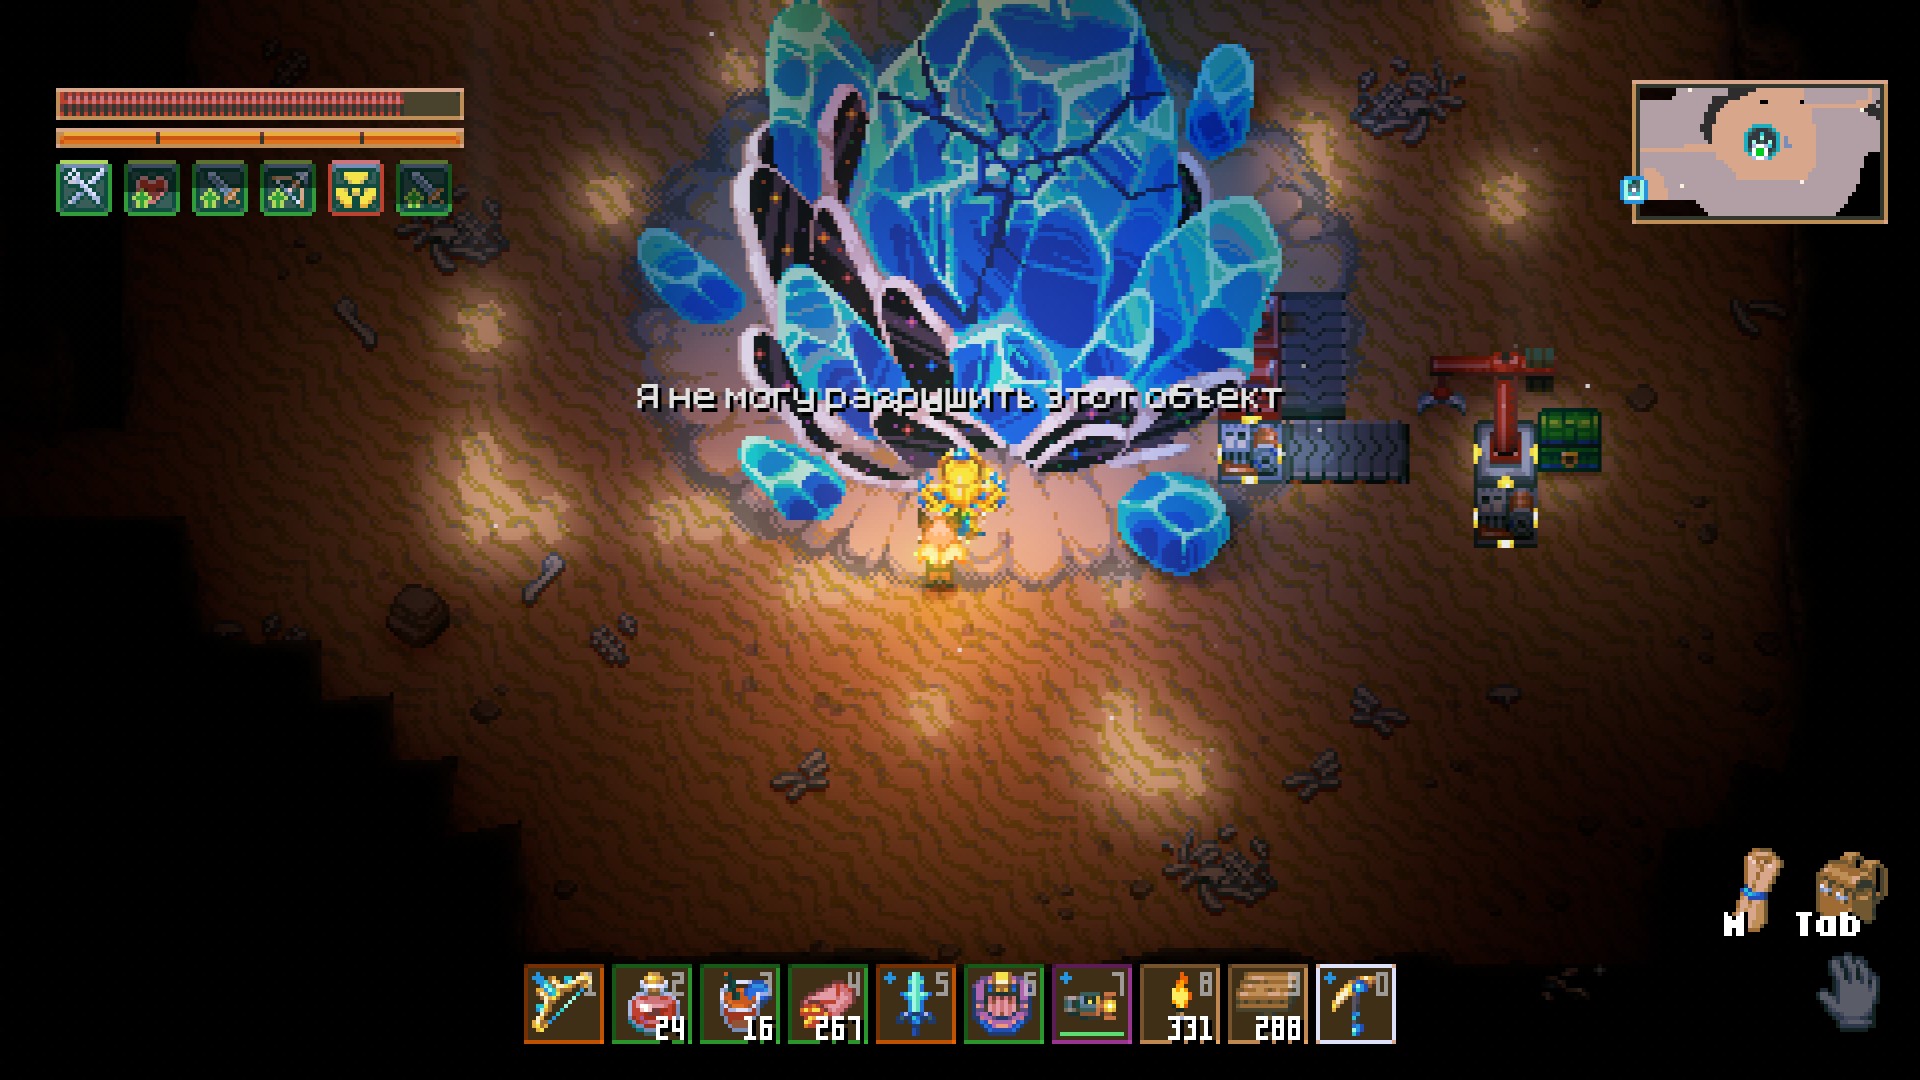
Approach the core and interact with it. It will start cracking, and the boss will begin speaking to you, explaining the story. Now you’ll see its name and health bar.
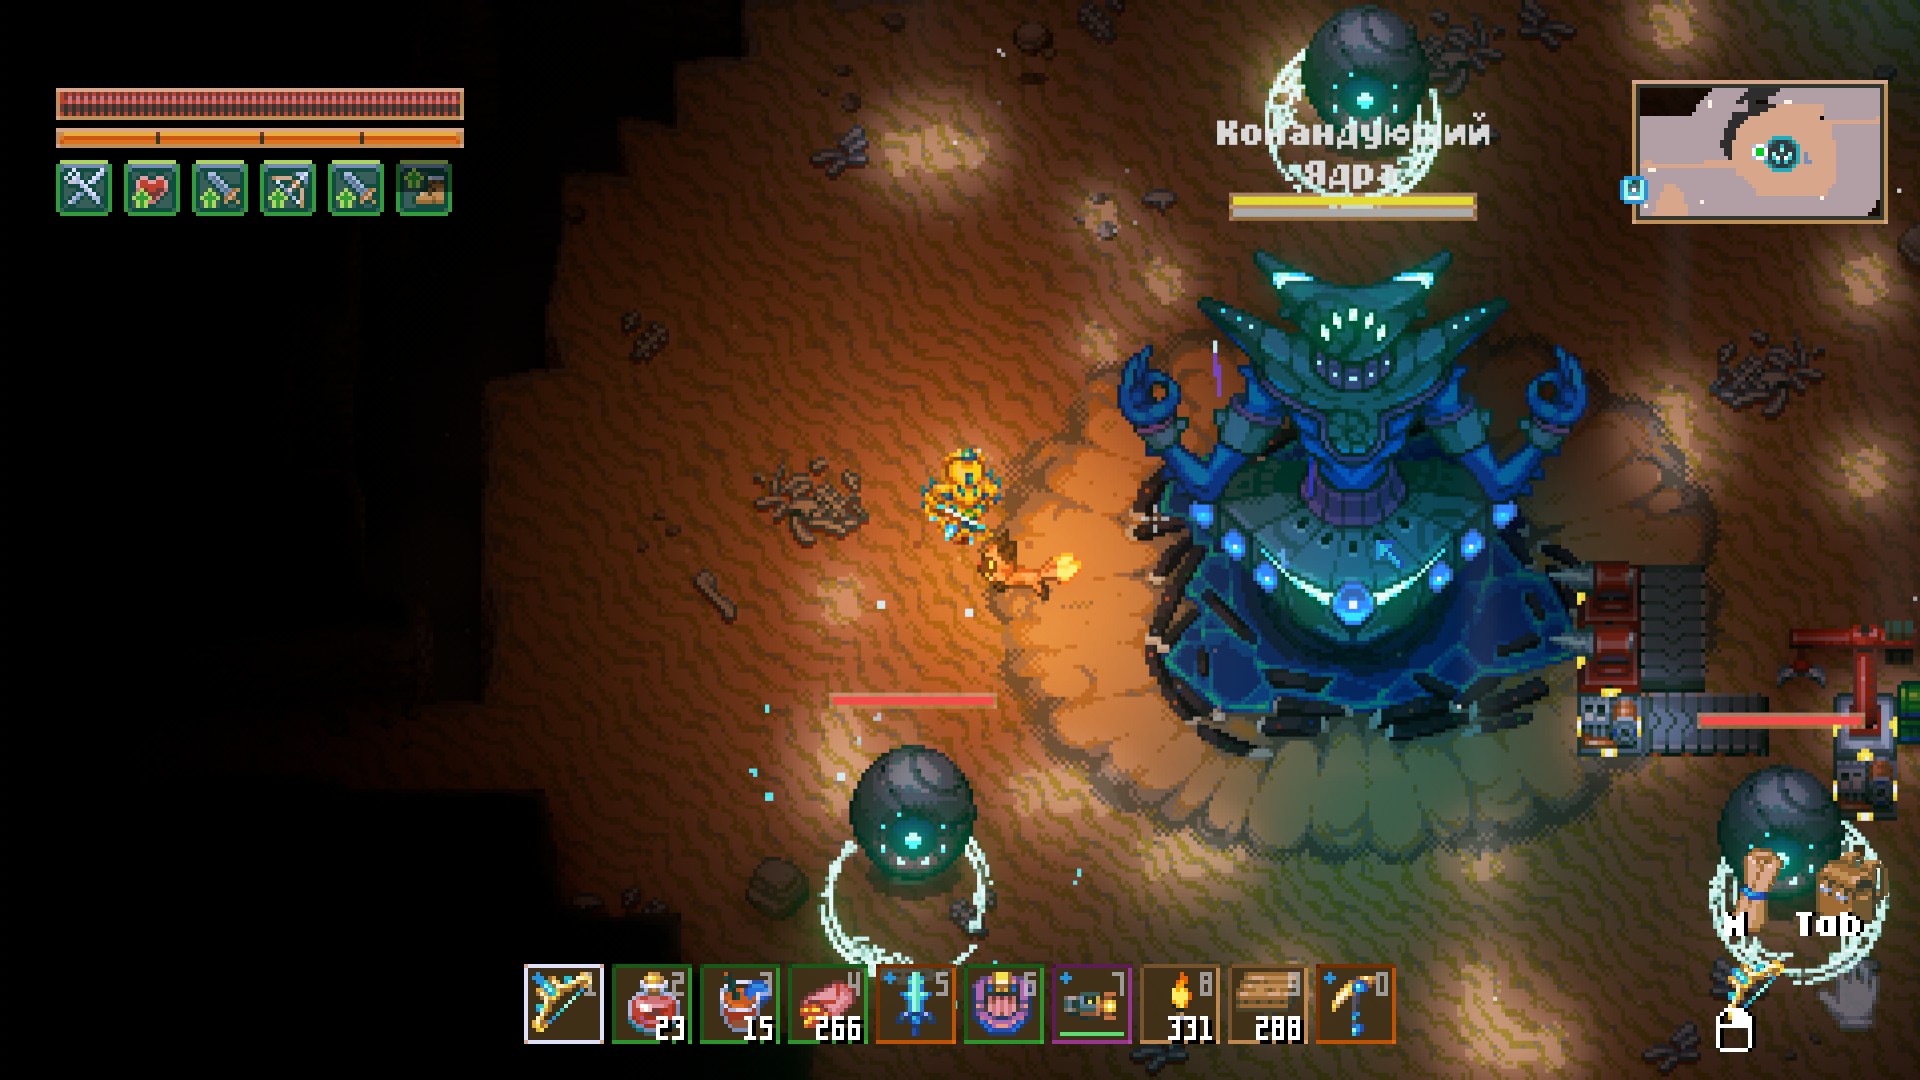
After the boss appears, three cores will rotate around it. You’ll need to attack these cores to break them. Once all three are destroyed, you’ll break the boss’s armor and can deal damage to its health. During the fight, the boss summons lightning that moves toward the player or surrounds you, shrinking inwards. All attacks are easy to dodge. The boss also gains a new attack—dark storms that pull the player in and deal damage.
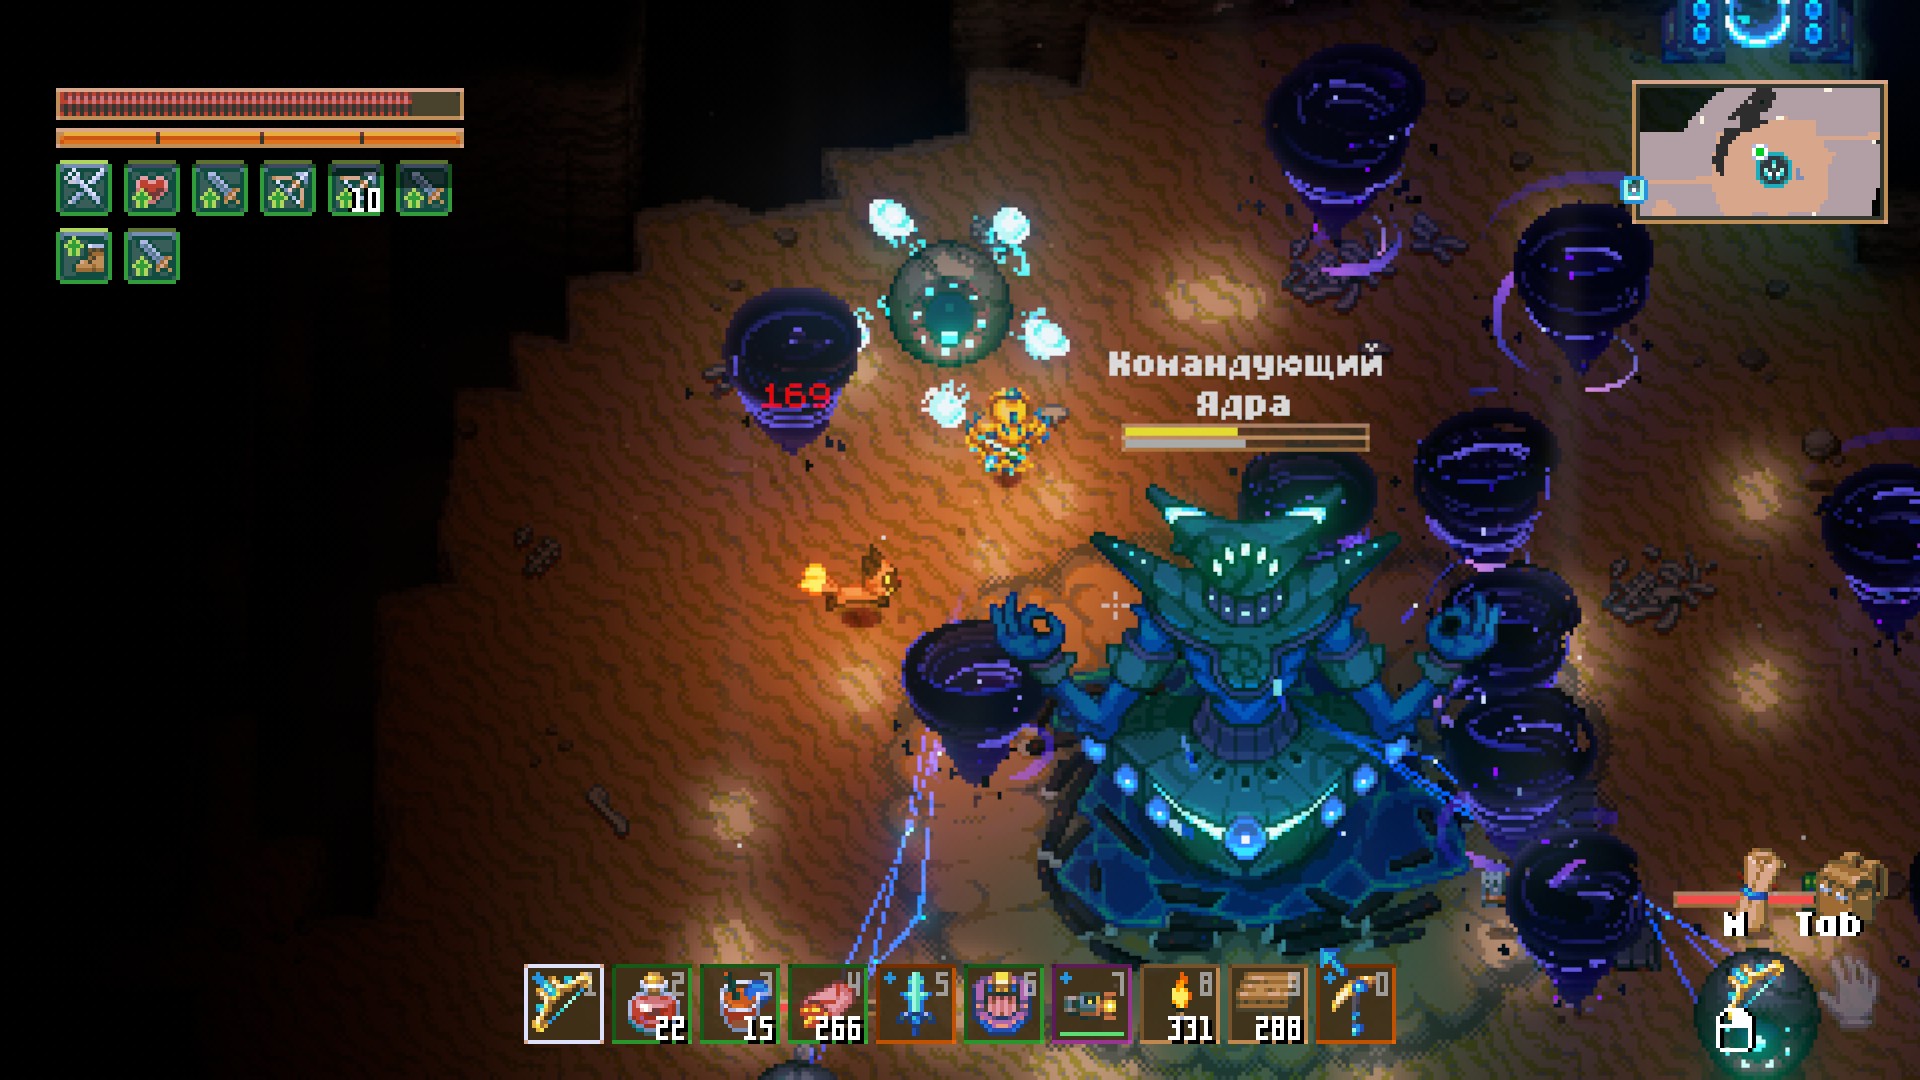
It took me two rounds to break the boss’s armor, after which it transitioned to its second phase with a new attack type.
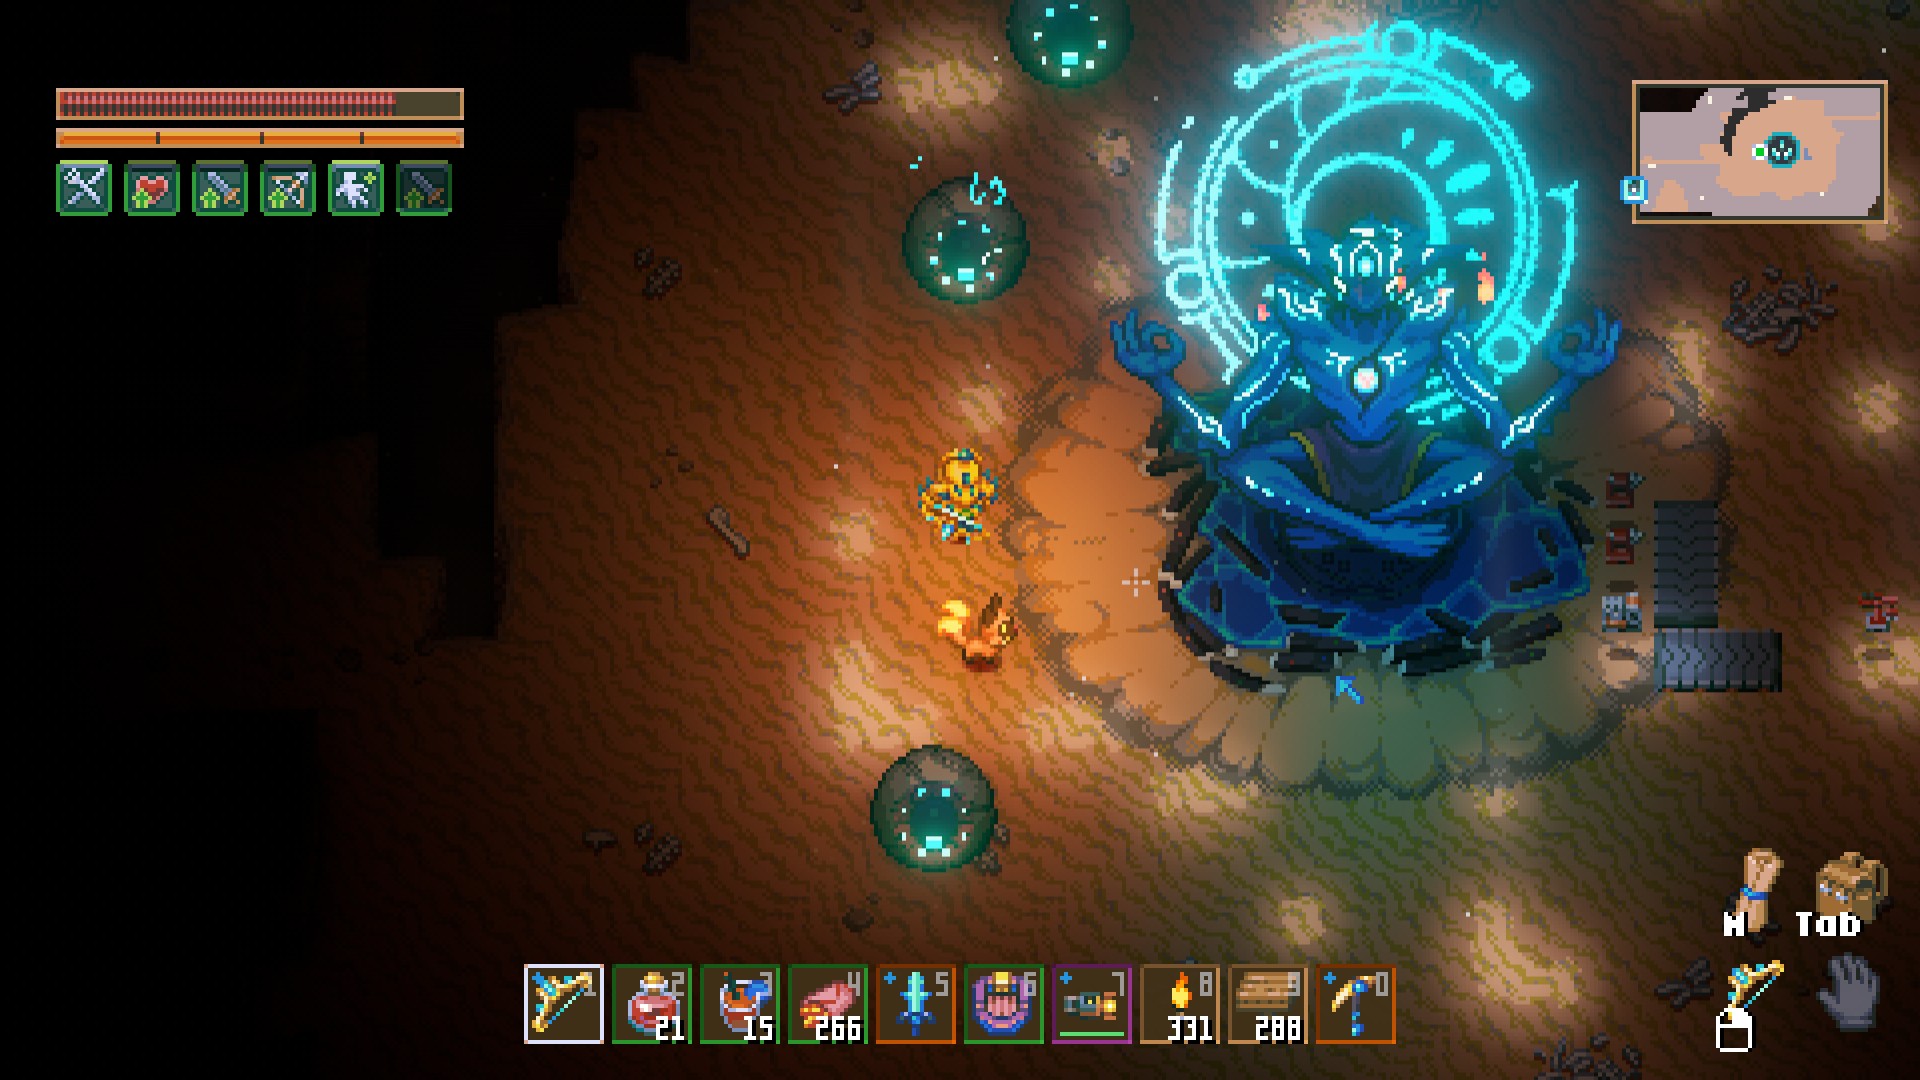
Phase 2
In the second phase, the boss summons a dark zone, and you’ll need to stand in the light to avoid taking damage. Continue breaking the three cores to lower its health.
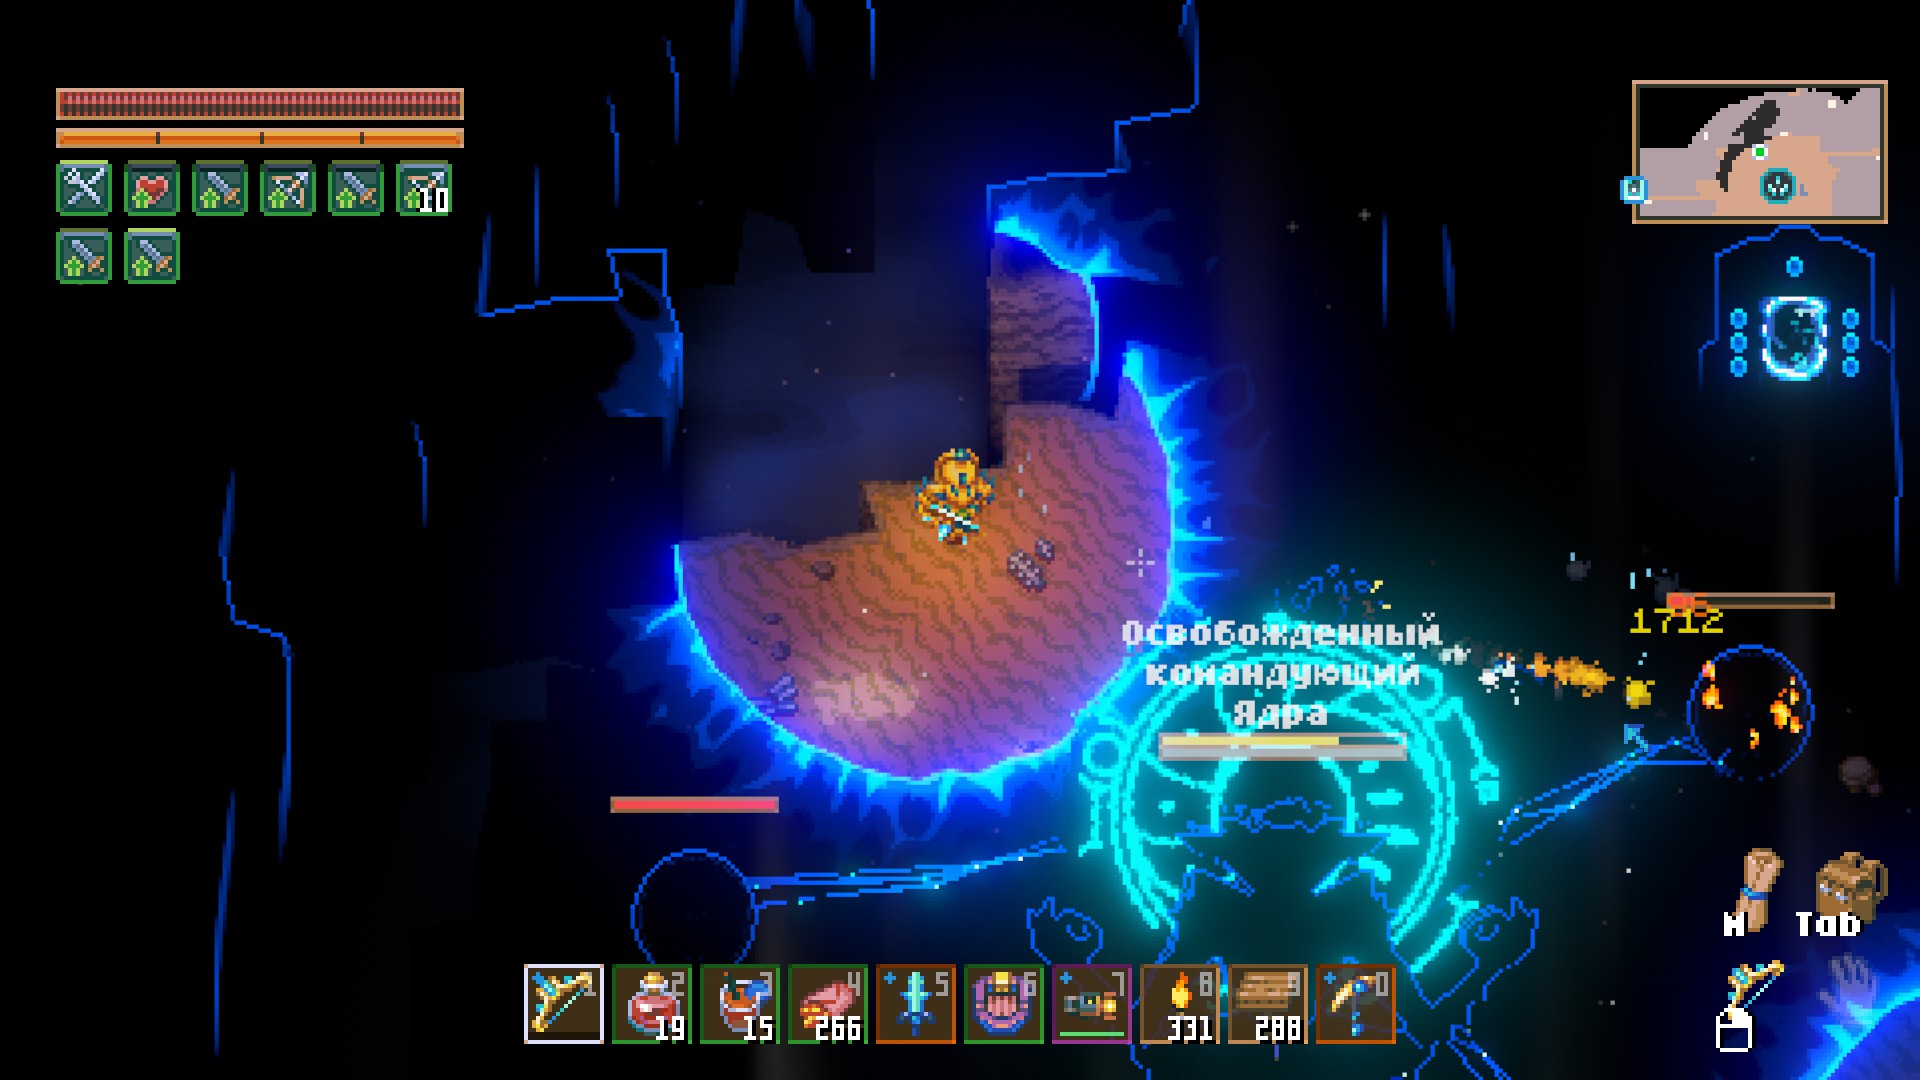
Keep this up until the boss is defeated. I’d like to mention again that pets, like my fire fox, are incredibly helpful due to their fire damage. They can attack the cores even when they’re out of your line of sight. Once the boss is defeated, you’ll witness its epic demise!
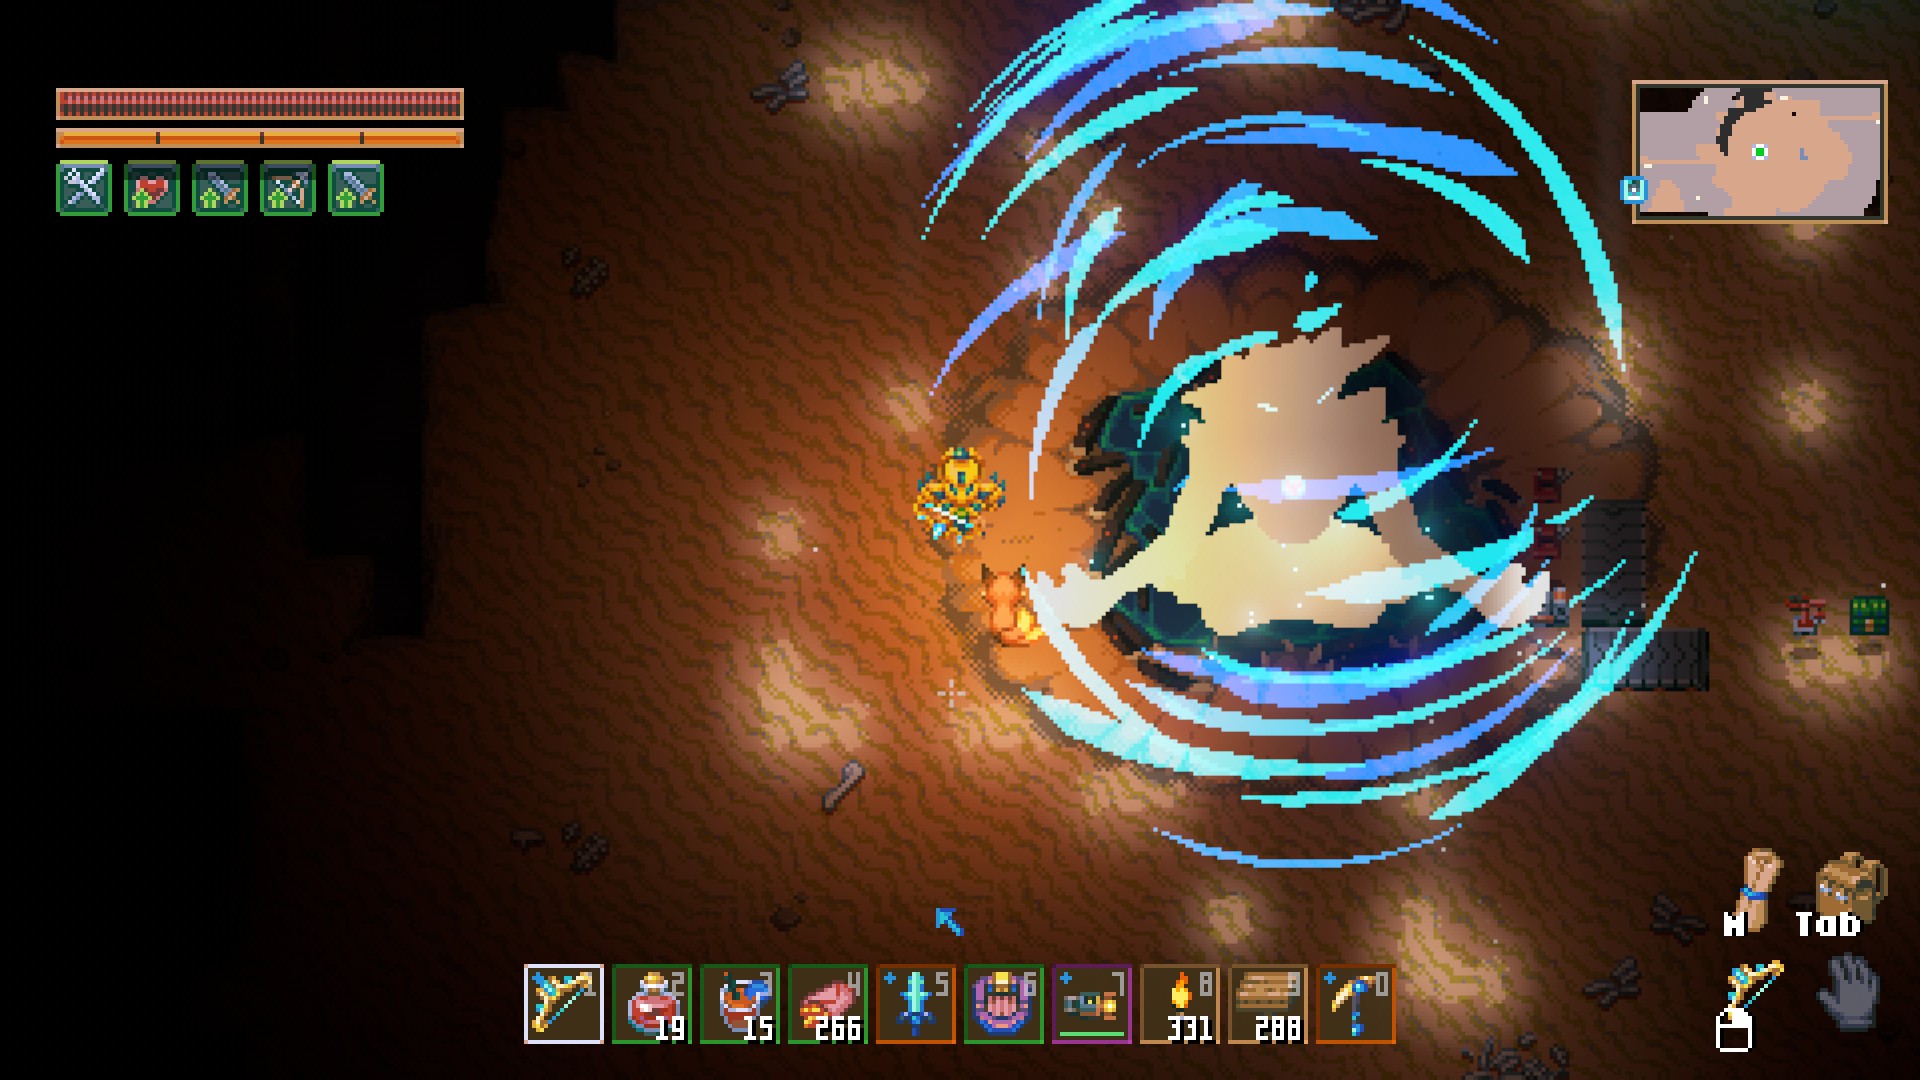
Congratulations—you’ve defeated the final boss! You’re a machine! Time to relax!
Now, you’ll get some tasty loot from the boss. Head back to the egg and talk to it for the final scene and credits! No spoilers—you’ll have to see it for yourself, or it’ll ruin the fun.
Conclusion
Now you know how the final boss looks and how to defeat it. Meanwhile, I’m off to create a new world and start over since my world doesn’t get new updates and biomes anymore!
Urschlime Boss
Introduction
With the game’s release and the addition of a new biome, a new boss has appeared, which can be considered post-main story. The biome surrounds the entire map. To find the boss, you’ll need to locate a new workbench in the biome and craft a scanner.
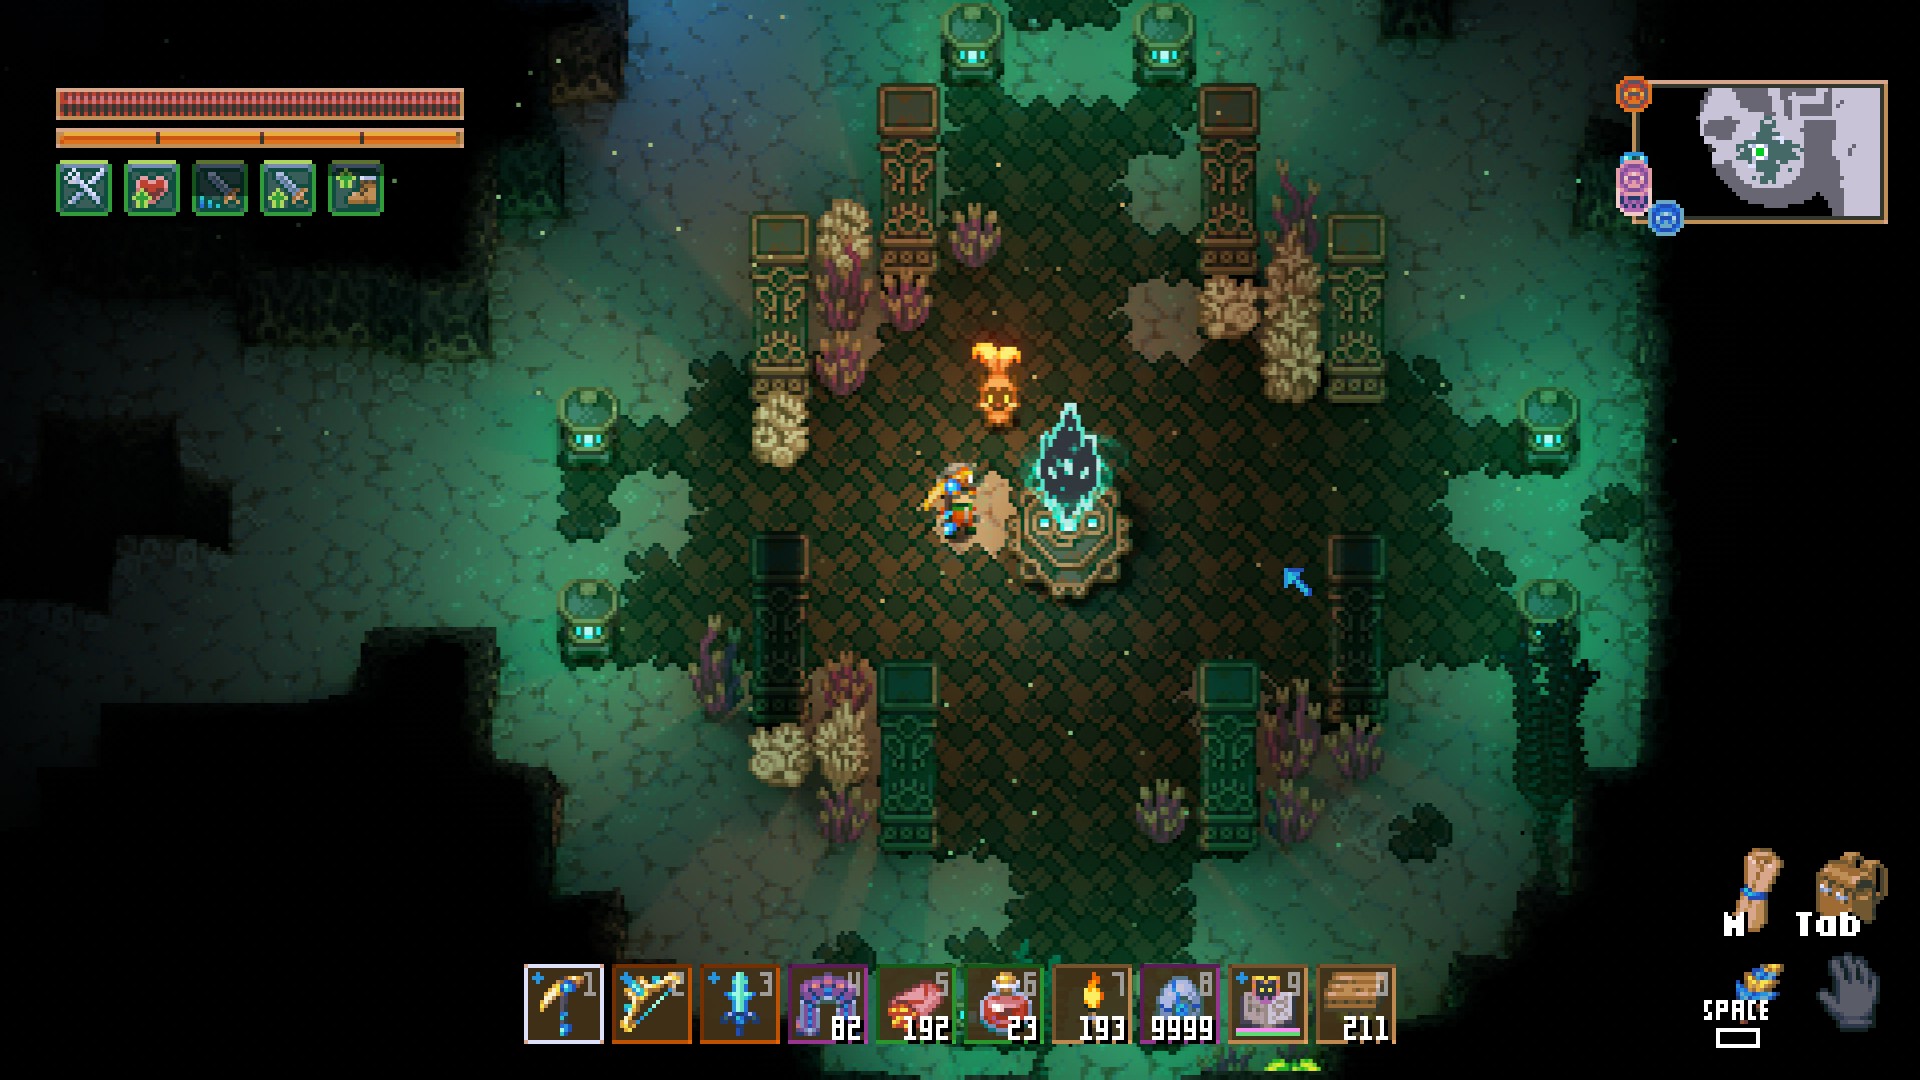
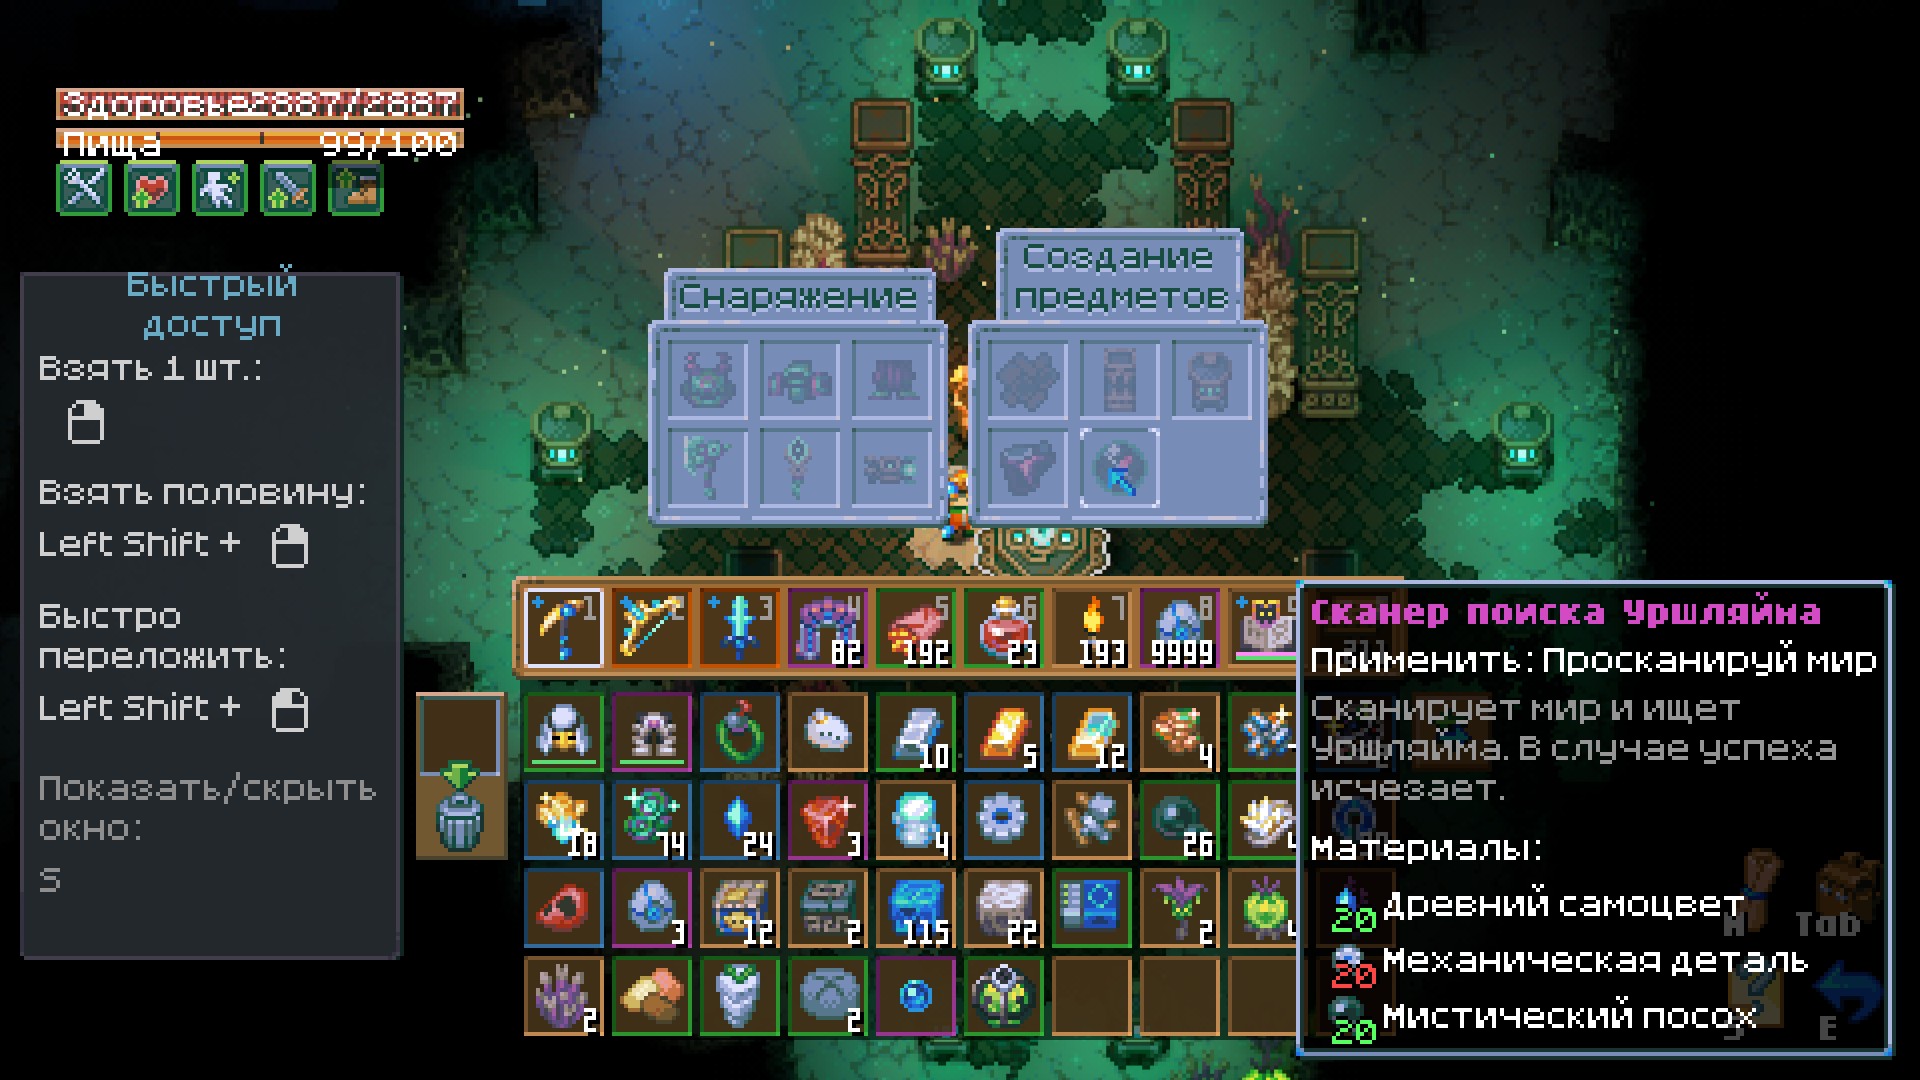
The workbenches are easy to find—they’re scattered throughout the biome. You can also break them and take them with you.
Boss
After crafting the scanner, you’ll see the boss’s location on the map. It moves in a circle around the biome. The boss itself is a giant slime that moves forward in a circle around the map. It has no offensive abilities, but if it "runs over" you, it’s an instant kill.
I recommend preparing the area ahead of time by leveling the ground, filling holes, and breaking blocks, so you can move freely during the fight.
Once you’ve prepared, plan your attack. The key feature of this boss is that it has three eyes that need to be hit with a ranged weapon.
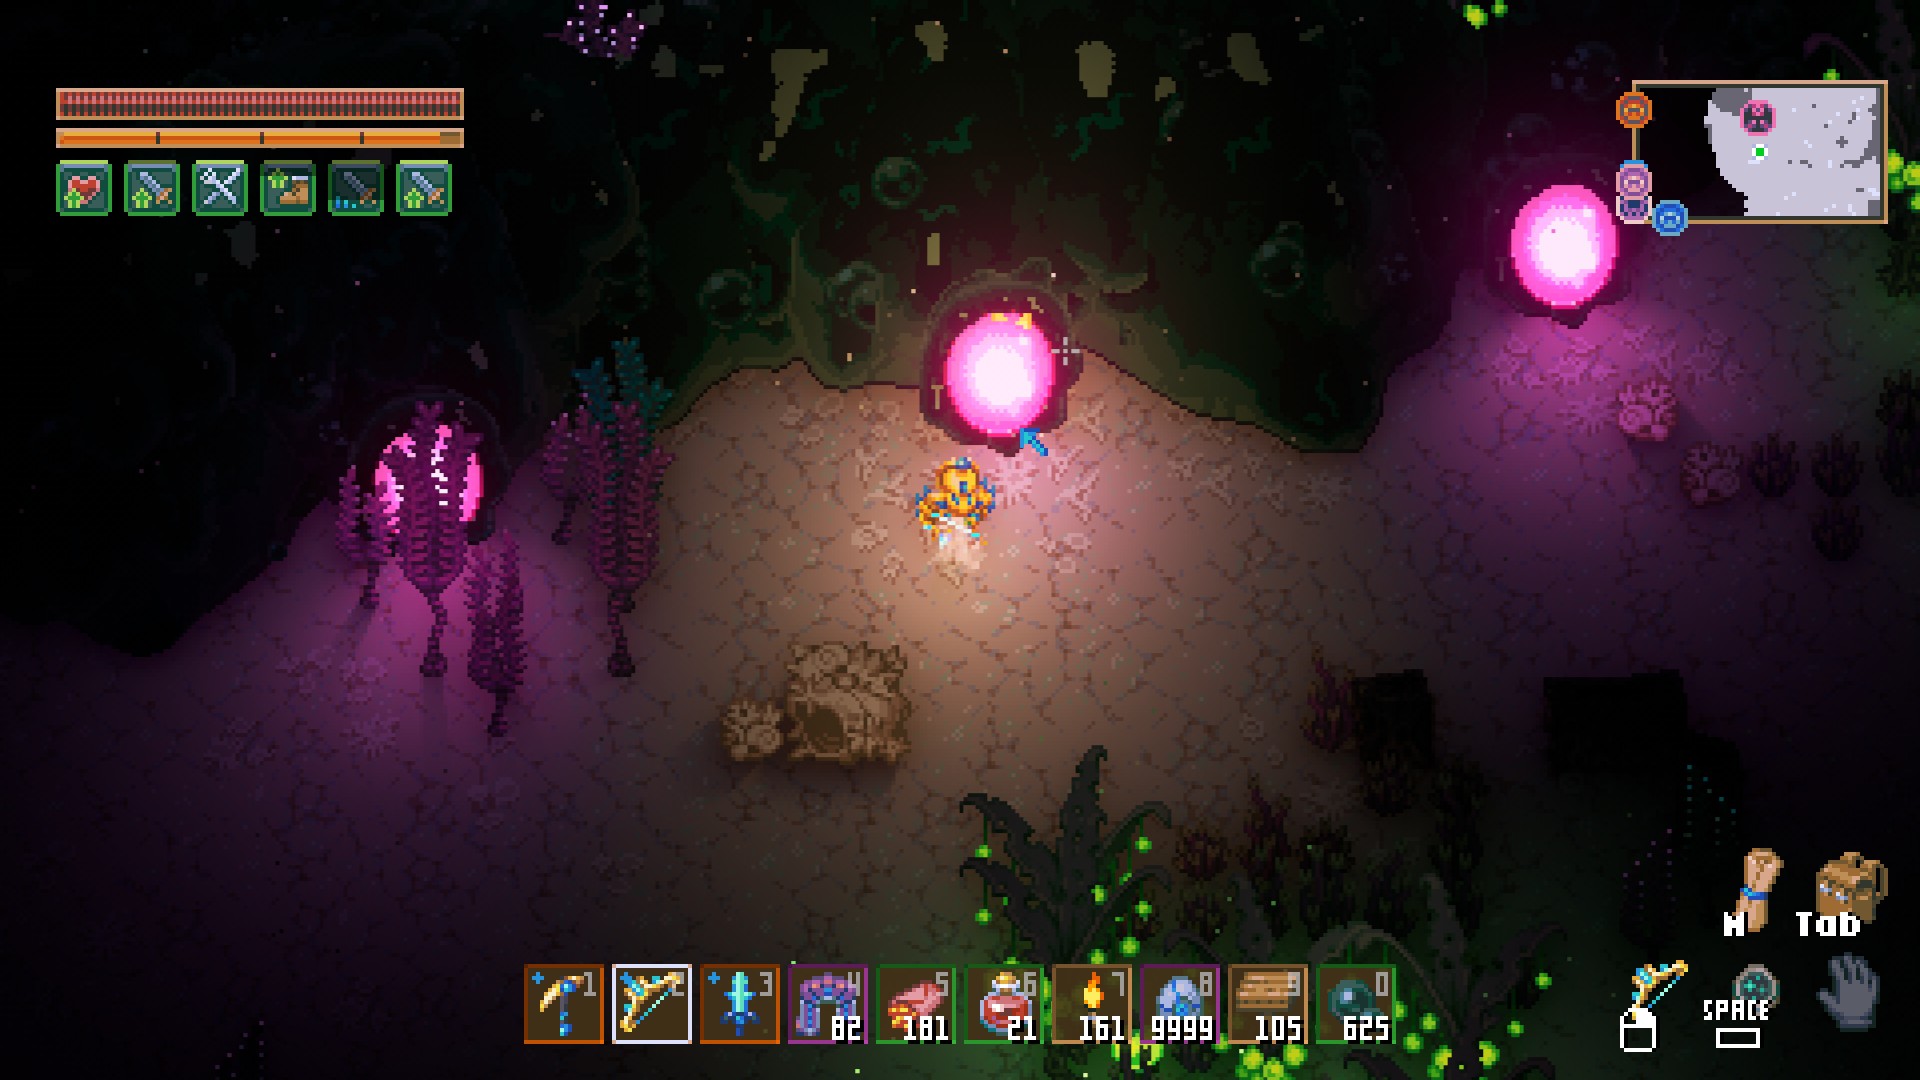
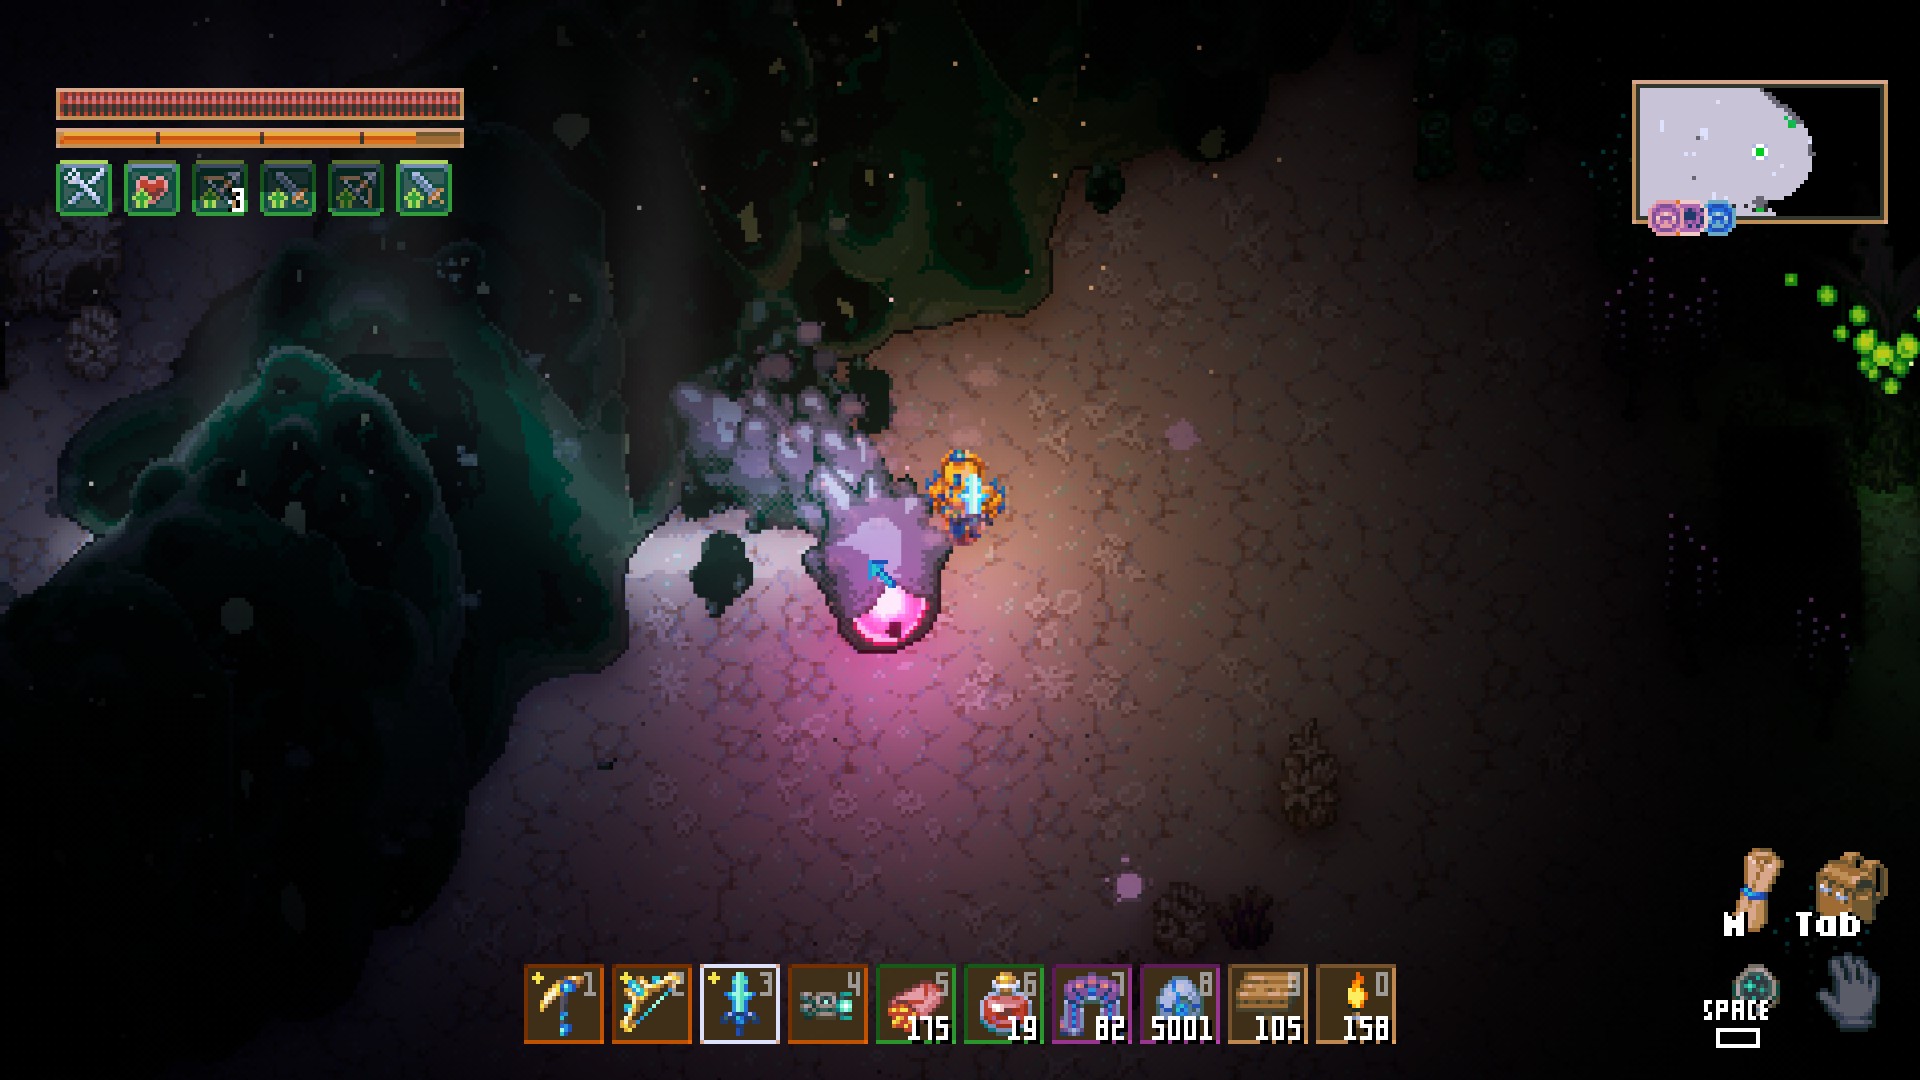
When you break all three eyes, the boss stops, and a worm emerges from it—this is its true form, where you deal the main damage.
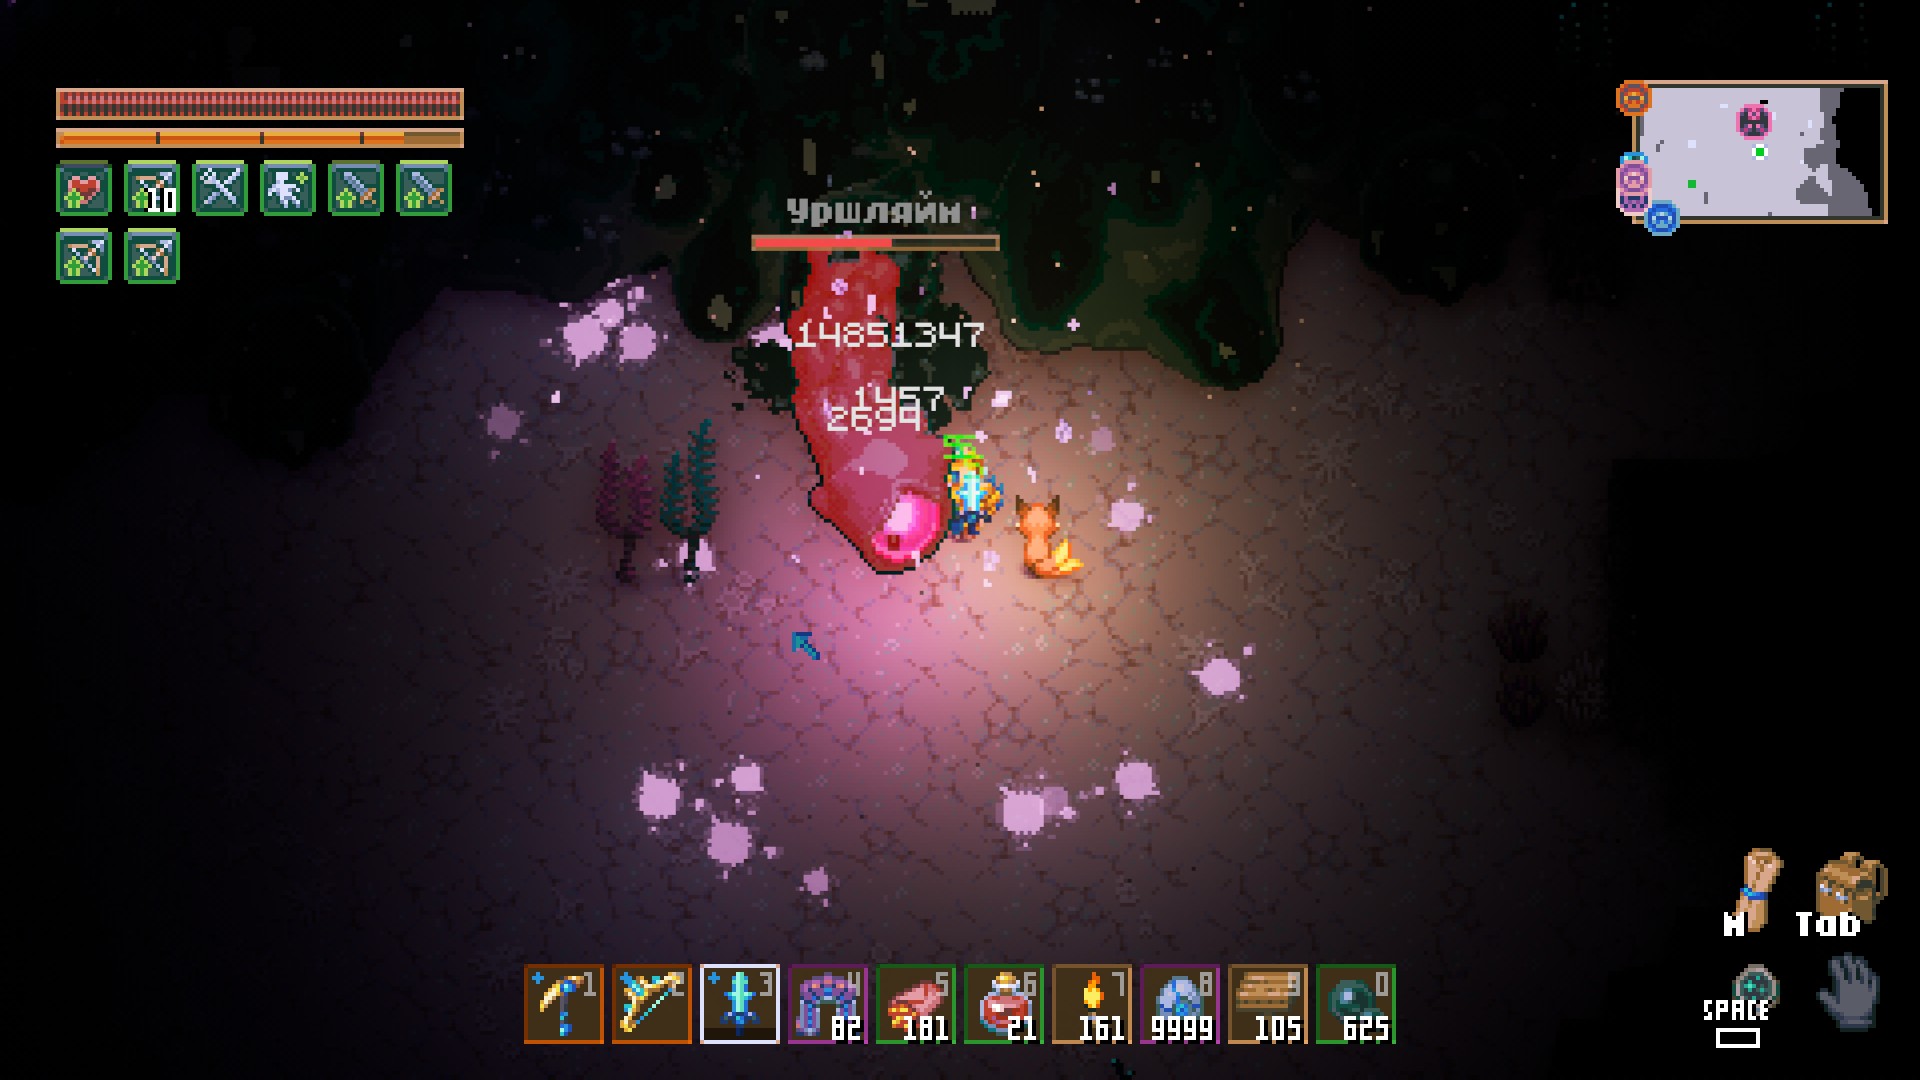
Now, simply attack the main body. Once it disappears, retreat and attack the eyes again. Repeat this until the boss is defeated. A helpful tip: use an item that grants a dash ability or the lens that drops from a shaman or a locked iron chest.
That’s it—congratulations, you’ve defeated the boss!
Mini-Bosses
Cursed Shaman
A mini-boss you can encounter while exploring the stone biome. To summon it, you’ll need a skull, which requires 10 shards. Shards drop from "cave people." Once you’ve gathered 10, craft the skull and place it at the altar.
The boss has two forms. In the first, it teleports to the player, throws fireballs, and summons fire randomly. In the second form, after you’ve damaged it enough, it gets angry. Now, instead of fireballs, it charges at the player and summons even more fire.
Here’s the boss’s location (there are many urns here, but I’ve already broken them).
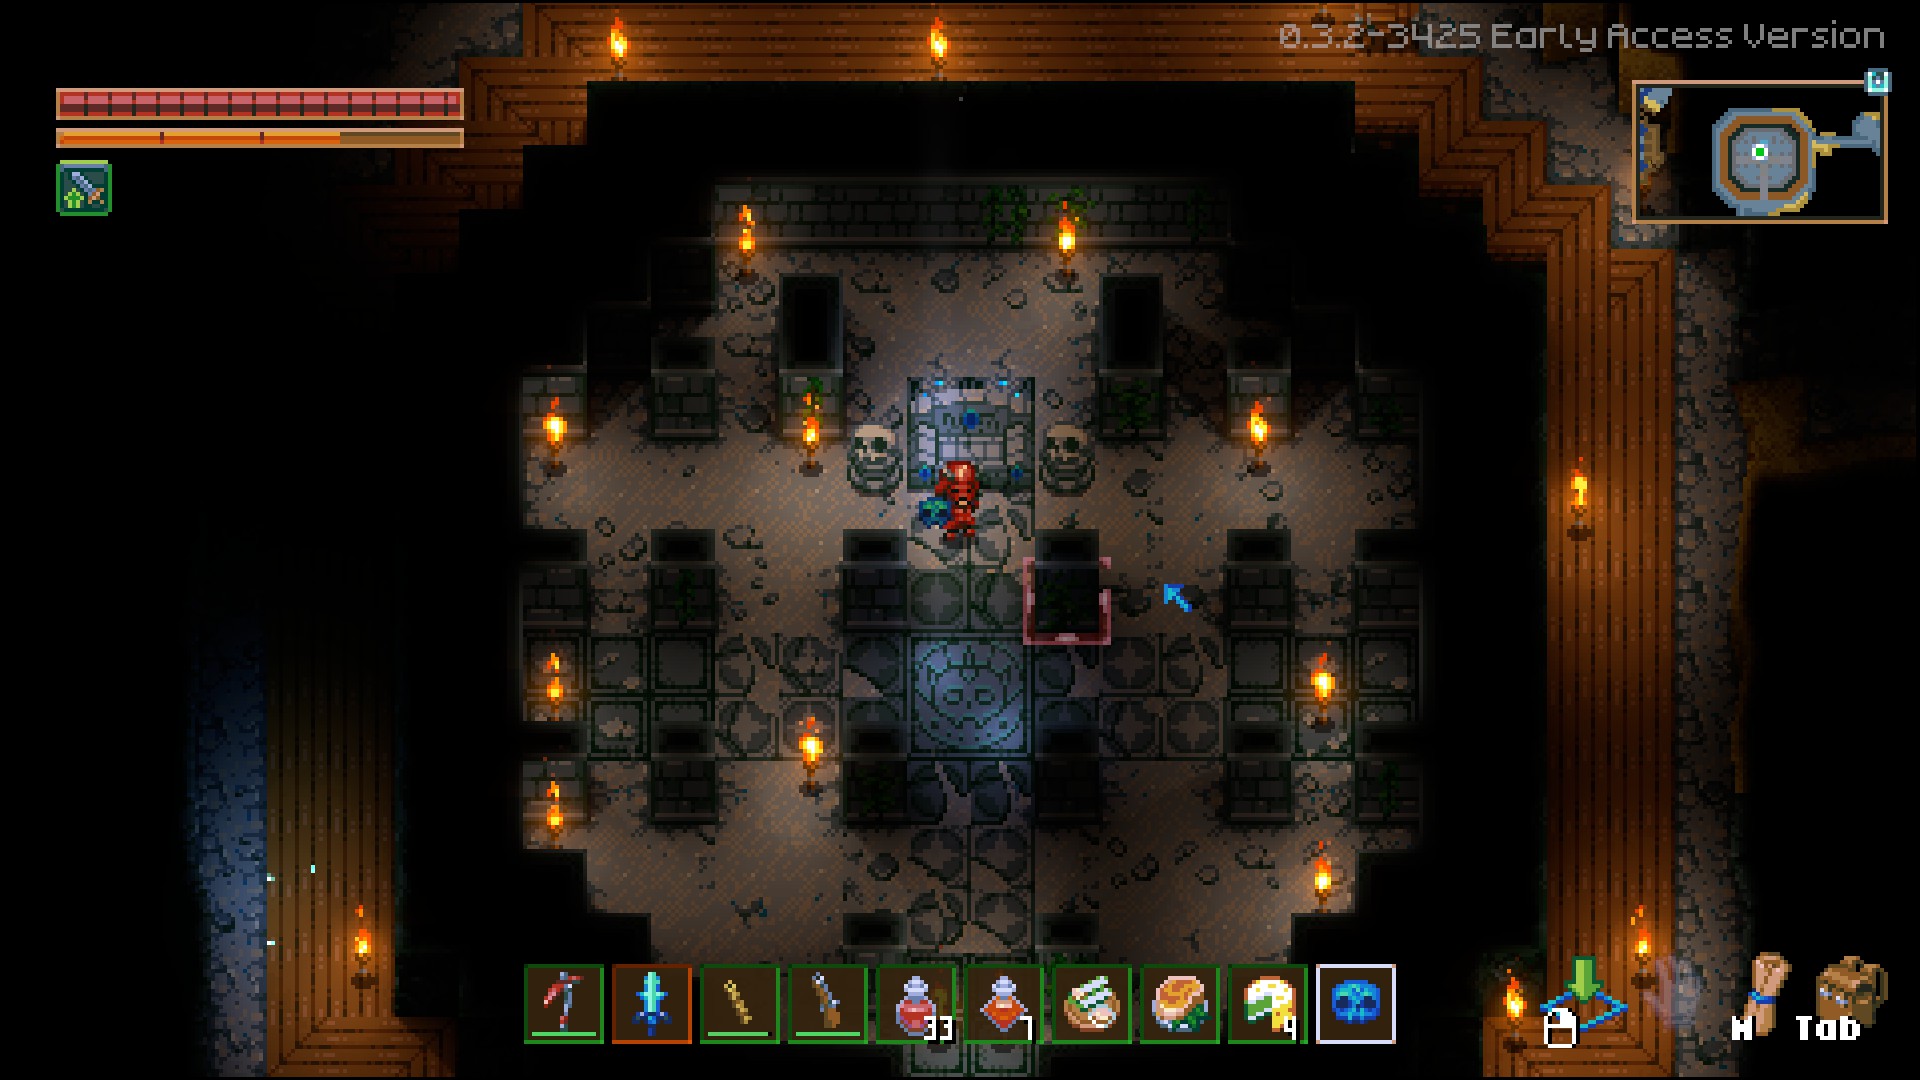
Place the skull at the center.
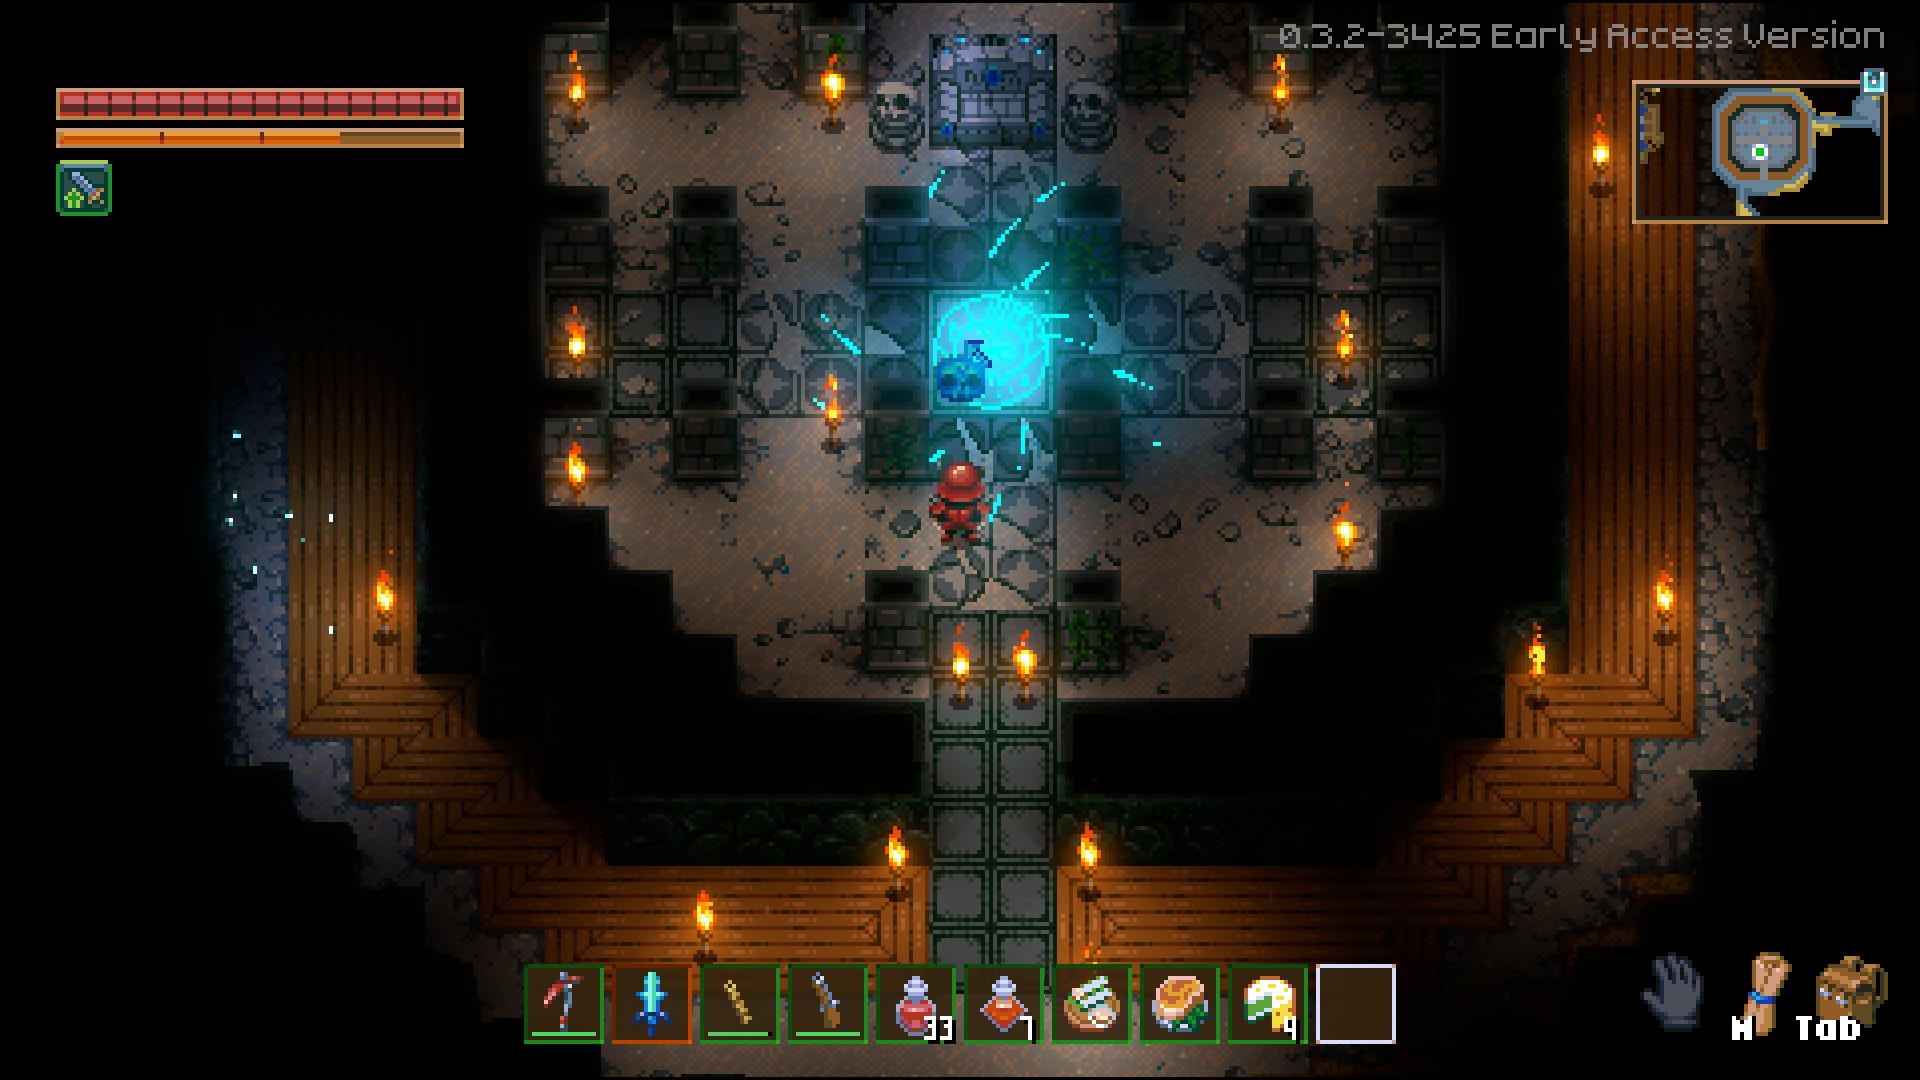
The shaman appears, and the fight begins.
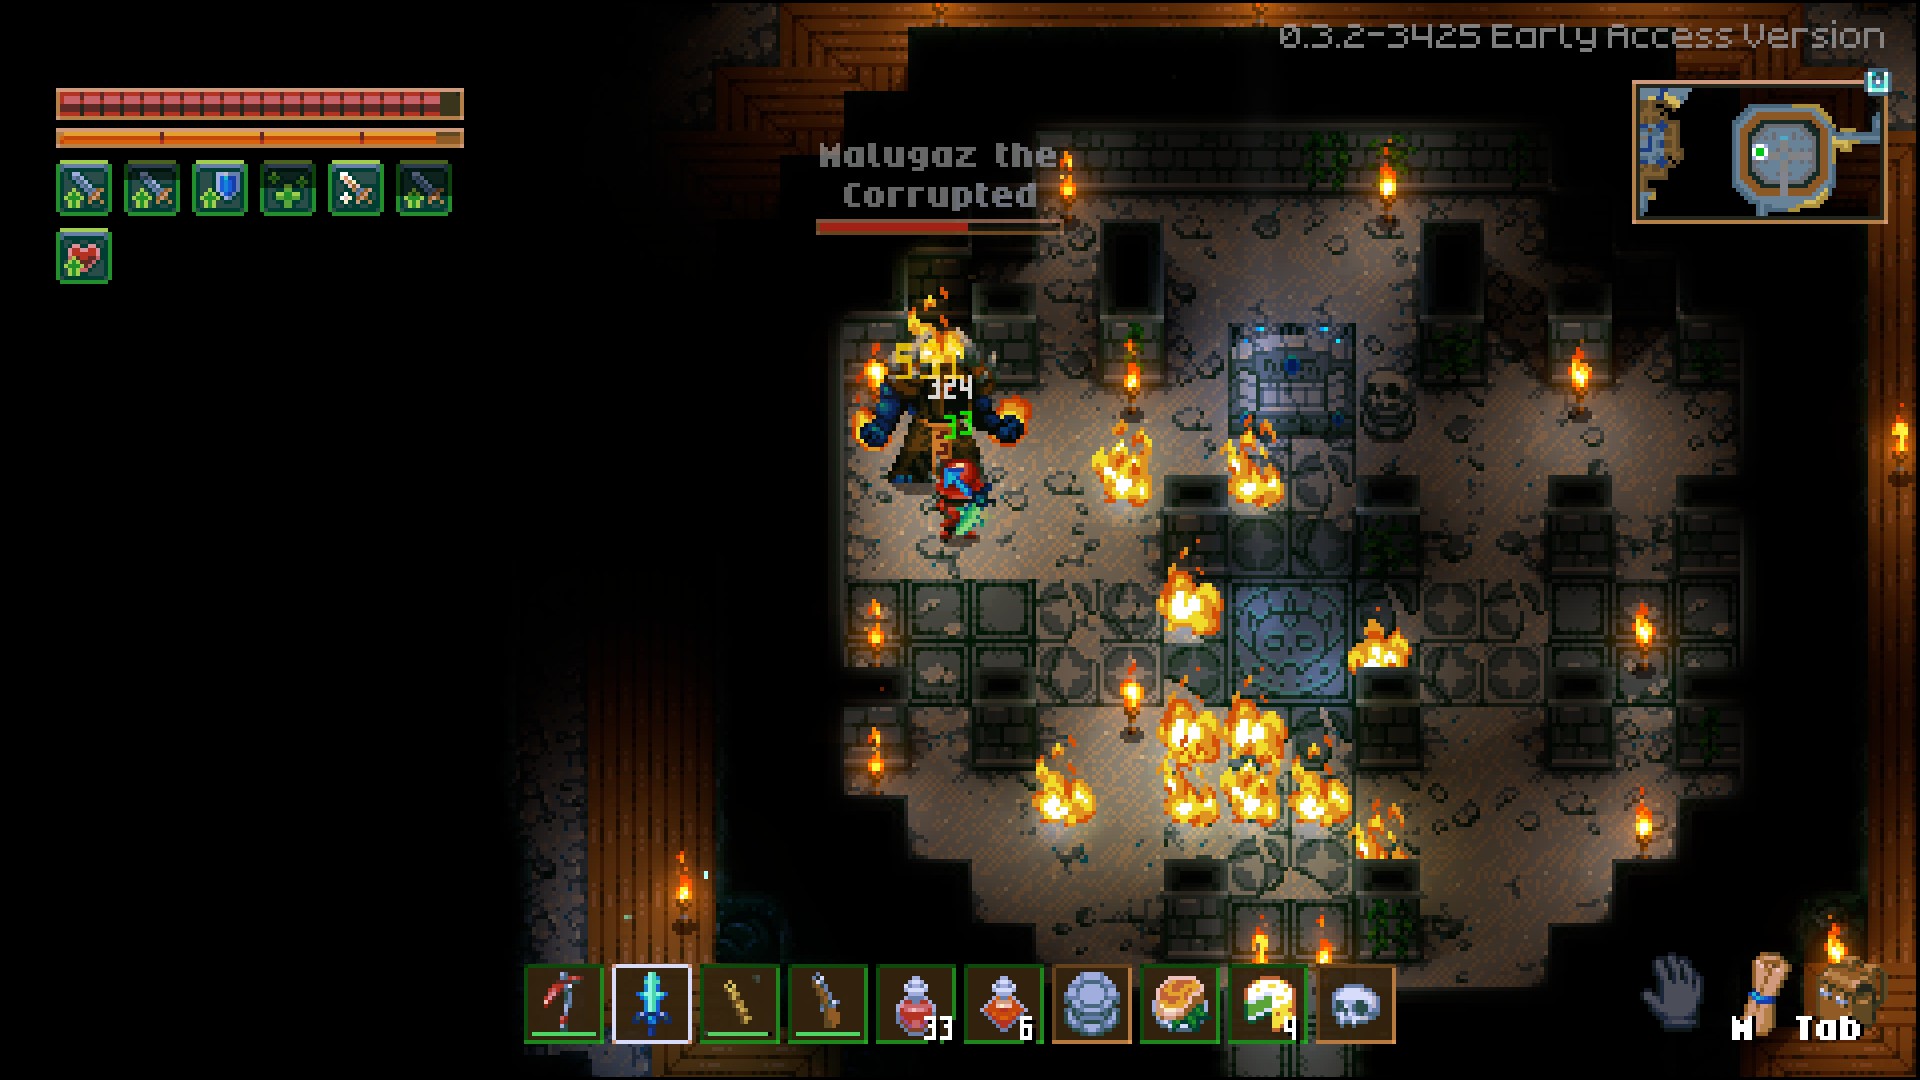
Boss Fight Strategy
In the first form, there aren’t many problems. Just attack the boss and dodge the fireballs and walls of fire coming from the ground. It’s easy.
In the second form, things get a bit more complicated. The shaman summons a lot of fire and starts charging at you. Dodging isn’t hard, but it hurts when hit. The strategy is simple: when it teleports and winds up for a strike, move aside, then attack. Repeat this throughout the fight.
As for what weapon to use, it depends on your preference. I used the rune sword and stocked up on damage food and potions, as well as healing potions.
Blue Slime King
The summoning item drops from any slime with a 2.23% chance.
This boss was added as part of a Terraria collaboration.
I’m too lazy to describe it, but I'll just say it’s like the basic first boss with slightly more HP and new loot. I'll upload screenshots eventually.
Conclusion
That’s the end! At this point, the game has been released in version 1, and we’ve got the full main story. If they add anything new, I’ll be sure to update this guide!